Status
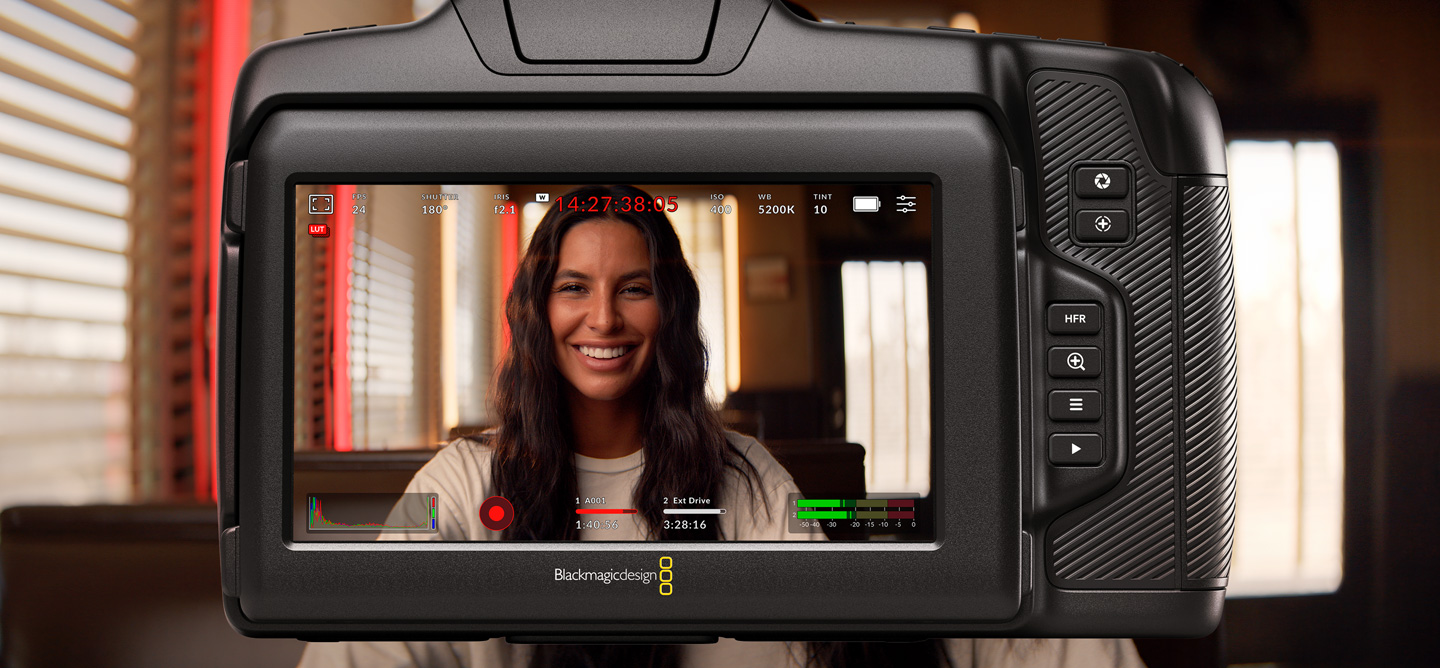
The indicators across the top of the screen show various camera settings and they can also be changed, just by touching the specific setting. An easy to use adjustment palette will then be displayed!
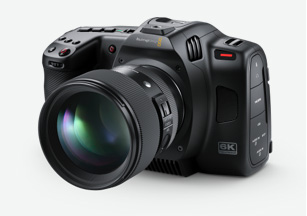
Blackmagic Cinema Camera features the same advanced Blackmagic OS software as Blackmagic URSA Mini Pro 12K, making it super fast to use and more intuitive than ever! All important camera functions can be accessed with a single tap on the heads up display, there’s an elegant digital slate that makes metadata entry a breeze and a dashboard that uses simple tap and swipe gestures for record settings, monitoring, audio, camera setup, presets and 3D LUTs. Each camera feature runs as a separate high performance app which means that you get greater stability than other simple camera software! Best of all, we’ll be able to add even more great new features in the future!
Find Reseller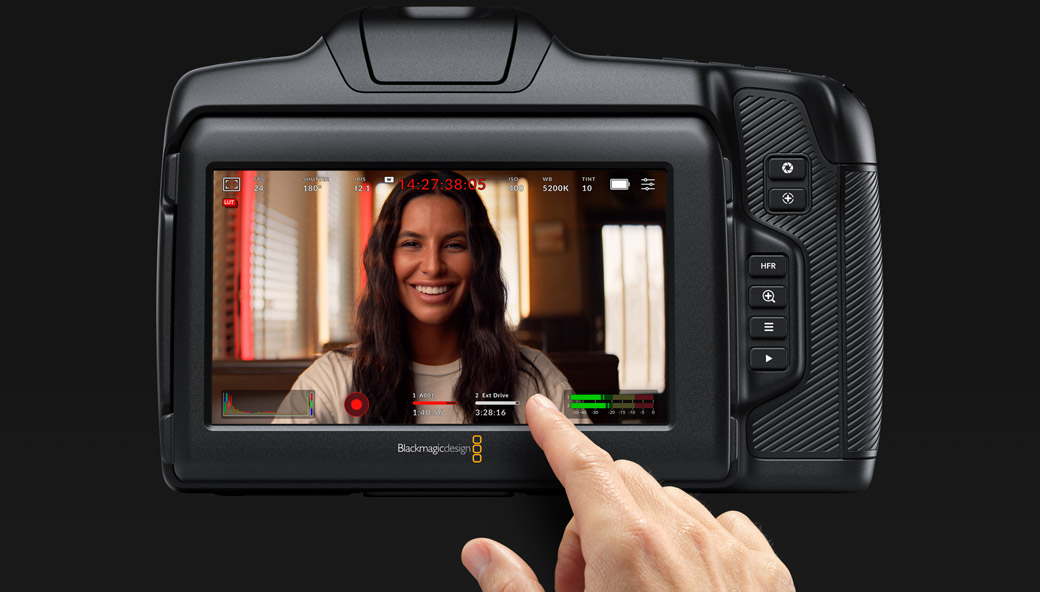
The heads up display, or HUD, contains critical information such as the frame rate, iris, timecode, shutter angle, white balance, ISO, audio levels and more. You can show or hide the heads up display by simply swiping up or down. For example, you can adjust settings such as white balance simply by touching the WB indicator, or change the audio levels by touching the audio meters. Everything is interactive, so if you tap any item you can instantaneously change its settings without having to search through confusing menus!

The indicators across the top of the screen show various camera settings and they can also be changed, just by touching the specific setting. An easy to use adjustment palette will then be displayed!

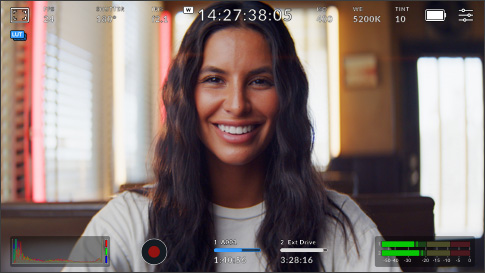
The timecode indicator will show you the duration of your recording, but it can also show the timecode embedded into the recorded file when selected. Plus, during recording the timecode will turn red.
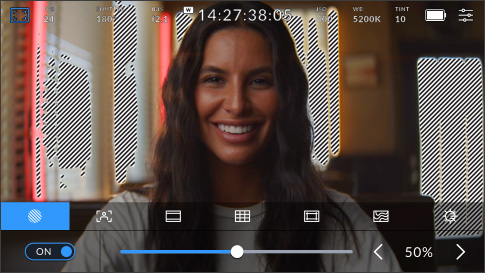
The Zebra display will draw diagonal lines over areas of your image that have excessive exposure level. There are eight zebra presets available including middle gray and middle gray plus one stop.
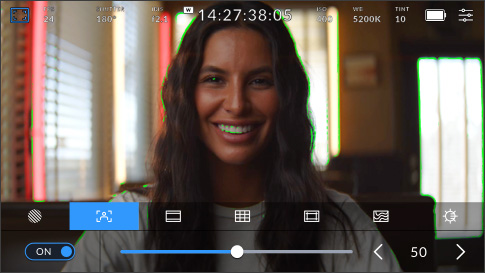
An extremely powerful feature, focus assist adds a colored highlight to fine image detail, so you can see what parts of the image are in focus. This allows manual focus to be used for cinematic looks.

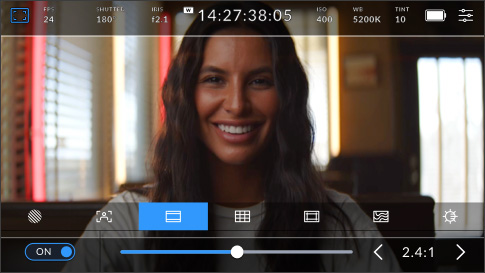
Includes aspect ratios for various cinema, TV and online standards. These overlay on the LCD and include 1.85:1, 2.35:1, 2.39:1 and 2.40:1 for theater release. You can also set 16:9 for social media!
The grid control adds on screen markers for framing and positioning items in a shot. There is a range of on screen markers including a rule of thirds grid, horizon meter, crosshair and a center dot.
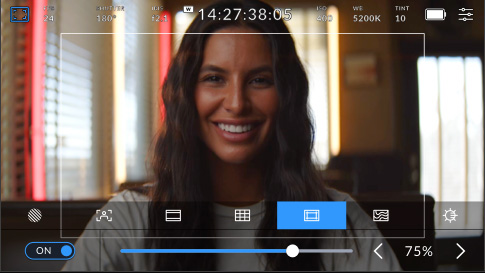
Safe area guides let operators ensure important image content does not get too close to the edge of the screen, otherwise it could be cut off when viewed on consumer grade televisions.
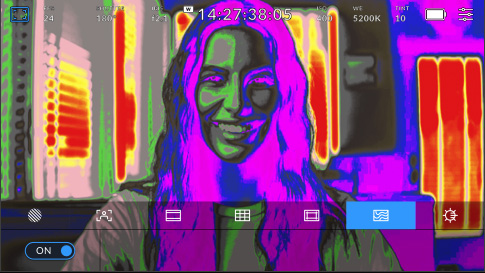
False color overlays colors to represent different exposure values. Pink represents optimum exposure for lighter skin tones, while green is good for darker skin tones, and red is overexposed.
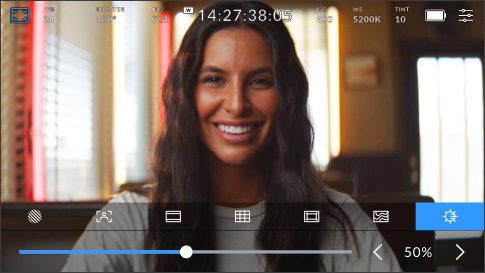
Tap the screen brightness icon and drag the slider to the left or right to adjust the brightness of the cameras touchscreen. The adjustment cannot be fully reduced so you will always see the settings!
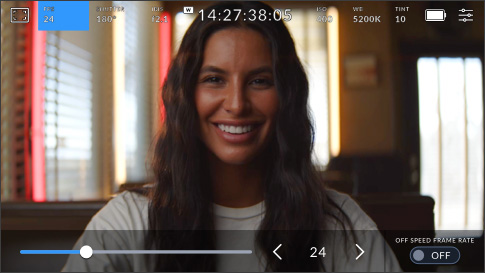
The frames per second adjustment is normally set based on the post production delivery format. You can also create interesting speed effects by setting the sensor rate independent of the camera rate.
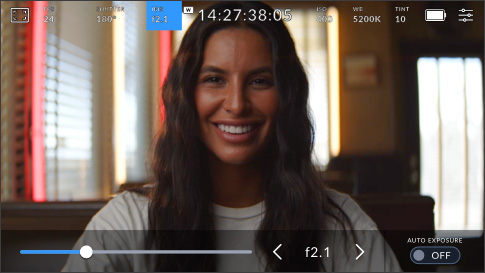
The iris controls the amount of light passing through the lens. By tapping this indicator, you can change the aperture of compatible lenses and even configure auto exposure modes for optimal exposure.
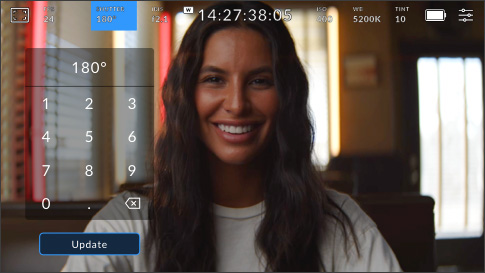
Shutter angle lets you adjust for varying light conditions or control the amount of motion blur in your image. You can set it manually or choose from suggested speeds by tapping the indicator.
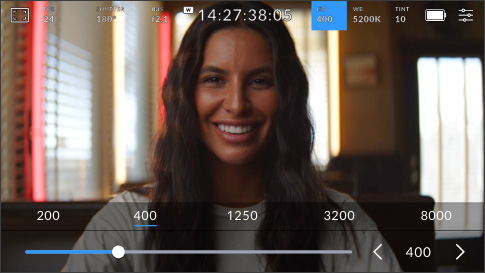
ISO adjusts the image sensor’s sensitivity to light. A setting such as ISO 100 is suited to outdoors, with higher values great for low light situations. Tap the gain icon to access the gain settings.
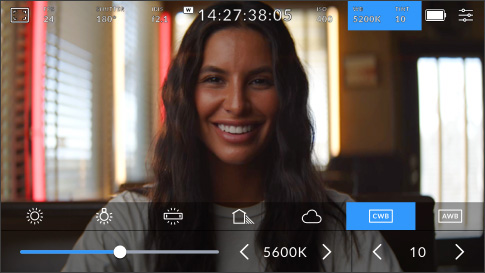
White balance lets you adjust your camera to different temperatures of light. There are common presets such as sunlight or fluorescent light, or you can set it manually using a white or gray card.
LUTs let you preview a specific 'look' as you are shooting. When in use, a LUT icon is displayed in the top left of the LCD. This icon will be blue if you are embedding a LUT in your recorded clips.

The histogram helps check exposure. The left side shows shadows and the far right shows highlights. If the edges of the histogram come to an abrupt stop, adjust exposure to ensure you’re not clipping.
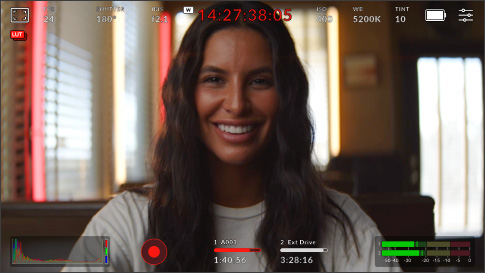
The record button lets you stop and start recording. Tap it once to begin recording and tap it again to stop. When recording, the button, media bar icon and timecode at the top of the LCD turn red.

The storage indicators show the remaining recording time for CFexpress cards or connected USB-C disks in hours, minutes and seconds. Tap the indicator to access the storage menu for formatting disks.
You can monitor the recording levels of the internal microphone or external sources using the audio meters. To avoid distortion, peak audio levels should fall in the upper end of the green zone.
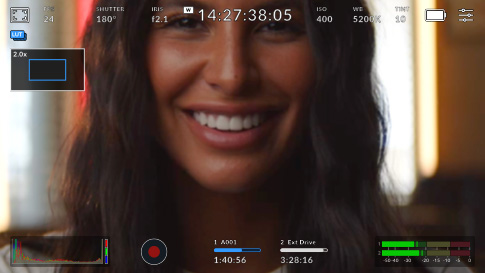
Double tap the LCD to magnify the image. This is useful for checking focus. You can also move the image by dragging your finger around the LCD. To return to normal view, double tap the screen again.
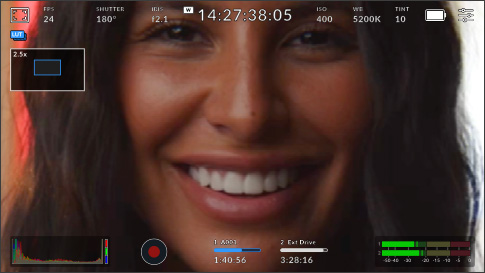
After double tapping the screen to zoom, you can use a pinch gesture to zoom in up to x8 magnification. To return to standard magnification, simply double tap your camera’s touchscreen again.
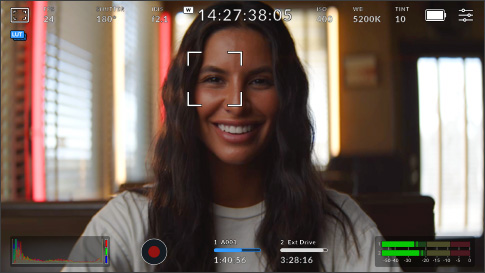
Touch to focus allows you to focus your lens in any region of the image. Tap and hold the screen in the area you want to auto focus. This function can be combined with the double tap zoom gesture.
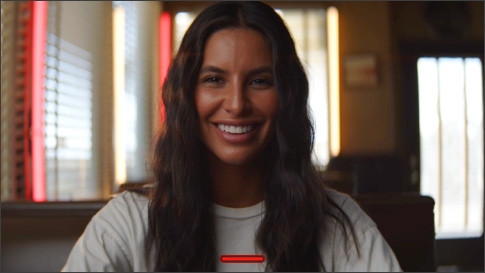
When you are framing a shot, overlays such as the histogram and audio meters can be distracting. To hide them, swipe up or down on the LCD. Once you have your shot, repeat swipe action to restore.
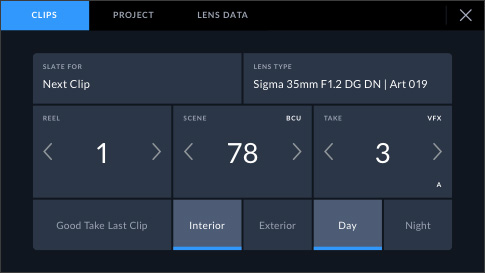
Metadata makes sorting and processing footage in post production easier. Blackmagic OS lets you add additional details such as shot type or project name. Swipe left or right to bring up the slate.
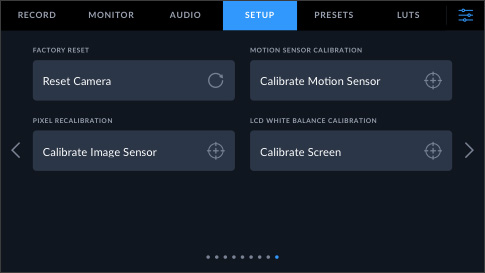
A built in motion sensor records pan, tilt and roll data that can be used to stabilize shots in DaVinci Resolve. Calibrate the motion sensor in the ‘settings’ menu under ‘motion sensor calibration’.
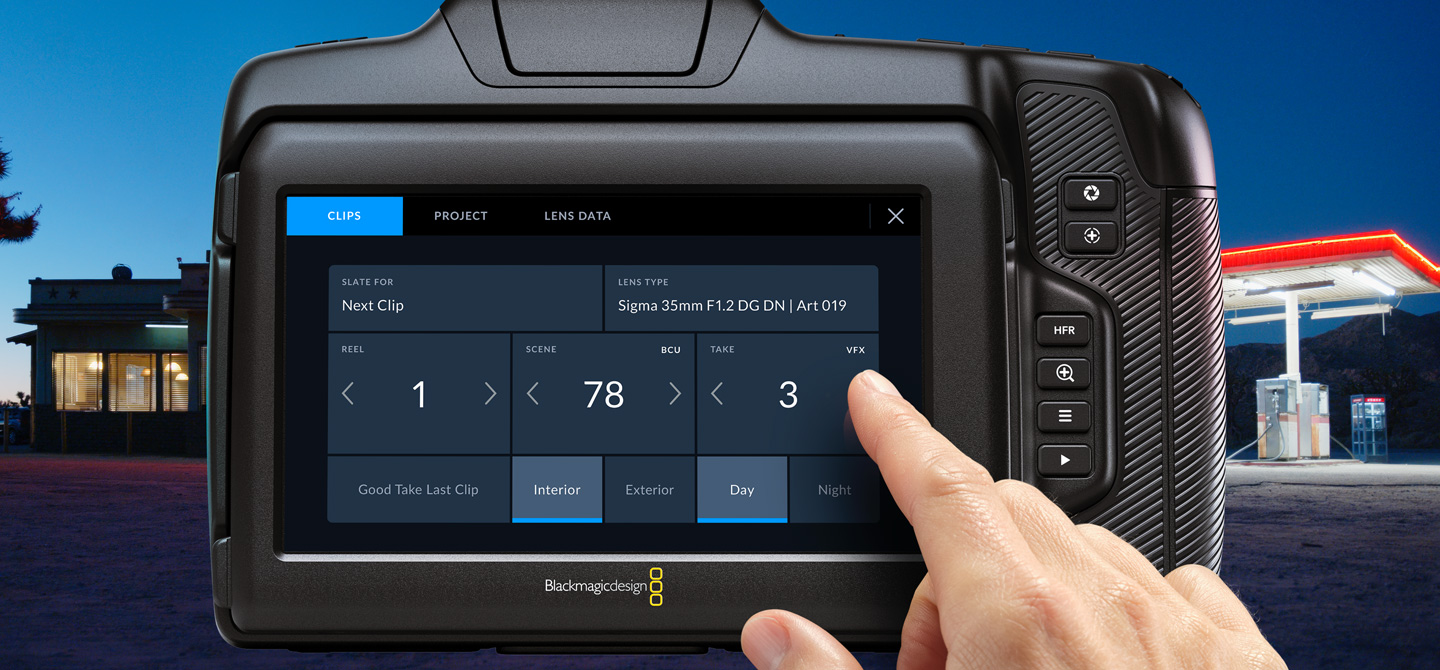

Blackmagic Cinema Camera features digital "slate" and incredible metadata features that make it extremely fast to add metadata to any shot! Simply swipe left or right to bring up the digital slate. Plus, if you start and stop recording, you can set to automatically increment the take number so you don’t have to enter them manually for each shot! In addition, lens metadata is automatically detected from electronic lenses or it can be entered manually, along with production specific information, technical information and much more! All of this metadata is saved with the files and available in post production when editing and color correcting with software such as DaVinci Resolve!
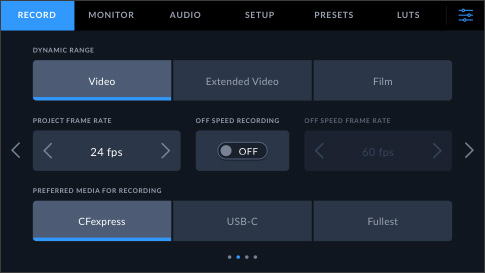
The Blackmagic Cinema Camera dashboard has six tabs with elegant, simple to understand interfaces that give you quick access and complete control over every setting and feature on the camera! Simply tap on the record, monitor, audio, setup, presets, or LUTs tab to access everything with just a few taps. The unique design of the interface offers visual consistency that puts items in the same logical order every time so you can quickly learn where settings are and remember how to change them!
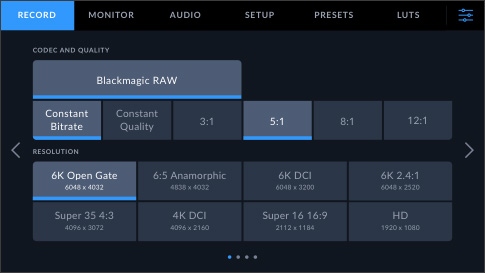
The record tab gives you a revolutionary, fast to use interface for selecting the recording format, resolution, frame rate and more! Simply tap on Blackmagic RAW and the appropriate variations such as compression ratios will light up underneath them so you can make your selection and then choose the resolution. The record tab also lets you adjust the dynamic range for film, extended video or video. You can also set the window sensor mode, frame rate, preferred card recording options, time lapse, sharpening level and more!
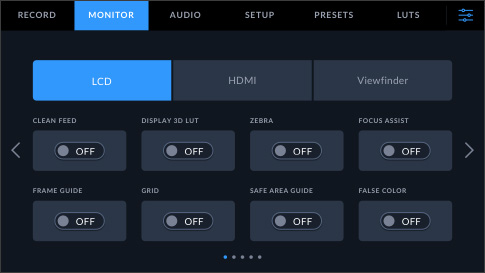
The monitor tab gives you total control over what is displayed on the built in LCD touchscreen and the main HDMI output. Each output can have independent overlays and you can select to send a clean feed, zebra, focus assist, frame guides and more to any or all outputs. You can even set the resolution and choose LUTs for each output! Best of all, you can define different display status text for the cinematographer and the director and then send that information out to the HDMI output, so the right people see the right information!
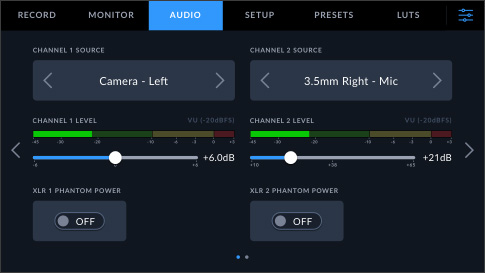
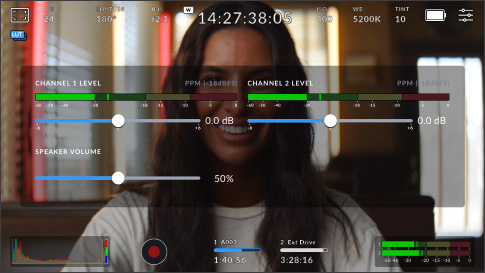
You can quickly adjust audio levels using the interactive HUD, but for complete control over audio settings, you can also use the audio tab on the dashboard. You can change inputs from camera mic to mini XLR, adjust headphone and speaker levels, mic levels, low cut filter and more. When adjusting audio input settings, you can choose whether you want to use mic or line levels independently for channel 1 and 2, turn on 48v of phantom power so you can use microphones that are not self powered, and adjust the gain.
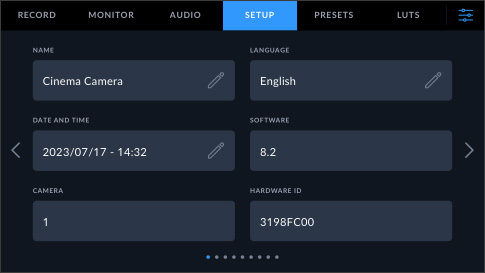
Blackmagic Cinema Camera makes it super fast to get your camera out of the box, set up and ready to go! The setup tab on the dashboard lets you enter the date and time, select the language, shutter measurement, electrical system, battery display, timecode and more. You can even completely customize the behavior of the camera’s 3 external function buttons to trigger presets or toggle certain features on and off!
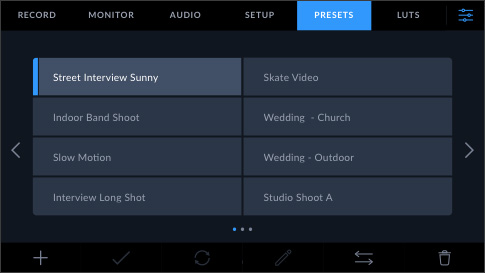
Different operators like to set up their cameras in different ways. Plus, different shows can require different setups too! With Blackmagic Cinema Camera, you can create and save 12 custom presets by using the presets tab in the dashboard. Presets can even be saved to CFexpress cards or external drives and then transferred to different cameras, making it fast to set up multiple cameras so they all have the same settings! If you often switch cameras, you can save your own presets to a CFexpress card and load them on any Blackmagic Cinema Camera on any shoot!
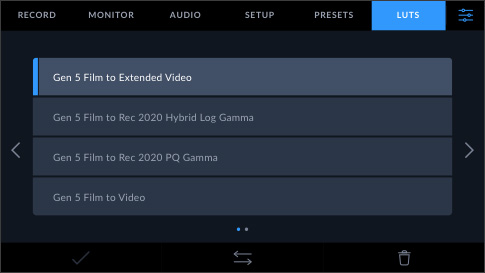
3D color lookup tables (LUTs) are used to adjust the color of the output so the director or cinematographer can see a certain 'look' as they’re shooting. LUTs are extremely useful when shooting RAW or when using 'film' dynamic range, both of which generally look flat when they’re shot. By using LUTs, the director and cinematographer can get a better idea of what the footage will look like after it has been color corrected in post production with software such as DaVinci Resolve. Blackmagic Cinema Camera can apply 3D LUTs independently to the LCD touchscreen or the HDMI allowing them to be used for high end feature film work. Blackmagic Cinema Camera allows you to store up to 10 custom 3D LUTs in the camera. You can even bake the 3D LUT into your footage and record it with your unique look applied!