Live Input
The video input button changes the viewer to a direct input from video hardware such as a switcher multi-view! This means you can add a low latency view of your cameras, ready to mark the POI for replay.

Introducing a new generation of live action replay! Blackmagic Replay is totally unique because it uses multiple HyperDecks to record into shared storage, while DaVinci Resolve is connected to the same shared storage as a powerful playback engine. This means you can add additional record channels by connecting more HyperDeck recorders. However, the true power comes from having DaVinci Resolve handle the playback. That’s because it’s not just replay, but an extremely powerful editor with multi user collaboration features. Plus color correction, visual effects and audio post production! So now you can convert replays into promos, title sequences and instant social media updates!
Find Reseller
Now you don't need to throw away a replay after it’s gone to air! That's because you can convert the replay into an edit timeline for posting to social media. Blackmagic Replay is more powerful than a traditional replay system because it’s built into DaVinci Resolve. This means you can load exciting camera angles into the timeline to edit, color correct and add visual effects. These edits can then be posted to social media in seconds. With Blackmagic Cloud, you can have more than one DaVinci Resolve system working on the job. Imagine every replay at a sporting event being transformed into a social media post. By creating instant social media posts, you can engage a new audience at a massive global scale!


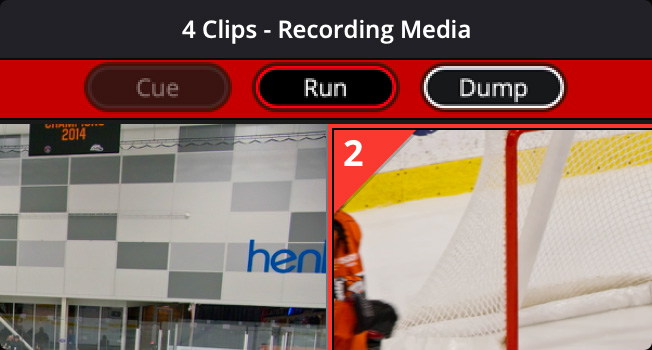
DaVinci Resolve lets you do replay in a few simple steps. It can be as simple as watching the input view in the viewer and then pressing the POI button when an exciting event happens. Pressing the POI, or point of interest, button will switch you from the input view to playback media, where you can see the different camera angles you have in a multi-view. Now you just scroll back a little, select a camera and you're ready to play by pressing the run button. While playing you can review other angles in the multi-view and play that angle to air using show sequencing. When your replay is done, press the dump button and your replay will load into the timeline. Now you can add titles and then post to social media.
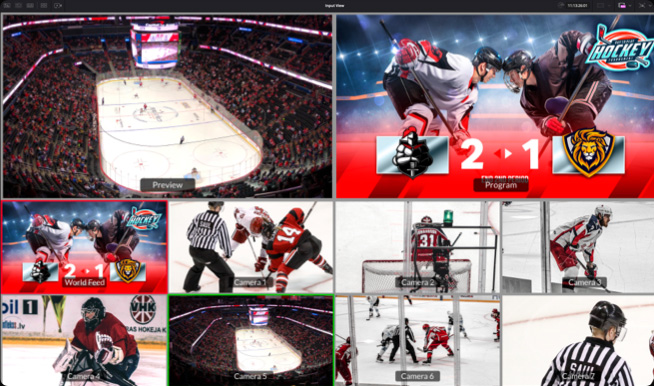
Select input view. Mark the POI when something happens. DaVinci Resolve will switch to the playback media and cue to the POI, then you can review and select a camera. Now press run to start the replay.
Once running, the multi-view lets you review other camera angles. Select a new shot by pressing a time key and a camera key. The playback will move to seconds before the POI and play the new angle.
The time between run and dump is the replay and it can be automatically added into the timeline. If you used transitions and speed changes in your replay, they will also be loaded into the timeline!

Building a high end replay system is easy as it's storage centric, where multiple HyperDecks record and DaVinci Resolve handles the playback. That lets you customize as many channels as you need. Just add extra HyperDeck recorders! That means you can build a replay system in HD, Ultra HD or even 8K. Then add more storage when you need extra space and higher speed. Plus, you can add more than one DaVinci Resolve system and they will collaborate globally using Blackmagic Cloud shared projects. Anything done on one system will automatically update on the others. Plus ATEM switchers with built in ISO recording features can also be used to do simple replay, because all the hardware is built in!

Add multiple HyperDeck recorders to a Blackmagic Cloud Store Mini or Max to record as many channels as you need. Set recording to numbered ISO folders inside a parent folder for the job.
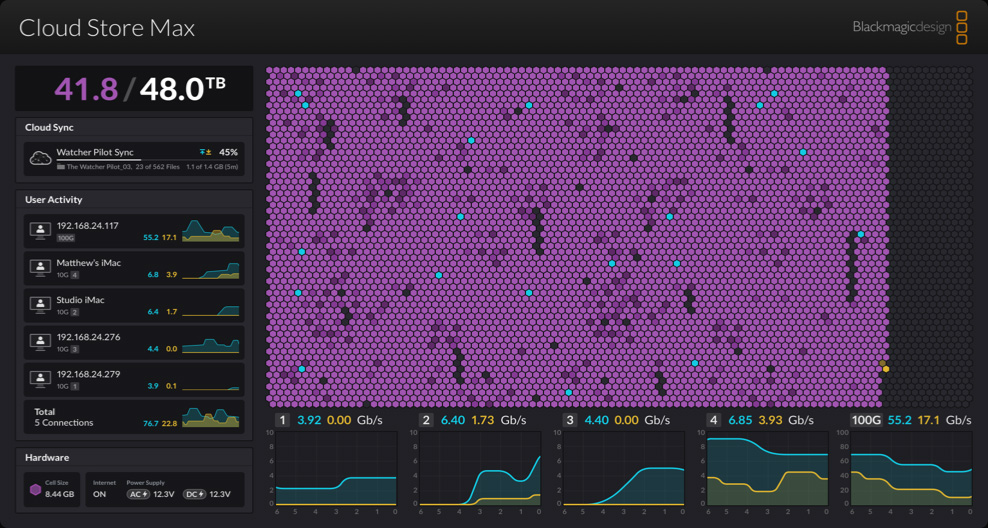
Blackmagic Cloud Store Max has been designed for replay because it's fast and has a large capacity. So it easily handles multiple record channels. You can add a second store when you need more speed.
DaVinci Resolve is connected to storage to manage the playback. You can play all camera angles in a multi-view and then select shots for playout. On big jobs, add a second DaVinci Resolve for playout.
While some DaVinci Resolve systems are working on replay, others can perform post production tasks. Other editors can see timelines that are created and add titles, color correct and post to social media.

The replay controls are accessed using the replay palette above the viewer, plus there are also dedicated buttons on the DaVinci Resolve Replay Panel. The cue button is good for replaying edit timelines, as it will cue to the start. The run button will start replay and change the video output to the selected camera while the viewer will change to a multi-view so you can review the next shot. Plus it will open the hardware key output to enable playback on the switcher. It will also run the auto stinger if enabled. Dump stops the playback, reverts the hardware output to a multi-view and runs the auto stinger if enabled. It also adds the replay to the timeline if add to timeline is enabled.
Because replay is built into DaVinci Resolve, you can arrange the specific views you want for replay simply by loading them into the bin. For example if you wanted to record 8 cameras but just do replay off 4 cameras then you only need to load those 4 cameras into the bin. Different users can load in different cameras and do replay customized for each workstation. This means more than one DaVinci Resolve can be used for replays. DaVinci Resolve builds its multi-view based on the media that's loaded into the bin, however with shared projects, you can create different folders in the same project with different cameras loaded. Then you navigate to that folder before selecting multi source.

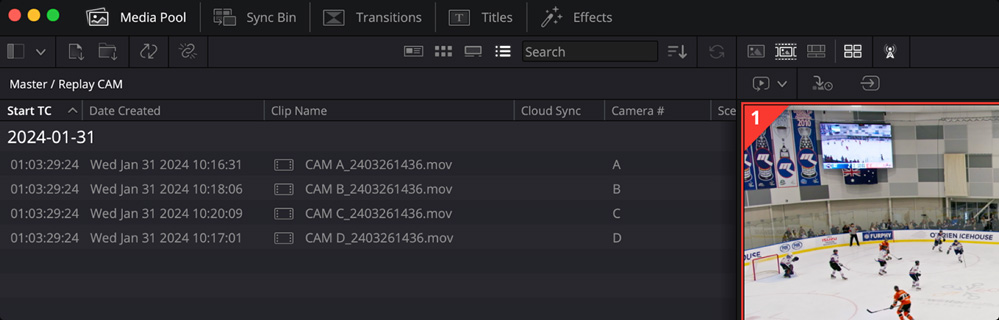
To start working with replay, you simply load the HyperDeck recordings into the bin. One of the reasons DaVinci Resolve can be used for replay is it can edit media files even while those files are still being recorded on disk. The viewer will automatically advance as the files grow in length, so you can scroll forward and get to the latest media being recorded. It updates fast and you can get to media recorded less than a second ago. The ‘go to end button’ lets you see the latest action. Then you can scroll and play to see your angles. There are even record indicators on the clips in the bin to show they are still being recorded. There are also record indicators in the multi-view views!

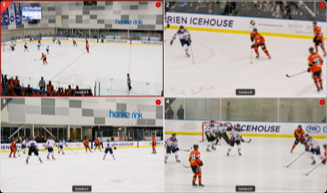
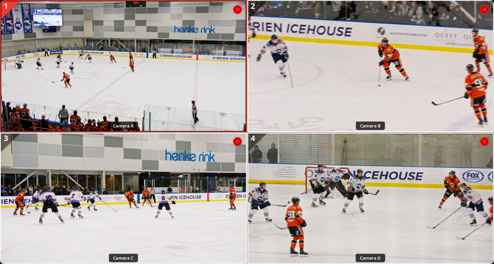
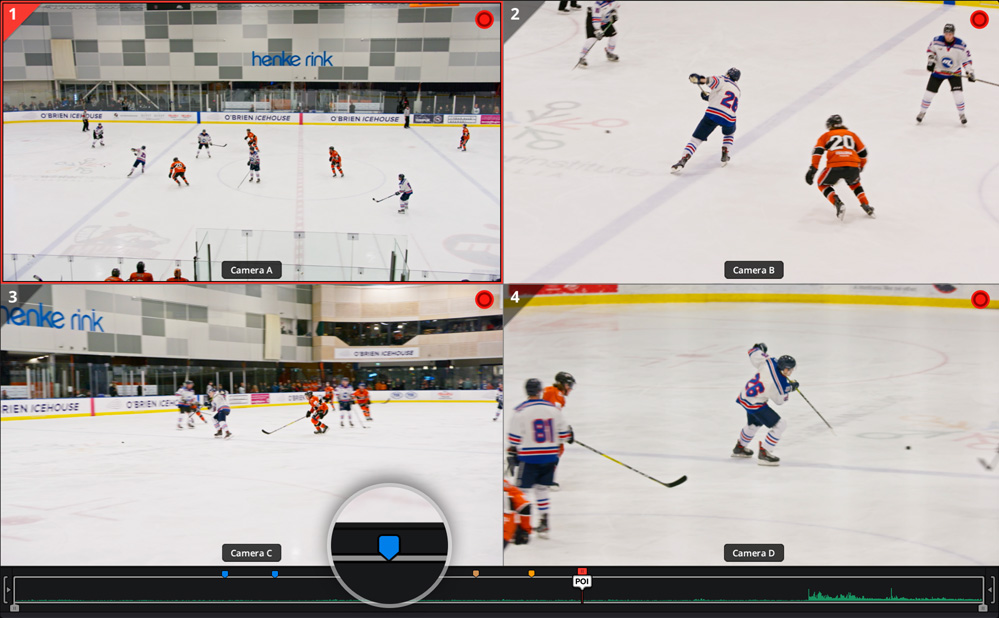
Multi source is where DaVinci Resolve automatically lines up all your recordings that match in time and displays them in a multi-view. This allows you to visually browse your media and see all the angles matched in time. As the clips are all being recorded on HyperDecks at the same time, you see events all aligned in time. The best way to get aligned recordings is to connect all the HyperDecks to a switcher so they get the same timecode. Now you can see all your angles and you can select different cameras to view full screen. You can also append and insert edits from the multi source. This means you can create edits fast, all while doing replay!

Most of the time you want to watch the action and wait for an exciting event to occur so you can set it up for replay. If you are connected to Blackmagic Desktop Video hardware then selecting the input view will show a live view of the SDI or HDMI input into the DaVinci Resolve viewer. This gives you a live view without latency. A good input is a multi-view output from an ATEM switcher. Plus input view will snapshot the video input timecode when setting the POI. Once you set the POI, the viewer will change over to the multi source media and cue to the POI point as it comes in from the storage. It's almost instant! Now you're ready to scroll the media, select a camera and start the replay.

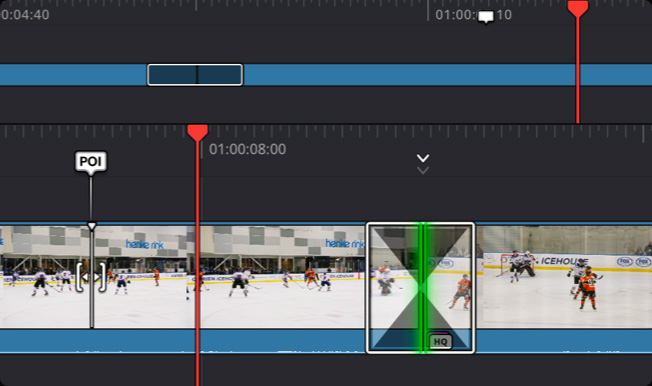
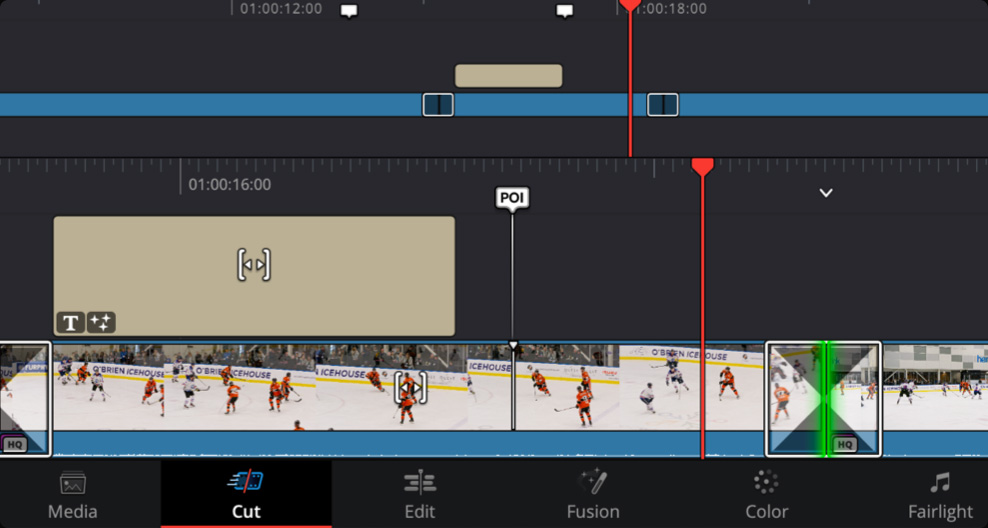
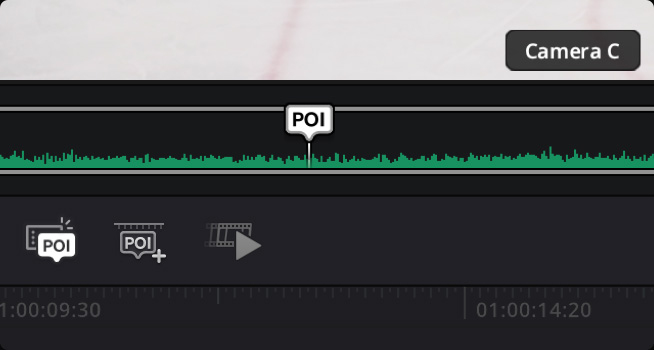
The point of interest or POI is a very important feature that makes replay possible. The POI is like a time based bookmark and it shows up on any clip, timeline point or bin icon when there is a match to the POI time and date. It’s not a marker because its time based and not connected to any particular clip or timeline. With a POI set, DaVinci can preroll back to play a new camera angle because it knows where an event happened in time. You can also use the POI for editing using the time and camera keys. Edits using the POI will appear in the timeline centered around the POI time. So you don't need in and out points. There is also a POI indicator that shows the scroll distance from the POI.


Shot sequencing allows you to play multiple camera angles during the same replay. It allows the single DaVinci Resolve system to handle complex replays. When playing the first camera angle to air using the run button, the view switches to a multi-view, even though the video output is the selected camera. This lets you review all the angles as you play for the first camera, and look for the next angle to use. This means you only need to get the first shot on air fast. You can review the other angles while playing the first. Then press a time key and second cam button and the playback will jump back to that timed number of seconds before the POI and keep playing. Even with transitions! All live!

An important part of replay is slowing the action down so viewers can see what happened in detail. The DaVinci Resolve Replay Panel has a dedicated fader control that can be used to slow down playback speed. It will slow down all playback, even when not playing to air, so there's a speed enable button to prevent you from accidentally applying a speed change! The speed change is great when doing shot sequencing because it will hold the same playback speed as you change cameras. Speed changes will also be added to replays that are added to the timeline. This means your social media post will also get the speed changes! DaVinci Resolve Studio also has AI processing for optical flow super slow motion!

Live productions often use complex automation for stingers. However DaVinci Resolve has built in auto stingers! These reduce workload as it’s like having automation built in. DaVinci does everything! Select auto stinger and DaVinci Resolve will then play the selected stinger when the run and dump buttons are pressed. It will also output the alpha channel in the stinger on the hardware key SDI output. Selecting run starts the stinger and then plays the clip. Dump runs the stinger again and then stops playback. The dump can be slightly delayed if an edit has just occurred, however double pressing the dump button stops playback immediately. Auto stingers make each replay look truly professional.
Markers are better in DaVinci Resolve 19 and can be used to log events when you will be editing the replay media later. Markers are very different to the POI as you can have multiple markers and they are attached directly to clips or the timeline. Markers are also remembered in the project when saved or shared. You can select custom colors for markers and also add titles and notes for each marker. With markers, it’s like having metadata tags on your clips and timeline so you can find shots. Plus there's a dedicated add marker key on the DaVinci Resolve Replay Editor so you can add markers as often as you like! Plus markers can be exported into video files to set chapters on YouTube.

The add to timeline selection will automatically add your entire replay into the timeline. Replays append at the end of clips already in the timeline, or create new timelines for each replay. This means each replay can become a separate social media post. Everything you did during the replay is remembered and added into the timeline, including transitions and speed changes. If you have a shared project, then other editors can get these timelines and add color correction and titles. This means your replay system can be integrated into a global network of post production! Someone in another country could even prepare your titles and they would automatically appear back into the replay system!

Even sports that have less local appeal can have a massive audience if you can engage viewers worldwide. The key to this is posting replays as social media content. The replay system is best for this because it has all the best camera views! Plus you get multiple angles with transitions and even speed changes. Then you could add a graphic, a sponsor logo and even a score card at the end to build a professional social media post. Each social media post can be sold to advertisers to help fund the production! It's so fast, you can post every few minutes. By posting just the highlights you will have fans waiting for the next social media update! That's a true global viewer connection!

With replay built into DaVinci Resolve, you get access to a post production network that includes some of the world’s most talented editors, colorists, visual effects artists and audio engineers. This adds a level of creativity to replay that's never been seen before. Editors can build promo videos and documentaries right from the replay media. Then add professional color correction. Then VFX artists can use the Fusion tools for exciting transitions, or even tracking graphics and all kinds of futuristic designs. Plus each person in the post production network can collaborate using Blackmagic Cloud. With most Hollywood films using DaVinci Resolve, you have the tools to do anything you imagine!

DaVinci Resolve lets you do basic replay using the software's user interface! The replay palette above the viewer has lots of controls for replay right from within DaVinci! The top right of the replay palette also has the input button so you can switch the viewer over to monitoring the video input of the connected hardware. There is an Add POI button located at the lower left of the viewer which when selected will snapshot the timecode from the video input and transfer you to that time in the source media. Now you can scroll to your camera, click the camera view you like, and press the run and dump buttons to do your replay. The replay palette also has the add to timeline selection!

The video input button changes the viewer to a direct input from video hardware such as a switcher multi-view! This means you can add a low latency view of your cameras, ready to mark the POI for replay.
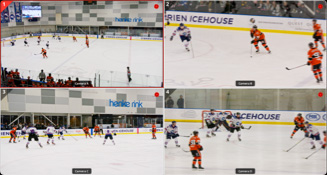
If you enable the multi source button, your viewer will show you all your cameras lined up in time in a multi-view. Just click a view to select a camera! Or press ESC to select all cameras.
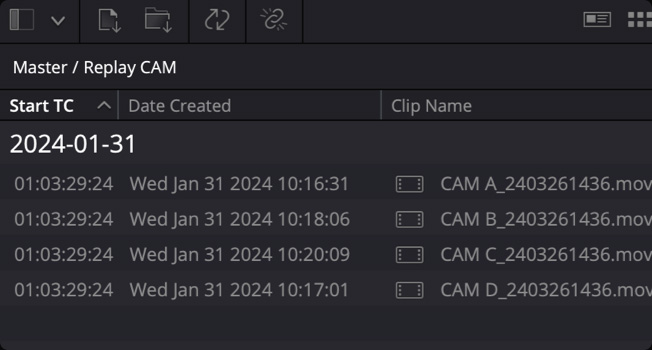
DaVinci Resolve will display only the media you load into the bin. This means you can load in as many camera ISO folders as you need. Or move up and down folder paths to watch more or less cameras.
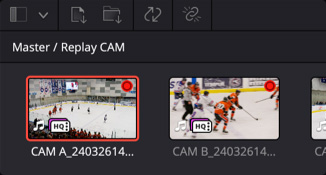
Clips for replay are being recorded live, so DaVinci Resolve handles files that are growing constantly in length. You can see record indictors in bin clips and the viewer media automatically grows in length!
To mark an event, press the add POI button or the space bar when input view is selected. This will set the POI time from the video input timecode, then switch to the source view and cue to the POI.
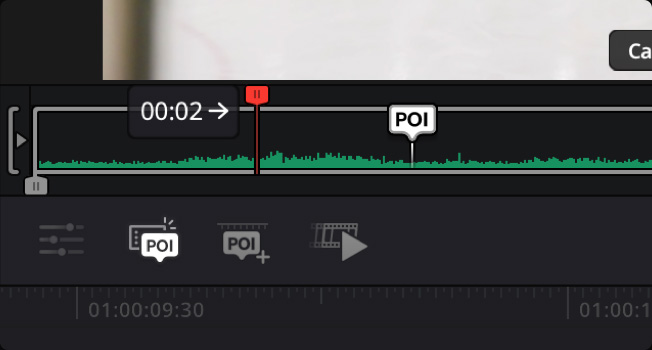
It's normal to move back before the POI so you can show the viewer what happened in the lead up to an event. The POI distance indicator will show you how far away you have scrolled in seconds.

Before you start a replay, you can select to enable an auto stinger. This automatically rolls a stinger when starting or stopping a replay. You can also select different stingers with the title keys.

The add to timeline selection lets you add a replay into the timeline as an edit. It's automatic and when enabled will add the clips after the replay has finished. You can append or use a new timeline.

The run button starts the replay. It will replay from the current position. It can also trigger an auto stinger. The viewer will change to a multi-view so you can review the next shot.

You can click on the camera views to cut between cameras when playing to air. Then the selected camera will be output to the video output. It’s like a live video switcher built into the viewer.
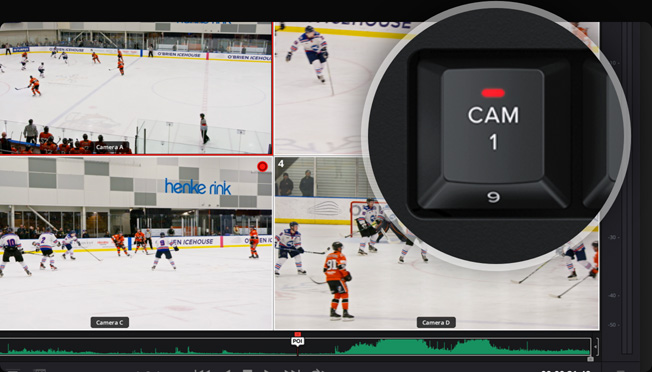
If you press one of the keyboard number keys and click a camera view while playing to air, DaVinci Resolve will jump playback back to the number of seconds before the POI and switch to the selected camera.
The Dump button stops replay and then adds the shots to the timeline if selected. Plus it can run the auto stinger. It's smart so it will wait a little if you have just sequenced to a new shot.

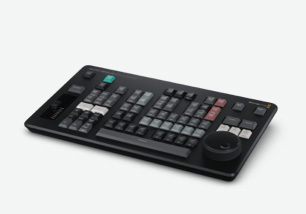
The DaVinci Resolve Replay Editor is a hardware control panel that combines features for both replay and for multicam editing. Its affordable design has the same high quality keys that gaming keyboards use, so it's reliable and feels nice to use. With features for both replay and editing, it means the same operator can work on replays while loading them into the timeline with the keyboard’s editing features. This makes it incredibly fast to use. Plus the buttons have been spaced so you can locate them by feel. Even the trim keys work with the large search dial for greater speed and accuracy. The panel can connect via USB or Bluetooth and the large internal battery lasts for hours.
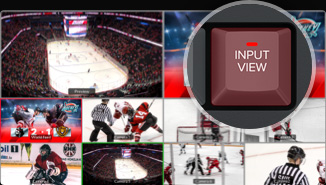
The live input button changes the viewer to a direct input from video hardware such as a switcher multi-view! This means you can add a low latency view of your cameras, ready to mark the POI for replay.
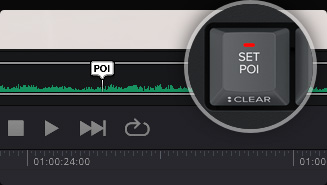
To mark an event, simply press the POI button or the space bar when input view is selected. This will set the POI time from the video input timecode, then switch to the source view and cue to the POI.

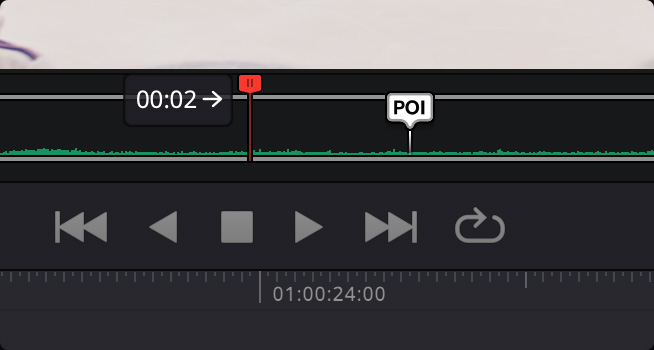
If you get distracted while editing and miss an event, then just press GO TO END! It takes you to the end of the media which was just recorded. Then you can scroll back to see what happened.
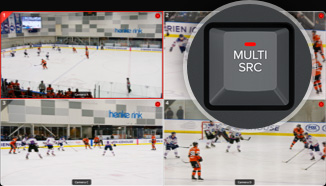
You can scroll back and see all the camera angles, because DaVinci Resolve can play them simultaneously into a multi-view. That makes it easy to find and select the best angle for your replay!

Before you start a replay, you might want to enable an auto stinger. This automatically rolls a stinger when starting or stopping a replay. You can also select different stingers with the title keys.

When rolling a replay, the cut and dissolve buttons let you select the type of transition you want when sequencing shots. Now each time you select a new camera, you get a nice dissolve transition.

The RUN button starts a replay and enables the key channel output so the switcher will show the playback and start the auto stinger. It also starts logging when adding the replay to the timeline.
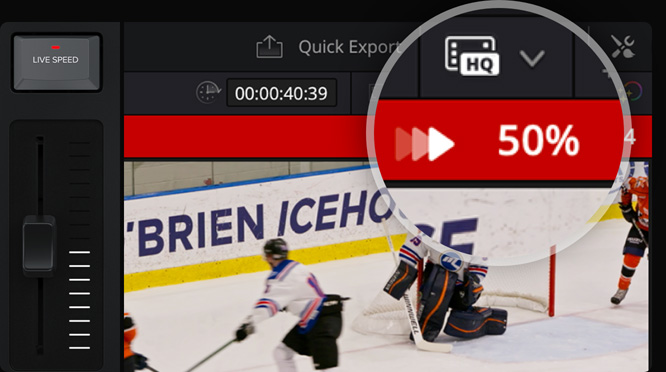
You can do live speed changes by using the slider control. You can slow playback speed on both the viewer and the timeline. When you slow to stop, the search dial lets you jog around the paused area.
Use the camera buttons to cut between cameras when playing to air. The viewer will continue to show a multi-view and the selected camera being output to the video output. It’s like a switcher!
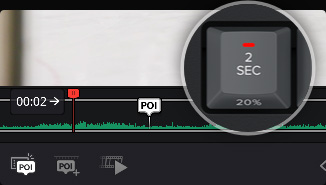
If you press one of the time keys and a CAM button while playing to air, DaVinci Resolve will jump playback to the selected time before the POI for the selected camera. You can even select it to use a transition!
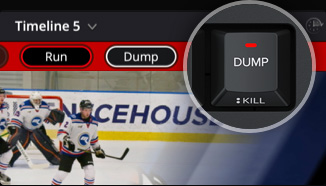
The DUMP button stops replay and then adds the shots to the timeline if one is selected. Plus it can run the auto stinger. It's smart so it will wait a little while if you just sequenced to a new shot.
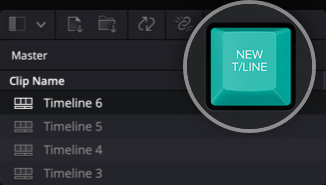
The new timeline key will save the current timeline and open a new timeline with a similar name. There is no dialog window displayed so it's very fast. You could create a new timeline for each replay!