1. Press a transition button to select the transition you want to use.
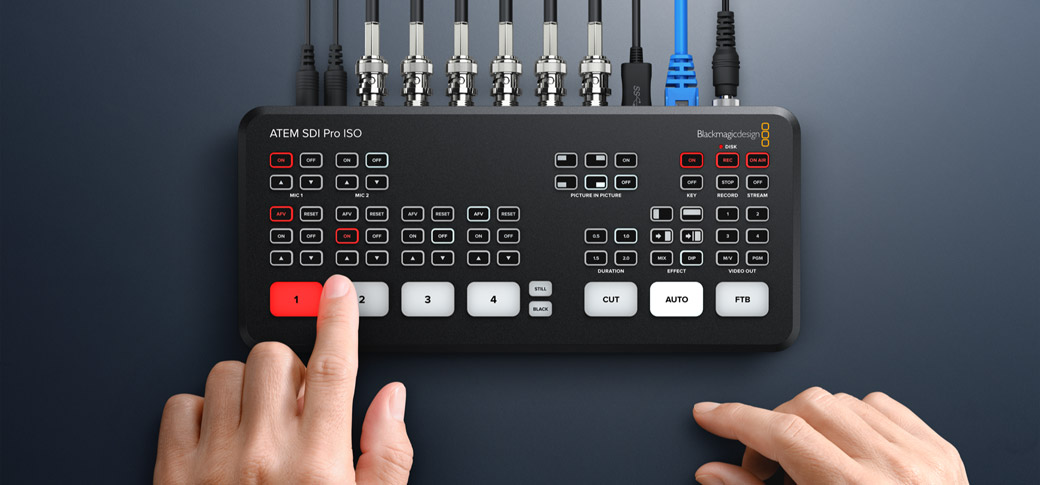
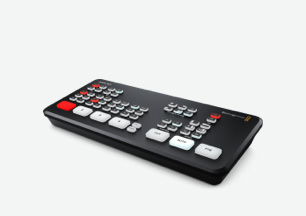
With ATEM SDI, it's never been easier to get started with live streaming and multi camera video production! This section will show you how to connect and set up an ATEM SDI switcher so you can create your first live stream! ATEM SDI is a compact broadcast switcher that lets you switch 4 or 8 SDI video sources depending on the model, plus 2 dedicated audio sources. The USB output looks like a regular USB webcam that you can use with video software. ATEM SDI's built in control panel has all the controls you need to make switching programs easy. Then if you want more power, just run ATEM Software Control to get access to the full feature set of ATEM SDI to create incredible effects and titles.
Find ResellerSetting up your ATEM SDI
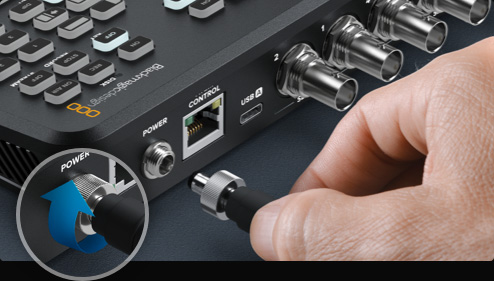
The first step is to plug in the power supply using the supplied power adapter. However most 12V power supplies will work fine, or even a 12V DC battery source will work fine. If you have a locking DC connector, then make sure to tighten it firmly.
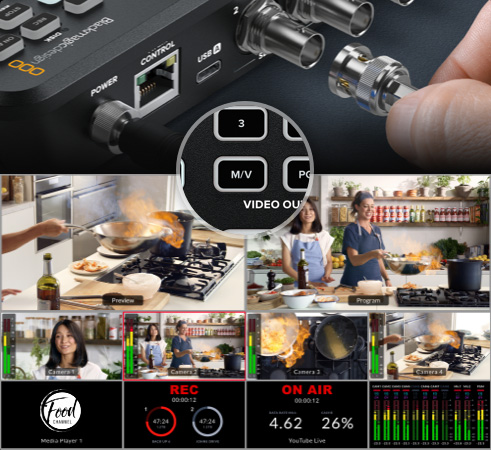
The ATEM SDI Pro or Extreme models have a multiview so you can see it if you connect a monitor to the SDI out. Make sure you press the M/V button on the video output selection. Now you can see all your sources as you plug in cameras!
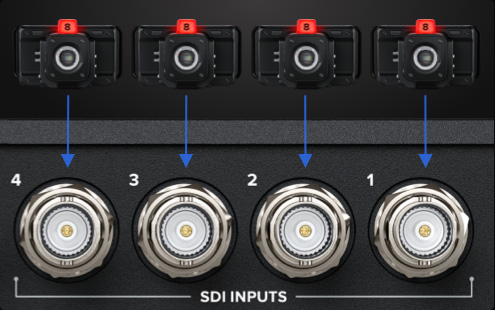
Next, plug your SDI cameras into ATEM SDI's video inputs. This gives you 4 or 8 different video sources, depending on the model, to switch between when creating your program. All the SDI inputs are standards converted so don't worry about settings!
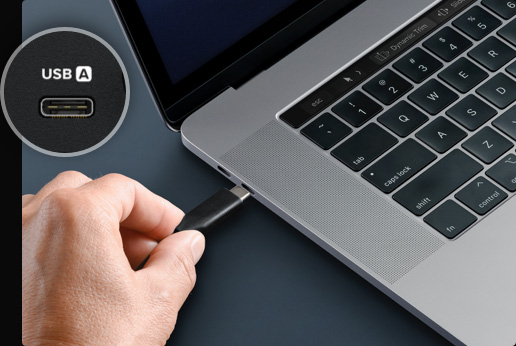
If you're streaming, then all models use USB as a webcam. First connect the USB to a computer. Your computer will recognize ATEM SDI as a webcam and you can then select it as the webcam source in your streaming software.

Zoom is a good app for testing, so let's configure it for ATEM SDI. In Zoom’s audio and video settings select Blackmagic Design as the video and audio sources. You will see the ATEM SDI video in the preview window and you can make calls!


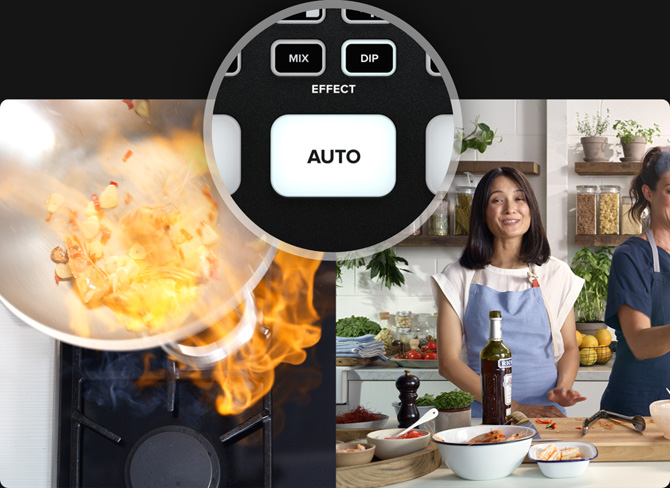
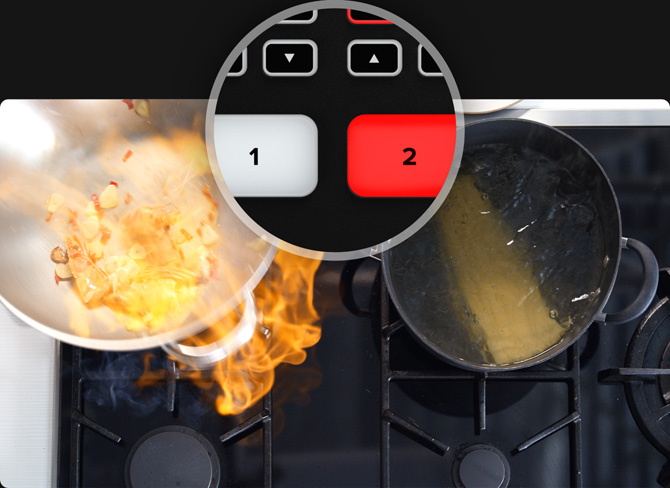
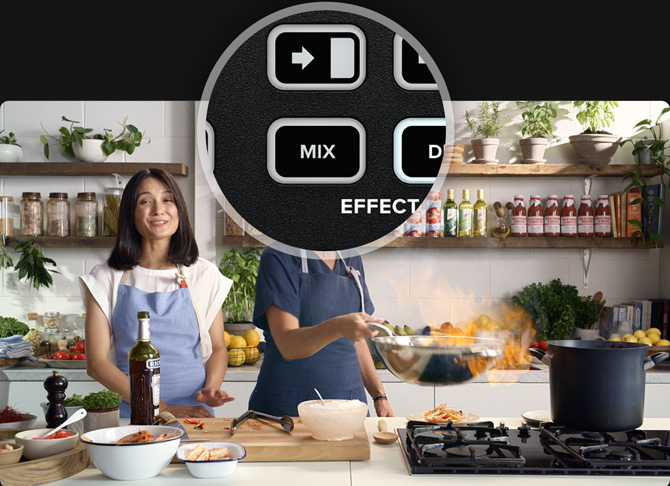
Now that you have your cameras connected, you can start switching your program! It’s as easy as just pressing the input buttons to switch between sources. You'll see the cuts are smooth and professional looking. To transition with a video effect, simply press AUTO so selecting input buttons will use a nice transition. Because cut is the most popular transition, there are dedicated buttons for cut and auto transitions. You can change the transition that’s used by pressing the buttons above the AUTO button. You can choose between mix, dip, DVE push, DVE squeeze, and vertical and horizontal wipes. Of course there are a lot more transitions available when using ATEM Software Control!
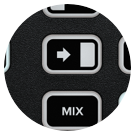
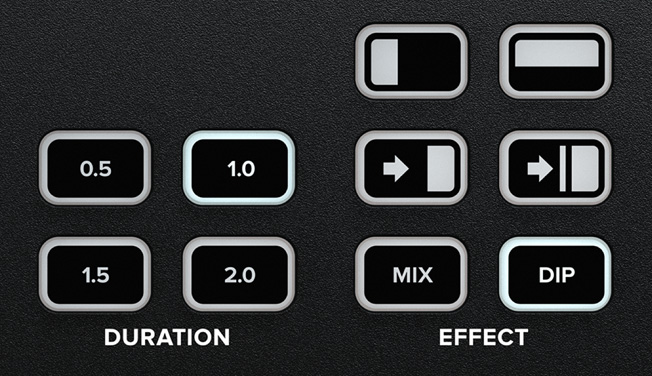
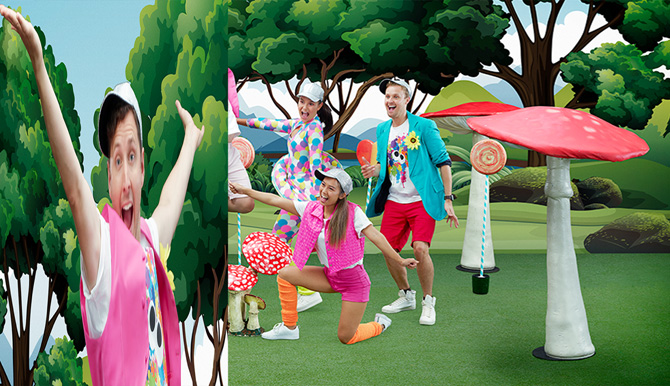

Before creating your first program, it’s worth thinking about the type of transitions available. From a creative point of view, a mix transition can feel very elegant as it gradually fades from one source into the next, while slower mix transitions can feel dreamy and gentle. A wipe transition will move a line across the original source revealing the next source and it has a different feel depending on the amount of soft edge you set in the wipe parameters. You can even set a wipe with a border that uses a color or even live video! DVE transitions are a lot of fun and they move the whole image during the transition, so they can feel crazy and exciting, making them perfect for kids shows!
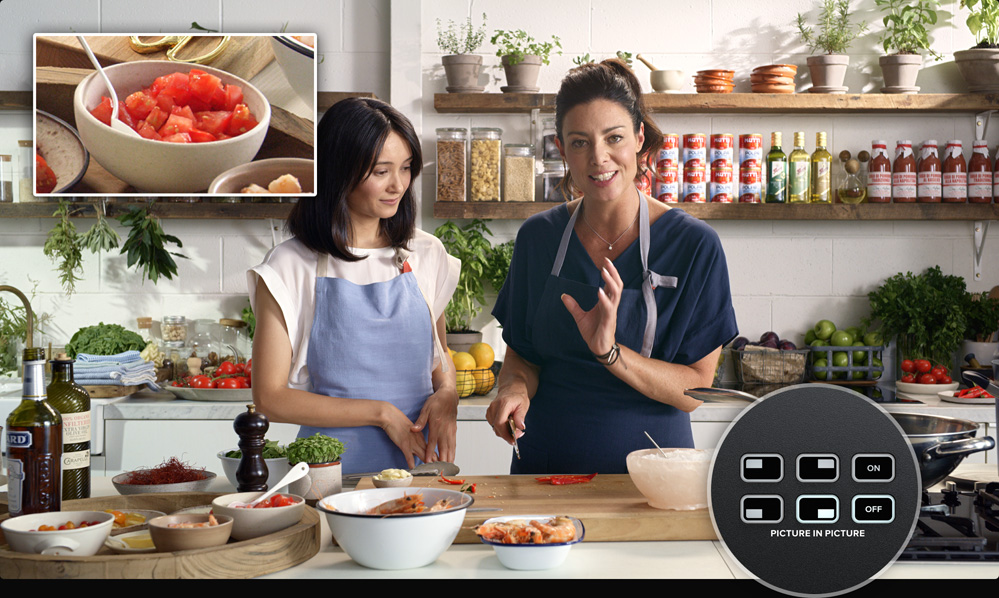
Picture in picture superimposes a video in a small box that you can position and customize over your main source. To do this you use the digital video effects processor, or DVE. The DVE uses input 1 for its default source, so if you’re broadcasting gameplay and want to superimpose your reactions, plug your camera into input 1. The ATEM Mini Extreme ISO G2 model has 2 DVEs and defaults to inputs 1 and 2. Make sure your game console uses one of the other inputs. To enable picture in picture select it on the control panel. As the DVE uses the upstream keyer, you also need to turn off the key. You can position the DVE and customize the borders and light source by using ATEM Software Control.
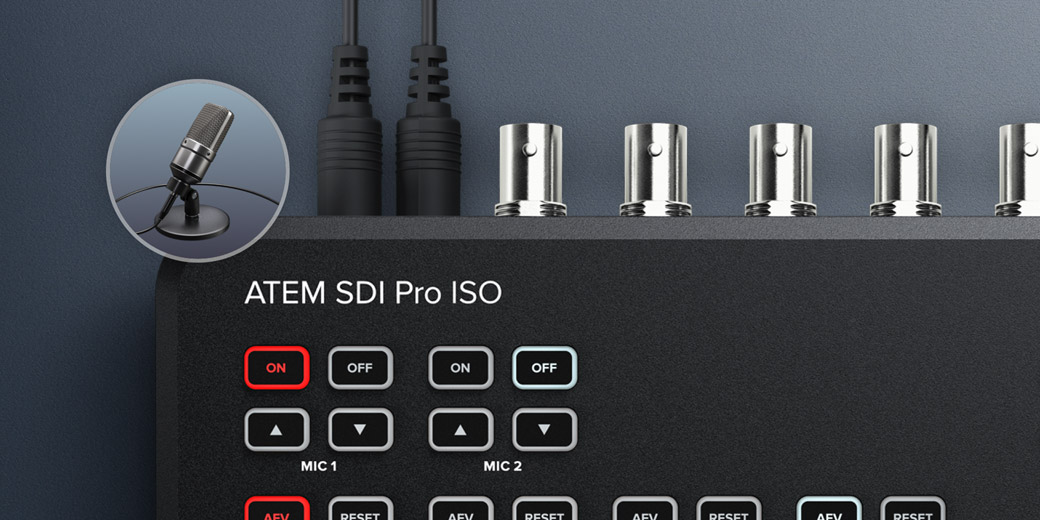
If you need to narrate or add commentary to your production, plug a microphone into one of the 3.5mm mic inputs or XLR inputs depending on the model. You can use two microphones for broadcasting interviews to individually control how loud or quiet they are. Use the audio control buttons or ATEM Software Control to turn on and off, or set to audio follow video for each audio source. There are many types of microphones available, such as tiny, wireless collar microphones so the presenter can move freely without cables or larger desktop ones for presenters. Using dedicated microphones as well as using the audio page in the ATEM Software Control to add EQ and some compression can dramatically improve the clarity of presenters.
If you really want to access all the power of your ATEM SDI, then you can run ATEM Software Control and get access to many more features than are available on the front panel. There are pages that let you run the switcher and palettes that have settings for every feature in the switcher. There are also pages in the software for changing settings, uploading and managing graphics, mixing audio and controlling cameras. Just connect the USB to a Mac or PC and run the software, as it uses the same USB connection that the ATEM SDI's webcam output uses. You can also use ATEM Software Control via Ethernet if you have more than one operator working on the same job at the same time.
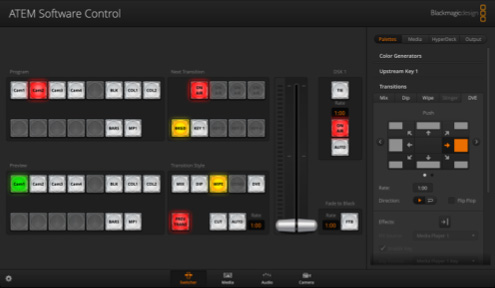
Adjust switcher settings, make live cuts, adjust keys, apply transitions, overlay graphics and more.
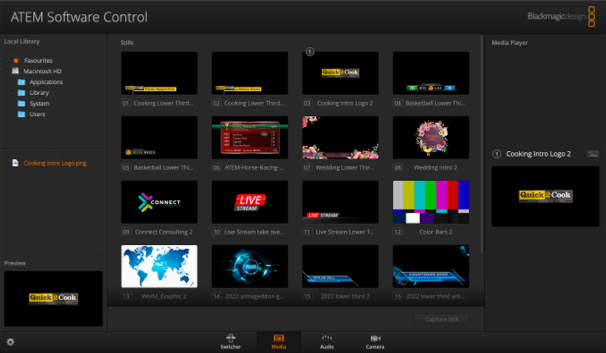
Upload and manage up to 20 RGBA graphic files. Graphics can be used for transitions, as bugs, lower thirds and more.
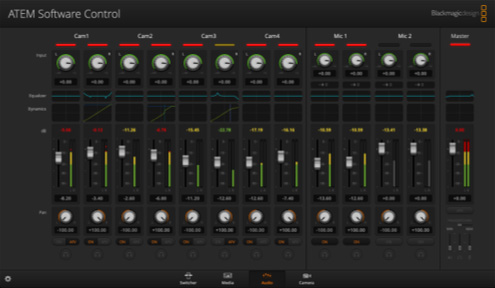
Professional multi channel Fairlight audio mixer with faders and meters for every input and the master level control.
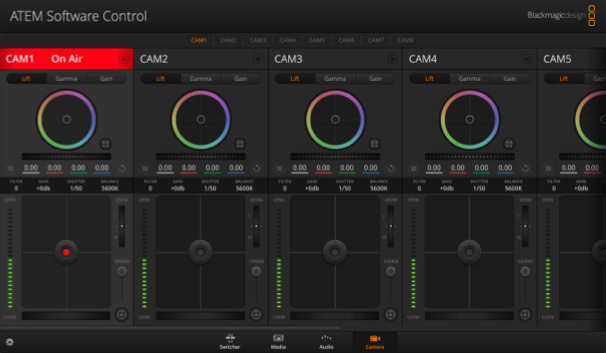
Remote control your cameras, including tally, camera settings and color balance!
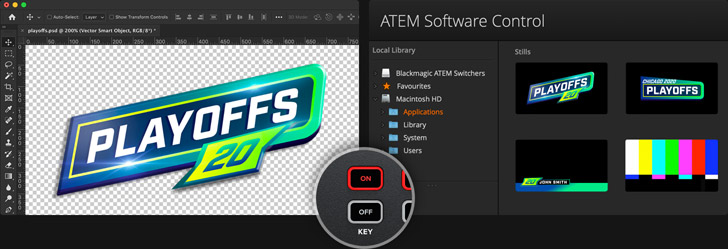
You can use any graphics software to create titles for ATEM SDI. If the graphic has an alpha channel, ATEM SDI will output the alpha as a key channel to allow graphics layering. Graphics with alpha channels can be created in software such as Photoshop. To use a still graphic, simply drag and drop it into one of the positions in the media pool in ATEM Software Control. Now go to the keyer settings in the switcher page, where you will need to set the media player source to be the still you just loaded. Then in the keyer settings, select the video and key sources to be the media player. Now turn on the keyer and you'll get professional titles overlaid in real time on your live video.


You can create professional mastered audio using the Fairlight audio mixer in ATEM SDI and controlled through ATEM Software Control. By clicking and dragging the mixer faders you can adjust the sound levels for each camera so they are louder or quieter, or adjust the microphone levels so voices are clearer and stand out. If a music player is plugged into the second mic input, you can even fade music in and out of your broadcast because each mic input has its own audio mixer inputs and effects! If you want to go even further, you can add Fairlight EQ, audio compression and limiting to tailor the sound of presenters to get them sounding clear and to keep the audio levels under control.
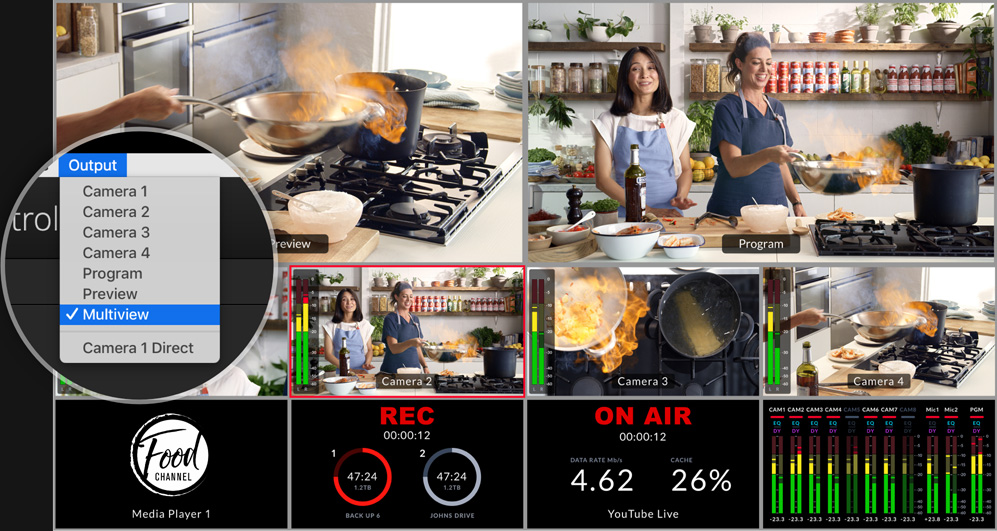
The SDI outputs of ATEM SDI can be changed, on professional switchers this is called an aux output. You can also loop a computer slide show and a projector through ATEM SDI, allowing access to the slide show as one of your sources. You can select preview out and set the switcher to program/preview switching to allow you to preview shots before going on air. On the ATEM SDI Pro and Extreme models, you can even select a multi-view out for full multi camera monitoring. Being able to see shots before using them on air means you eliminate mistakes. If you are broadcasting gameplay, depending on the model, input 1 can be set to zero latency allowing ATEM SDI to be looped between the console and the gamer’s monitor.

If you want to live stream and you have the Pro or Extreme models, you can stream direct using the Ethernet connection. Once you have connected Ethernet to the internet, first request a streaming key from the streaming service. In the ATEM Software Control switcher page output palette select the streaming service you want to use, and the server you want to use choosing the server closest to your location, and enter the streaming key. Generally select the highest quality, unless you have speed limited internet access. Now press the on-air button on the panel and you should see your program video live to your streaming service. On these models you can see your streaming status in the multi-view!

You can record using the SDI output and recorders such as the HyperDeck Studio, allowing you to upload your television shows later, or to archive your production history. There are also many software tools for recording webcam video so you can use this software to record from the USB on a computer. However on ATEM SDI Pro and Extreme models, you get recording features built into the switcher itself! All you need to do is connect a USB flash disk and then press record on the front panel! ATEM SDI Pro and Extreme also support recording to more than one USB disk, such as a Blackmagic MultiDock, so you can keep recording to a second disk when the first disk becomes full.
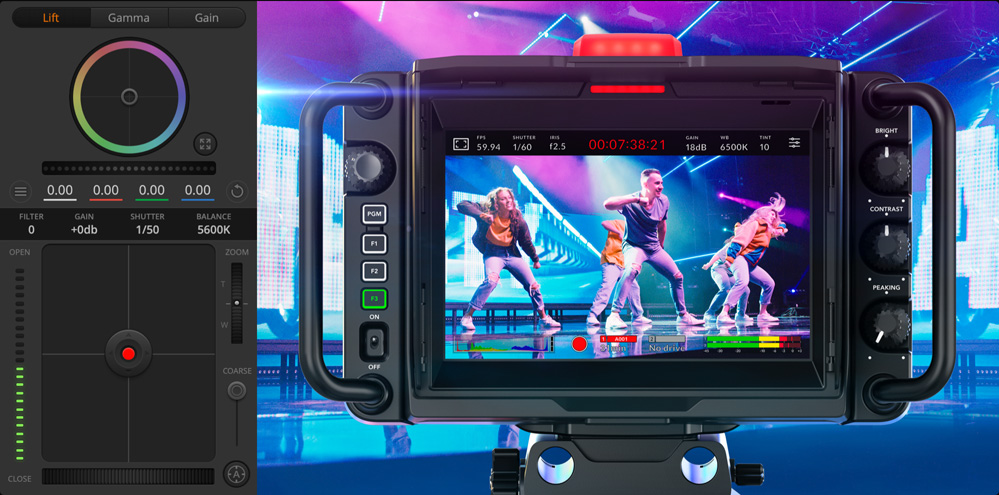
If you have Blackmagic Studio Cameras then you can control them from ATEM SDI! Control is sent back to the camera via the SDI out connected to the cameras’ program return. Now you can go to the ATEM Software Control Camera page to get a CCU style interface where you can adjust and match your cameras. Move the main CCU control up and down to control the iris and left to right adjusts the black level. It's the same as a broadcast CCU! There are also controls for color tint to balance the cameras. Plus you can set the focus, gain and shutter speed of the camera. To access DaVinci color correction, select the DaVinci icon to open up full color wheel primary corrector controls.
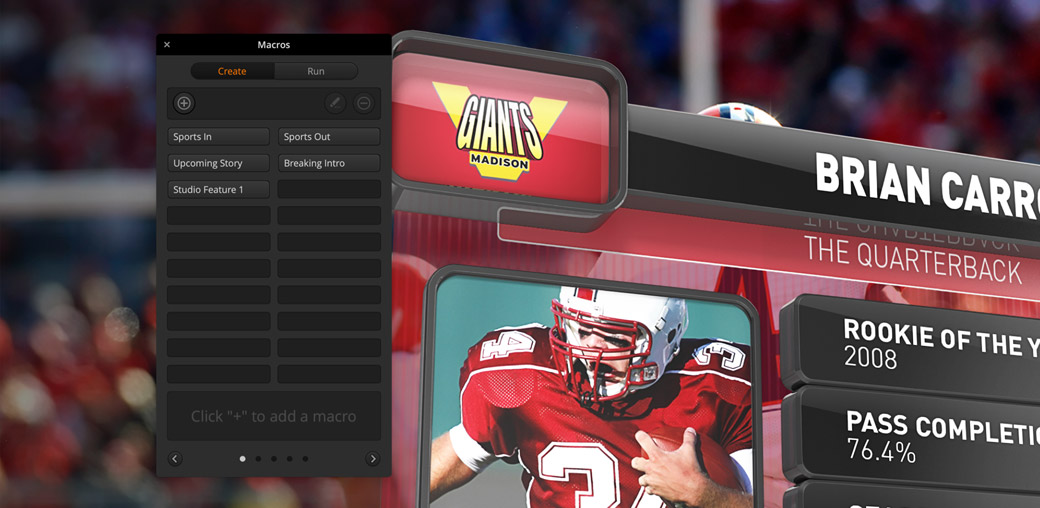
You can also use ATEM Software Control to build macros. Macros are useful for recording a sequence of switcher actions so you can repeat them with a single click of a mouse. For example you could record a combination of switcher actions that transition between several camera sources, switch a graphic to air, and adjust audio levels all in one single macro that can then be played at any time. Macros can be as simple or complex as you want and are extremely powerful when used in a live production. Your actions are automatically stored as an XML file that can be edited and combined together. To use a macro, just click run on the Macro palette in the software switcher settings!

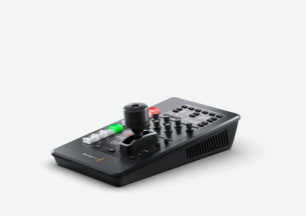
ATEM Micro Camera Panel
ATEM 1 M/E Advanced Panel
ATEM hardware panels are external control panels that can be used for additional control over ATEM SDI. Even though ATEM SDI is an extremely powerful broadcast switcher all by itself, an external ATEM hardware panel gives you extra power. Connecting an ATEM hardware panel to ATEM SDI's Ethernet port lets you operate the switcher from a different location such as a control room. That keeps ATEM SDI closer to the cameras and the SDI cables shorter. Professional control, such as an ATEM 1 M/E Advanced Panel, has physical buttons and controls so it’s much faster to use. There are so many things ATEM SDI can do! It’s a great idea to check the ATEM SDI instruction manual to learn more!