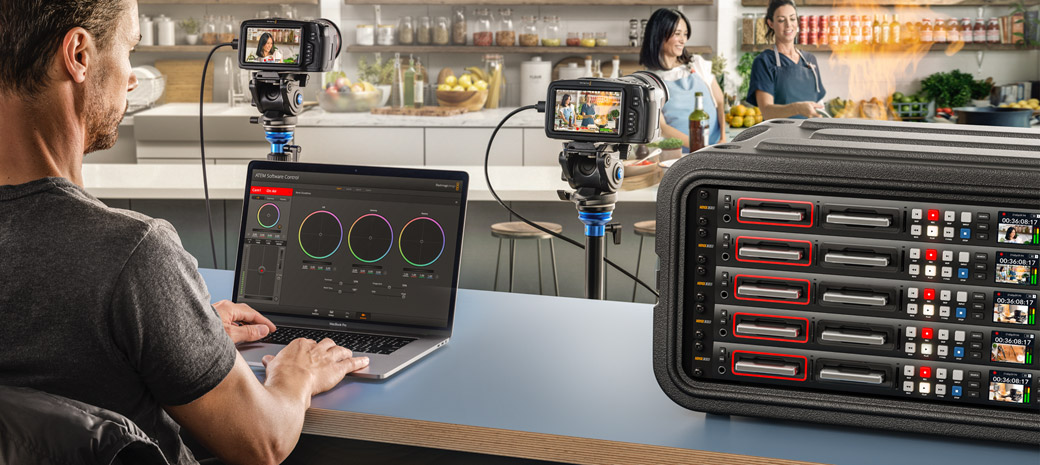
Get Faster Production Using ISO Recording
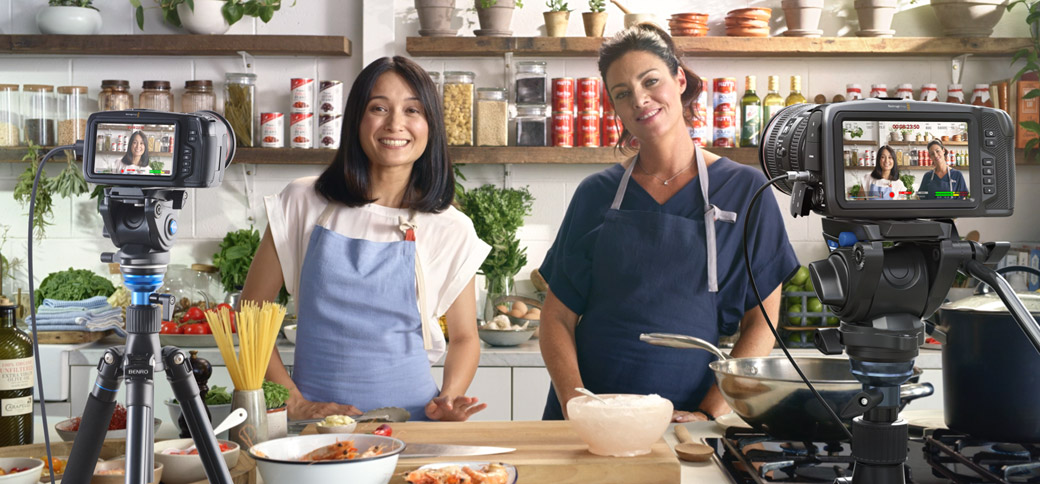
By stacking multiple HyperDeck Studio recorders, you can record perfect timecode synced video files for multi-cam editing. That's perfect when you want the speed of a live shoot but the perfection of using post production to finish the show. Imagine using multi-cam to fast turn music videos, interview programming, cooking shows, educational content and more. Each HyperDeck has a built in sync and timecode generator so will sync other HyperDecks in the stack. That means all cameras will be in sync! The Plus and Pro models even have remote out so you can start recording on all decks with a single button. DaVinci Resolve is then the fastest way to edit these HyperDeck multi-cam files!
Find Reseller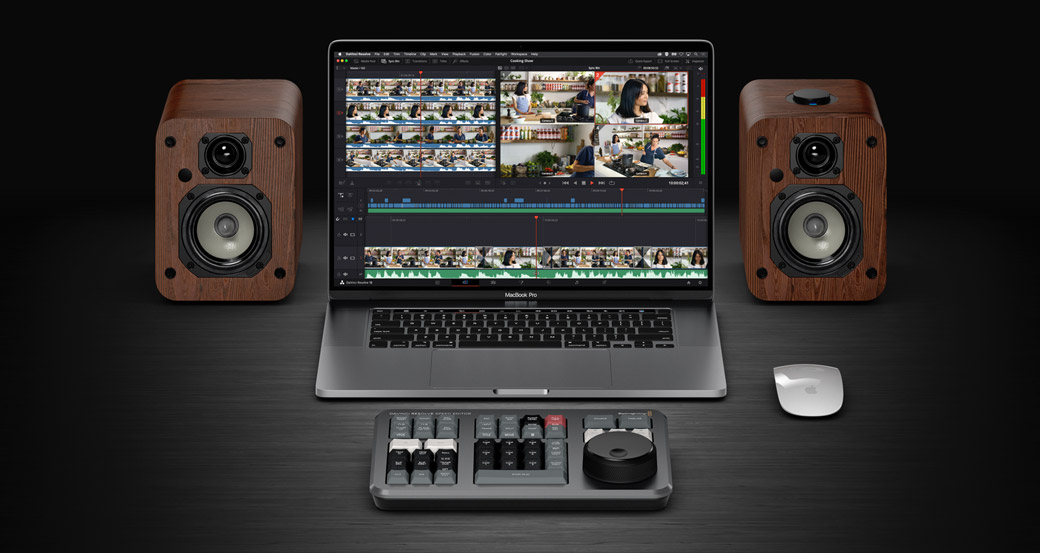
Hardware and Software Combined!
Traditional edit software hasn't changed much in 30 years. The reason is because edit software was designed for a mouse and keyboard, so it's slower. That's an even bigger problem when editing multi-cam. The DaVinci cut page changes everything as it combines software and hardware to make editing much faster. It all starts with the dual timeline, allowing the search dial to be used for faster scrolling, editing and trimming. You always see the whole timeline and the current edit point simultaneously. There's no annoying horizontal and vertical scroll bars! Trimming uses the search dial and is live, plus all edits are intelligent, so most of the time you don't need in or out points!
Setting Up ISO Recording
Getting started with ISO recording using multiple HyperDecks is easy! You start by stacking the HyperDecks, looping timecode and reference, pressing record and then passing the files over to any editing software that has a multi-cam feature! It's that easy!
Step 1:
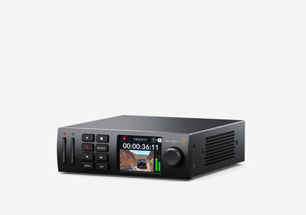
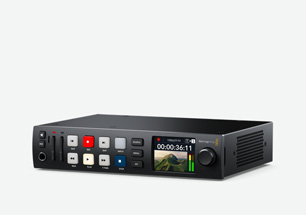
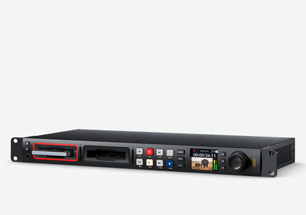
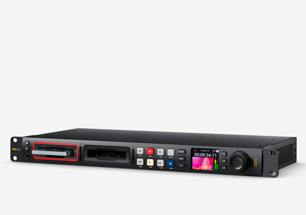
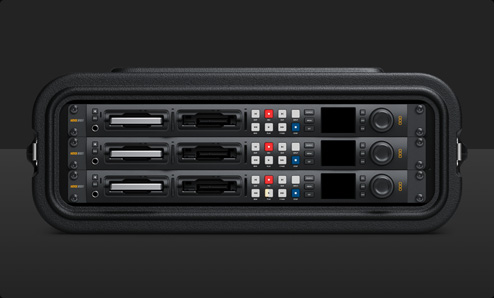
Stack HyperDecks
You start by stacking the HyperDecks, or racking mounting them for a more permanent installation.
Step 2:
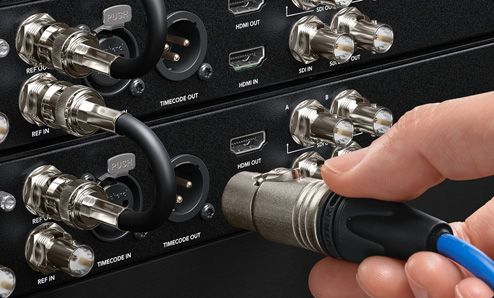
Loop Sync/Timecode
Now you need to choose which HyperDeck will be the master so you can use it to generate timecode and video reference to all the other HyperDecks. Loop the reference and timecode out of this master deck to the one next to it, and then so on, until each HyperDeck is looped to the next.
Step 3:
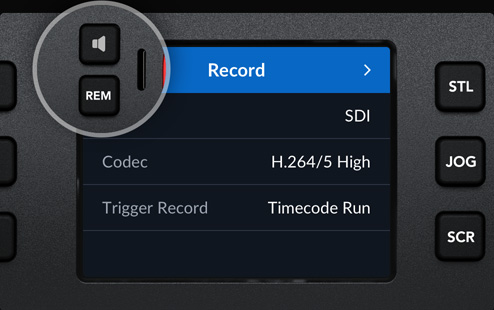
Loop Remote
On the Plus and Pro models you can also loop the remote. Just enable the remote function so when you press record on the master HyperDeck, all the other ones will go into record.
Step 4:
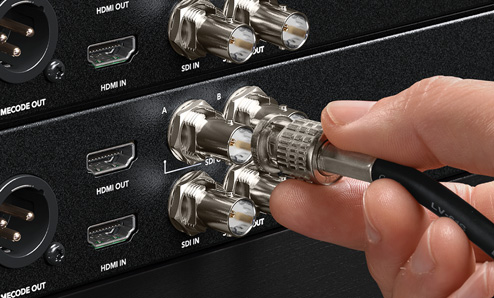
Connect Cameras
Now you can connect your cameras, with each one connected to a separate HyperDeck SDI or HDMI input. If you want to sync the cameras from the HyperDeck, the SDI output will be locked to genlock when the re-sync inputs menu setting is selected, so you can send the program back to the camera to sync it.
Step 5:
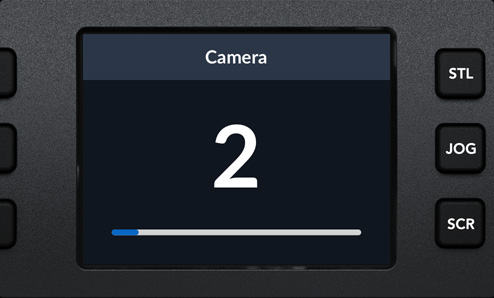
Set Camera Number
You will want to set a camera number for each HyperDeck so DaVinci can find the cutaways for when you’re editing later. Go into the setup menu and select the camera number. The camera metadata uses letters, so give each HyperDeck a unique letter.
Step 6:
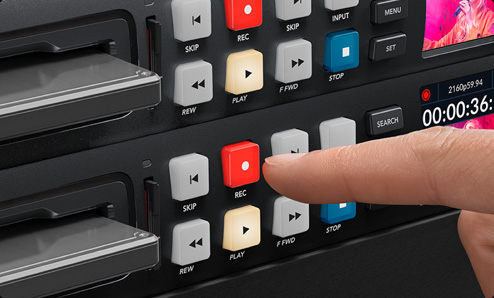
Press Record
Now you can press record on all decks to start recording, or if remotes are looped, just press record on the master deck. Now you can transfer the files to any editing software that supports multi-cam.
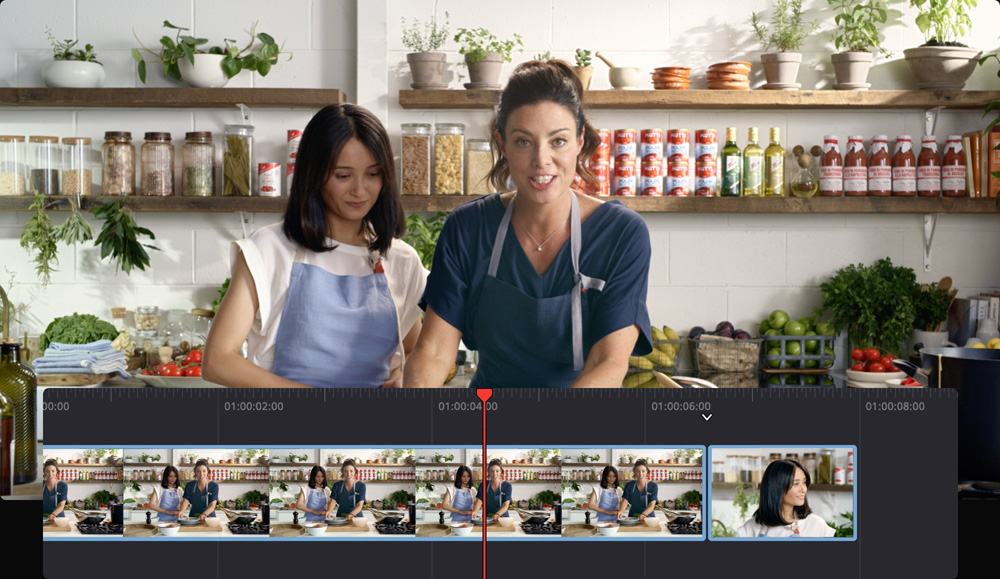
Next Generation Multi‑cam Editing
When multiple deck ISO recordings are complete, DaVinci Resolve is the perfect tool to use for fast multi-cam editing. While the DaVinci Resolve Edit page has a traditional multi-cam editor, the new 'cut' page is much faster as it features an innovative new Sync Bin, a faster version of multi-cam that works in using a familiar multiview style interface. While the cut page has a new kind of editing interface with new editing tools that make editing much faster, the cut page has also been designed to work with a hardware panel such as the DaVinci Resolve Speed Editor. This means you get a true professional editor that’s focused on introducing new innovations in speed!

Editing Multi-cam is Fast and Easy
In the DaVinci Resolve cut page, everything is live with only a single click for each task. Editing is faster and the sync bin allows you to do multi-cam editing in a new faster way, so it's the perfect solution for editing HyperDeck camera files. You only need to lay down an edit of a single camera, which will be a guide to use for editing all the cutaways in the sync bin. Then you can use the DaVinci edit keyboards to make the whole process even faster!
Step 1:
Load Media
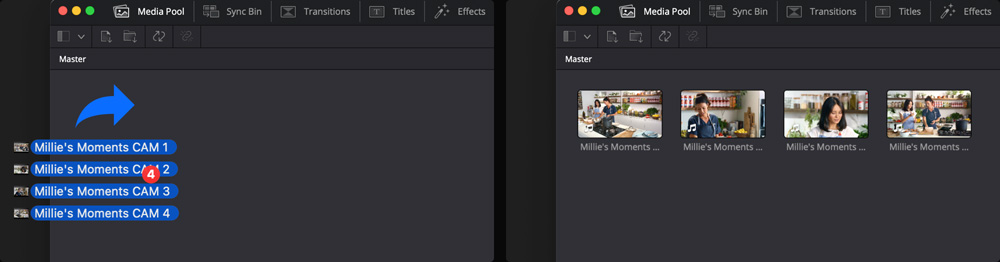
The first step is to load your media into DaVinci Resolve's bin. That's easy as in the cut page there is import file and import folder buttons. Just copy media from each HyperDeck to your local disk and then load it all into the DaVinci Resolve bin by using the import feature.
Step 2:
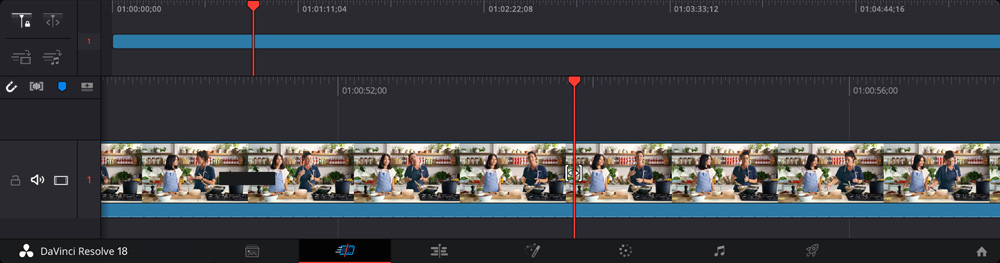
Create Base Edit
Multi-cam in the cut page is a little different because you lay down a base edit first and then add cutaways to the timeline as you go. It’s fast and easy as you are always working on your timeline and DaVinci will find all the cutaways for you. Choose a camera, generally the wide shot camera and complete an edit on this single camera on layer 1.
Step 3:
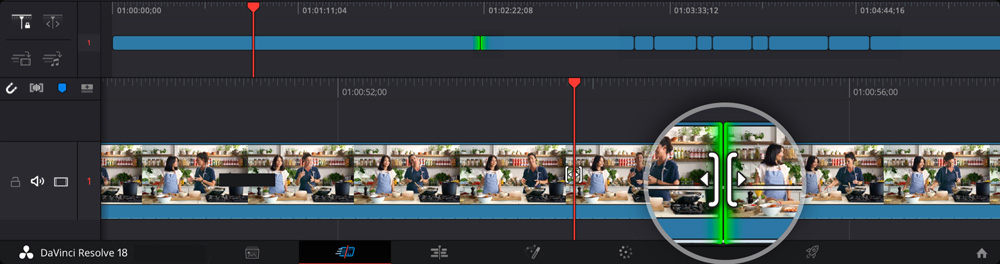
Trim Edits
Now you have a base edit that's essentially the whole program duration, but without cutaways, you will need to do some trimming and to remove shots. You can use the auto trim tools with the mouse to adjust edit points. Or you can scroll and trim using the trim tools in the DaVinci Resolve Speed Editor.
Step 4:
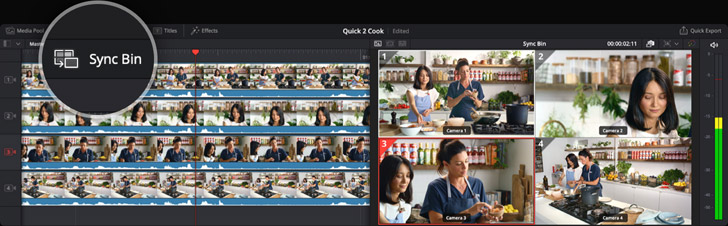
Select Sync Bin
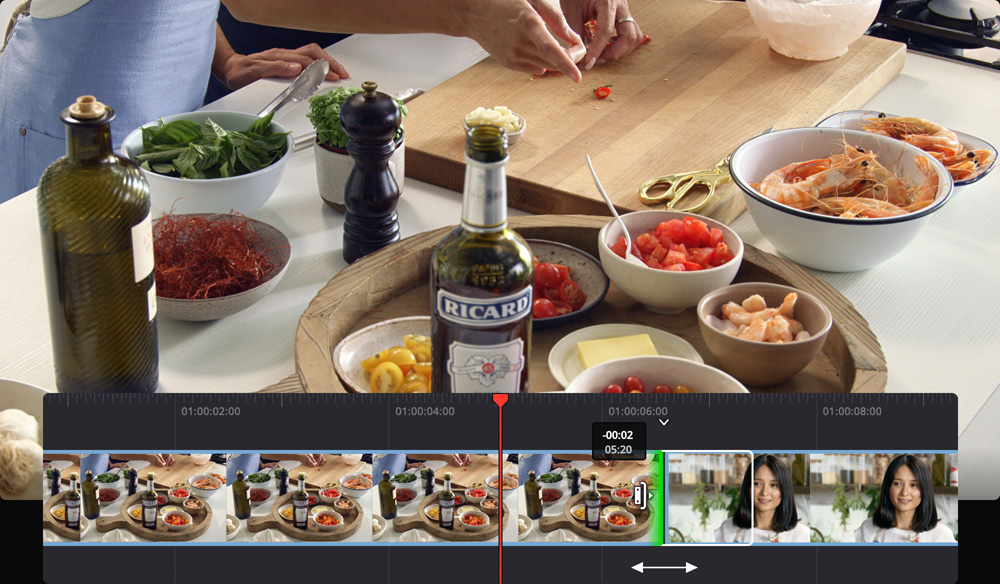
Now you have your base edit trimmed, you need to add cutaways so your edit becomes much more exciting than a single camera show! Just select the sync bin and now DaVinci Resolve will find any cutaway you have in your bin that syncs to the current position of your timeline. You can see the cutaways in a multi-view that replaces the viewer and you can see each cutaway is assigned a camera number. Scroll the timeline and check out what other camera angles you have!
Step 5:
Select Cutaway
To select a cutaway you can press the camera number on the keyboard or click on the camera view using the mouse. DaVinci will auto enter an in point for you and it will add an out point at a 4 second duration. Use the mouse to trim the in or out point for the section of cutaway you want.
Step 6:
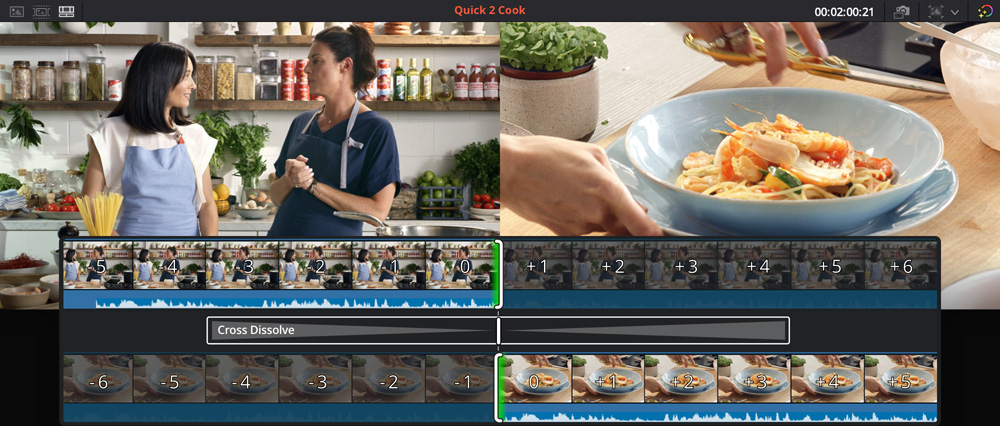
Source Overwrite Edit
Now you want to add that selected cutaway to the timeline, so select the source overwrite edit. Source overwrite is a special edit mode that will take the current clip and add it to a layer above the clip in the timeline, perfectly matched to the timeline clip’s timecode. What this means is you will get the cutaway added to the timeline in perfect sync. Scroll the timeline to check it out! Source overwrite works on any clip selected in the viewer, so it is not limited to use in the sync bin only!
Bonus Step:
Live Overwrite
The DaVinci editor keyboards have an extra feature that makes the sync bin even faster! These keyboards have a search dial used for shuttle, jog and scrolling clips, however it can also be used for live trimming. It also has another use called 'live overwrite' that works in the sync bin. To use live overwrite, hold down a camera button and scroll the search dial. You will see DaVinci paint the camera into the timeline on the layer above and you can change numbers and scroll along adding cutaways. Using the edit keyboards you can lay down cutaways and trim edits at incredible speed.
Innovative
DaVinci Resolve Cut Page Features
Intelligent Editing
The cut page is so intelligent, most of the time you don't need to use in or out points, so editing is much faster! The timeline features a ‘smart indicator’ that points to the closest transition, so the edit will be placed automatically when no in point is used. That’s much faster and the smart indicator will move from edit to edit as you scroll the timeline. To insert a clip, simply click the smart insert button on the toolbar. The clip is added at the nearest edit point and the timeline will ripple! Most edit modes can be placed using the smart indicator, so it's incredibly fast to insert or append clips, create close-ups, add synchronized cutaways from b-roll and much more.
Dual Timeline
Zooming in and out of edit timelines is very slow! The dual timeline means you never have to zoom again! The upper timeline shows you the entire program while the lower timeline shows you a zoomed in area of where you're working. This means the lower timeline is always zoomed to the perfect amount so the trim tools work perfectly. Both timelines are fully functional, allowing you to move and trim clips in whichever timeline is most convenient. Simply drag between timelines to move a clip anywhere in your edit. Only the dual timeline lets you see both your edit as well as the whole timeline simultaneously!
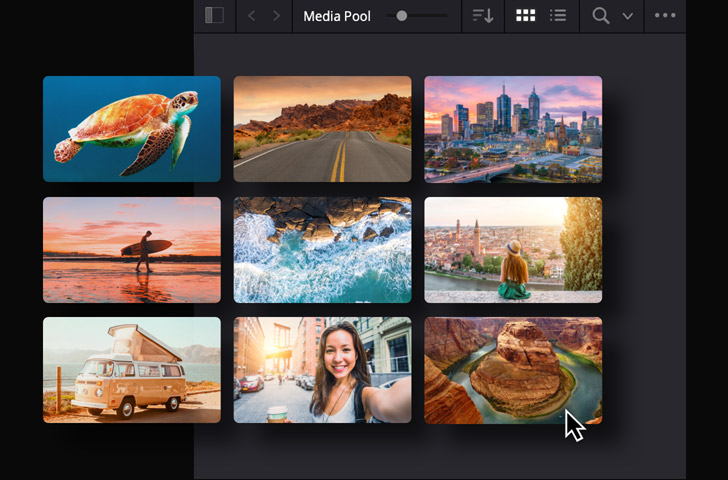
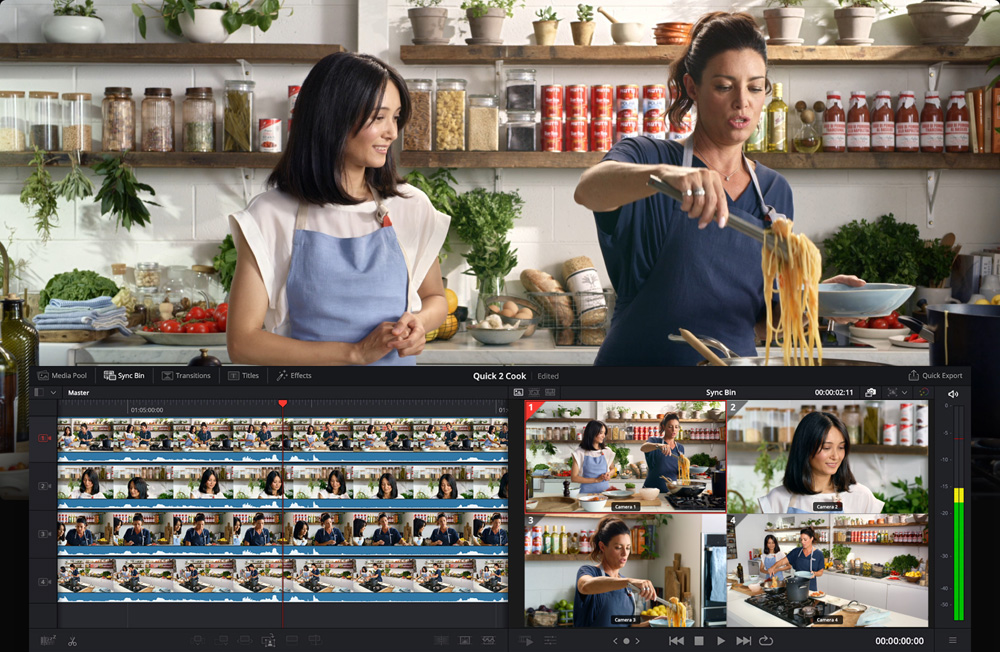
Import and Sort Media
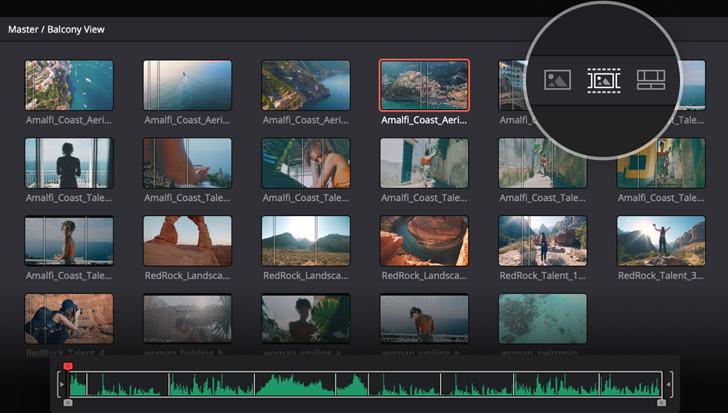
The cut page works with all HyperDeck file formats as well as virtually all native camera formats, so you don’t have to convert media files or create proxies before you start editing. The media pool at the top left of the screen features buttons to quickly import individual files or entire folders of clips. When you bring in a folder with subfolders, they’ll be imported with the same structure. You can click the buttons at the top of the media pool to switch between icon, filmstrip, a customizable list, or slate view. Each view can be sorted and the new slate view displays a thumbnail along with the most relevant clip information such as shot, scene, take, name, or timecode.
Source Tape
Finding a clip in a bin with thousands of files can be slow and frustrating! With source tape, you no longer have to waste time hunting through bins to find the clip you need. Simply click on the source tape button and all of the clips in your bin appear in the viewer as a single long ‘tape’. This makes it easy to scroll through all of your media because you’re doing it visually! Simply scroll your media, find a shot you like, then edit it into the timeline! Plus it won't switch to the timeline after an edit, so you can keep scrolling the source tape and adding shots you like to the timeline. If you're working with unknown media then the fast preview lets you fast play the whole source tape.
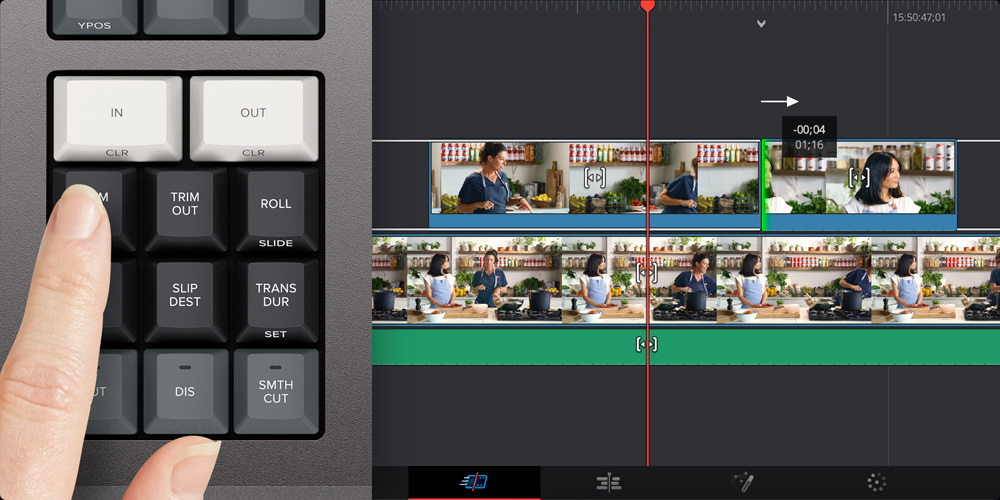
Automatic Trim Tools
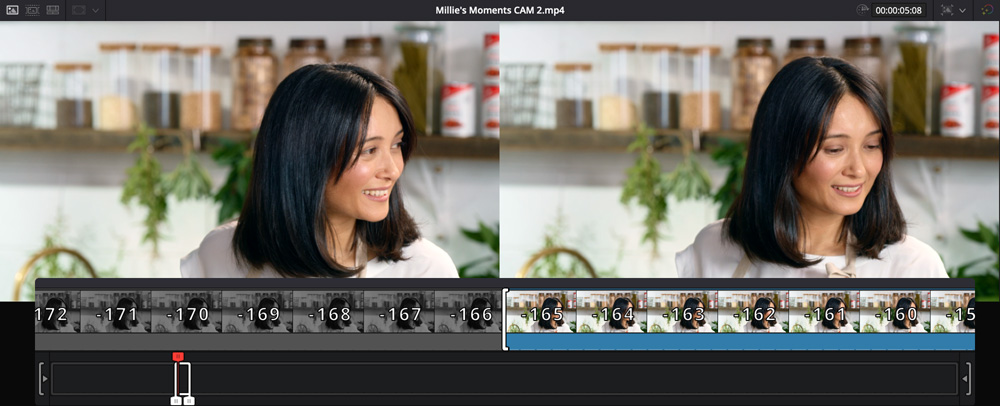
Trimming is incredibly fast because trim tools are selected automatically. Simply move the mouse around the edit point and each trim tool will be selected based on the mouse position. The mouse icon will change so you know what trim tool has been selected. When you start trimming, a trim editor will appear in the viewer so you can trim with greater accuracy. In the trim editor, the clips are laid out in a film strip with each frame visible, so frame accurate edits are simple and fast. That means there are 3 places you can trim, the upper timeline, the lower timeline and the trim editor! All edit modes are supported, including trim in and out, roll edit, transition duration, slip and slide.
Viewer Trimming
The cut page features a large, graphical trimmer that lets you view and trim edit points with extreme accuracy. Also known as an A/B trimmer, this graphical view lets you see both clips in an edit at the same time. Double click any edit point to open the graphical trimmer in the viewer. The left clip is called the ‘A’ clip and will be displayed on top, while the ‘B’ clip on the right side is displayed below. You can see exactly where the trim point is and adjust each side with numeric frame counters and nudge tools. That means you can trim in 3 locations, the lower timeline, the upper timeline and the trim editor! When you’re done, click anywhere in the timeline to close the trim editor.
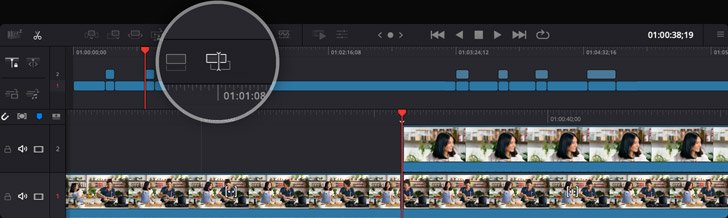
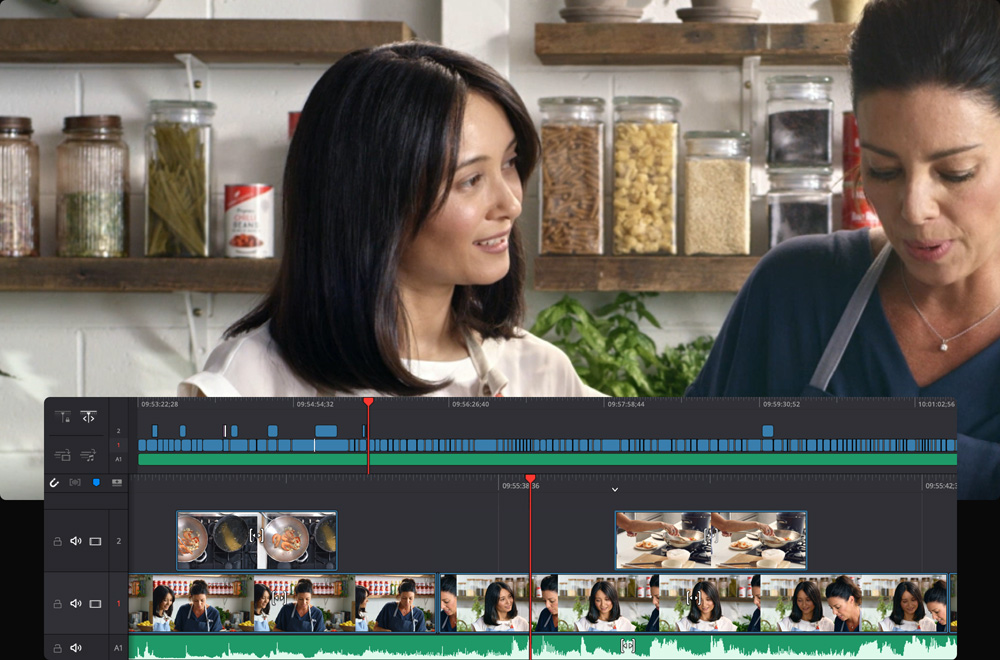
Sync Bin for Multicam
The sync bin is the world’s fastest and most innovative way to select the perfect cutaway when doing multi camera shoots. Using the sync bin is easy and it’s much better than a traditional multi-cam feature. Just select the sync clips icon and DaVinci will find all clips that sync to the timeline and display them in a multiview. Simply scroll up and down the timeline and you will see all the clips that sync to the point in the timeline so you can pick the best cutaway. Then click the view with the mouse and adjust the in and out points to select the cutaway you want. Now use the source overwrite edit mode to add this selected clip to the timeline, perfectly synced to the clip below!
Works with Small Screens
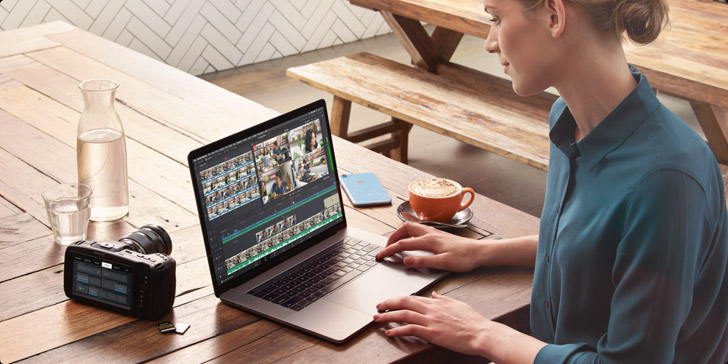
The cut page is designed to work on small laptop screens, perfect for on location editing. The user interface automatically scales itself to give you the highest amount of usable space so you can edit quickly and get your program finished! When you move to a larger display the user interface scales up beautifully, giving you even more room to keep working. That means you won’t have to open and close windows or slide things around as you work. There are even menus for importing media and rendering edits so you can complete all work in the cut page and you don't need to use the other pages! Every feature on the cut page has been designed to save space and allow editing on smaller monitors.
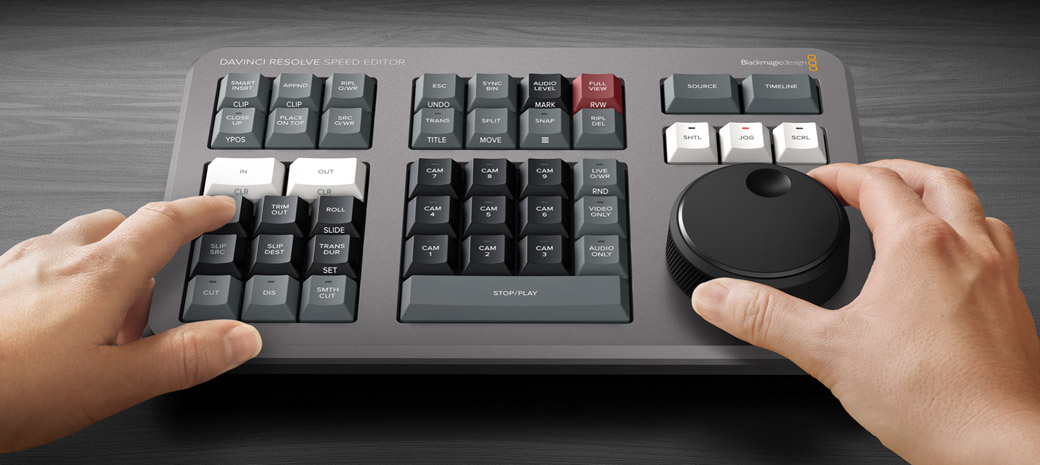
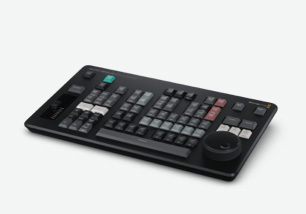
DaVinci Resolve Speed Editor
The DaVinci Resolve Speed Editor model includes built in Bluetooth so you can use the keyboard without messy wires. You can even use it in conjunction with your regular computer keyboard. It features a machined metal search dial in a design that eliminates clutter because it only has keys needed for editing. That results in a very small size so it's perfect when editing on a laptop. It also has Bluetooth with internal battery for connecting wirelessly, or you can connect via USB-C. You can also use the keyboard via USB if required and the USB connection will also charge the internal battery. With Bluetooth and a built in battery, the keyboard is extremely portable!
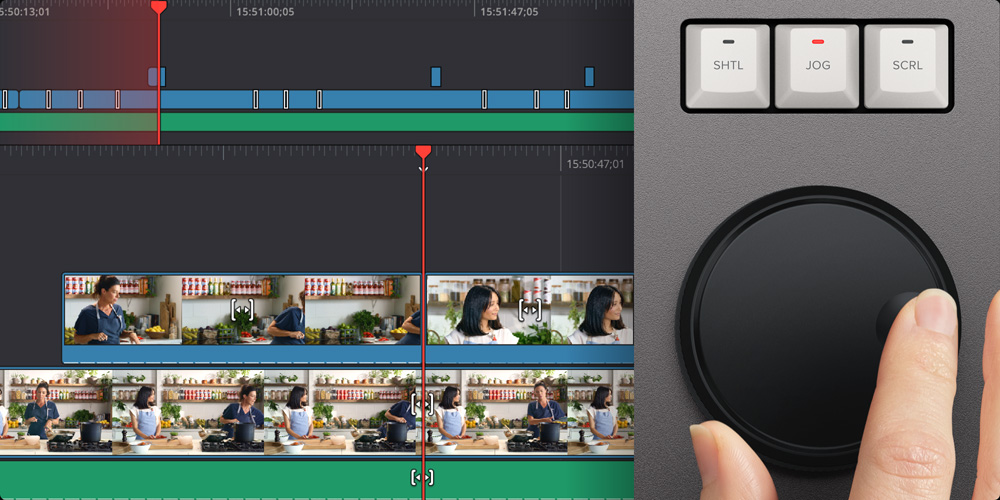
Search Dial Control
The DaVinci Resolve keyboards allow a better quality editing experience because they create a physical connection to the edit that’s deeper than a simple computer mouse. The search dial is a machined metal design so it has a weighted feel and it can be spun fast to move up and down the timeline quickly. However the search dial is more than this because it can be used for live trimming! Simply press one of the trim buttons and the search dial will transform into a large adjustment knob for real time, precise trimming! Once you've experienced trimming with the search dial, it's virtually impossible to go back to a mouse!
Trim Live Using the Search Dial
With a large high quality search dial built into the panel, you get an extremely accurate way to trim shots. With the search dial being such a physically large control, it completely transforms how it feels to trim shots. Plus it’s much faster too! The trim buttons will change the search dial into a trim control and you simply hold the trim buttons and rotate the search dial. This means you can select various trim modes with your left hand while adjusting the trim with your right. It's extremely fast and the smart indicator in the timeline will let you know which edit you are trimming. Just move along the timeline and live trim edits. It’s a whole new way to work!
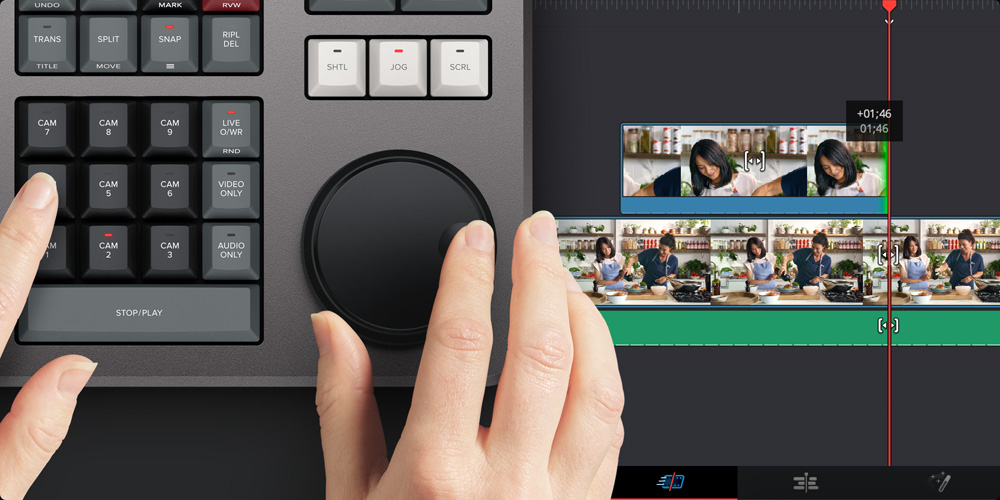
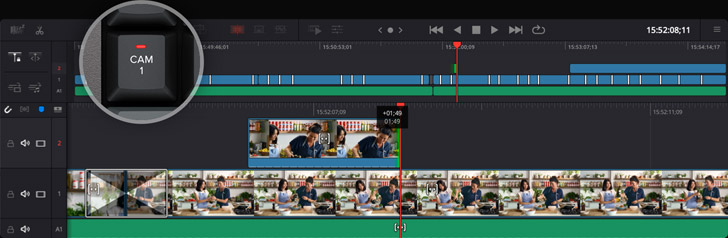
Live Overwrite
While you can select a camera number to do a multi-cam edit, there's an even faster way called ‘live overwrite’! Using the hardware panel, if you press a camera number while turning the search dial, the selected camera will be applied to the timeline in real time as you jog forward. This live override feature can be used on both the DaVinci Resole Edit Keyboard and the DaVinci Resolve Speed Editor, and you can move fast ‘painting’ cutaways into the timeline. You still use a multiview to see all the shots that sync to the base later in the timeline, but you can press and hold camera numbers to do the edits. Plus you can select video only, to lay down video only cutaways.