
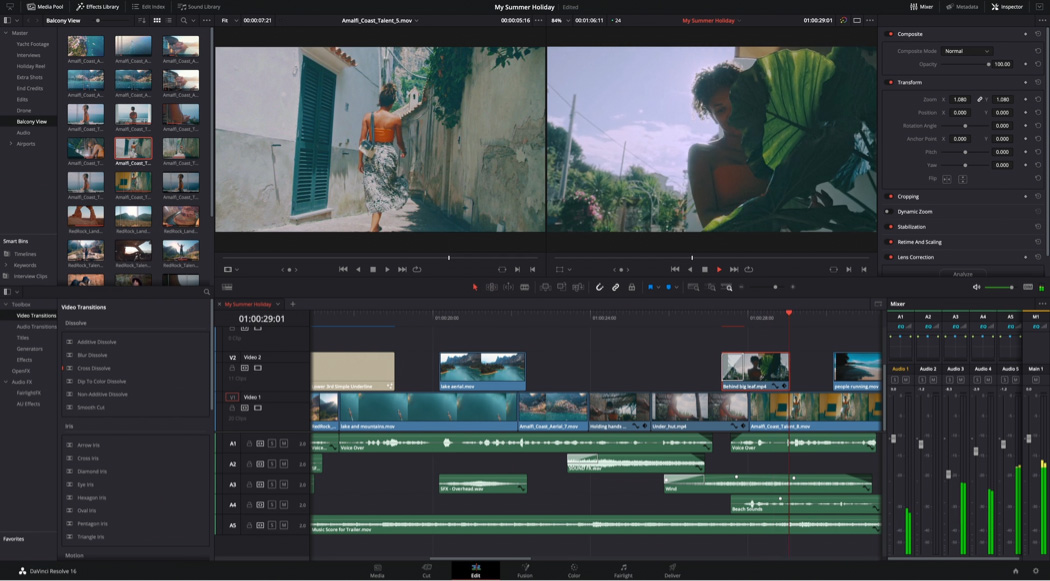
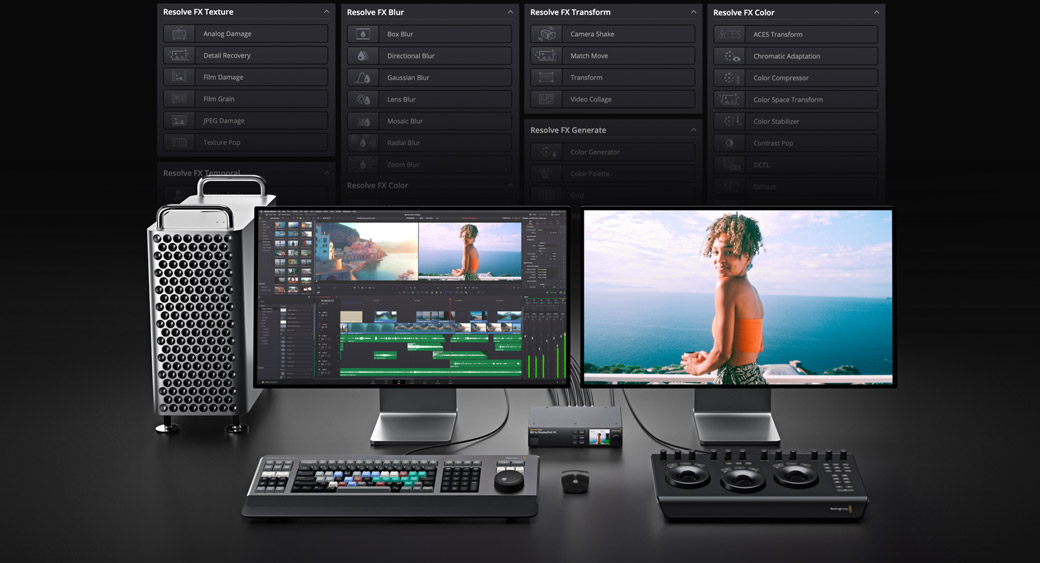
The World’s Fastest Professional Editing Software!
The edit page is designed to be easy and intuitive for new users, yet powerful enough to give professional editors all the tools and control they need! You get drag and drop editing for quickly building a story and moving shots around, as well as traditional three point editing tools used by industry editors. Plus, DaVinci Resolve is faster because it features an automatic trim cursor that changes depending where you click in the timeline, so you don’t have to waste time continually going back and forth changing tools. The edit page also includes dozens of transitions, effects and titles that make it easy to create professional work for broadcast television, feature films and online streaming!
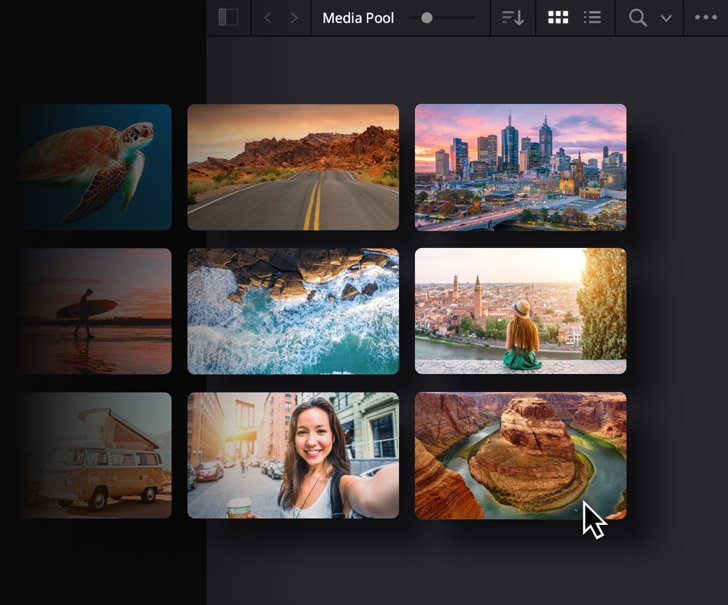
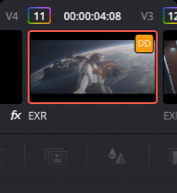
Quickly Import Video
Getting files into DaVinci Resolve is as easy as dragging and dropping! The media pool at the top left of the screen contains all the clips in your project. To get started, simply find files you want to import on your hard drive, drag them into the media pool and start editing. You can even drag entire folders with subfolders into the media pool and maintain their structure. DaVinci Resolve is designed to work with virtually all professional video and audio file formats ranging from H.264 and H.265 to ProRes, Blackmagic RAW, EXR and more. Whether you’re shooting on an iPhone or using a high end digital film camera, you’ll never have to waste time copying, transcoding or moving files.

Mark Clips
Marking clips using "in" and "out" points lets you refine the portion of the clip you want to use in the edit. Double click a clip to load it into the source viewer on the left. Drag the playhead to the frame you want, then click the in and out buttons at the bottom right corner of the viewer to mark the start and end points of the clip. You can also use the I and O keyboard shortcuts for a faster workflow. Audio and video can be marked separately to create split edits where the audio starts before or after the video. Turning on audio waveforms lets you visually see where sentences start and stop, and you get tape style audio scrubbing so it’s easier to find the part of the clip you want.
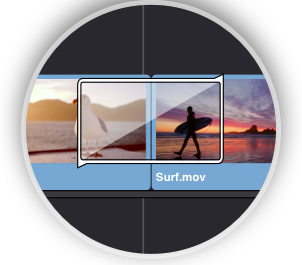
Edit Clips Into the Timeline
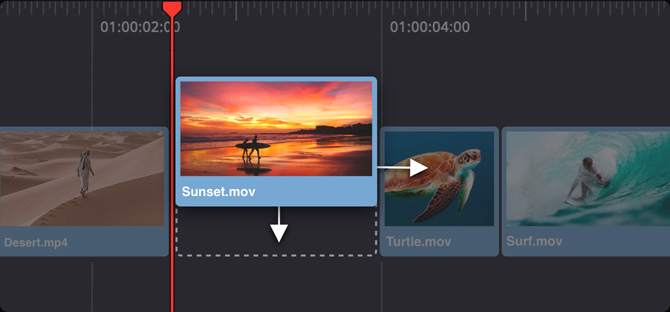
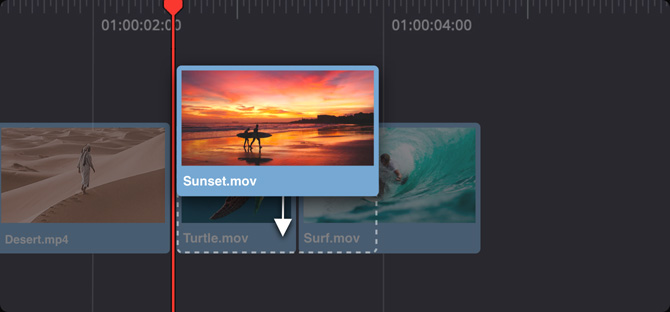
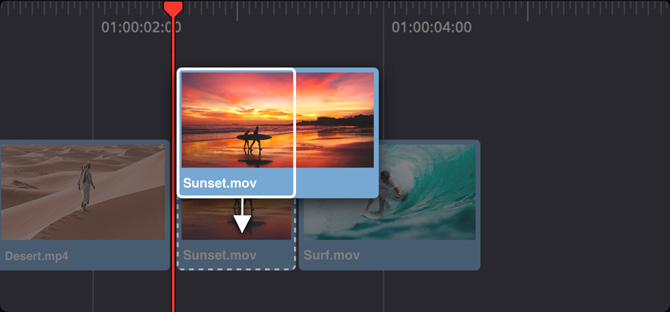
You can drag and drop clips directly into the timeline or the timeline viewer on the right, where you will see an overlay with editing options. The edit overlay gives you instant access to the most popular types of edits, letting you quickly choose between insert, overwrite, replace, fit to fill, place on top, append at end, and ripple overwrite without having to remember shortcut commands. Once you’re familiar with the different types of edits, you can use the buttons for the most common edit types on the toolbar or use keyboard shortcuts to work even faster. After you’ve placed a few clips on the timeline, you can rearrange them using the swap and shuffle commands.
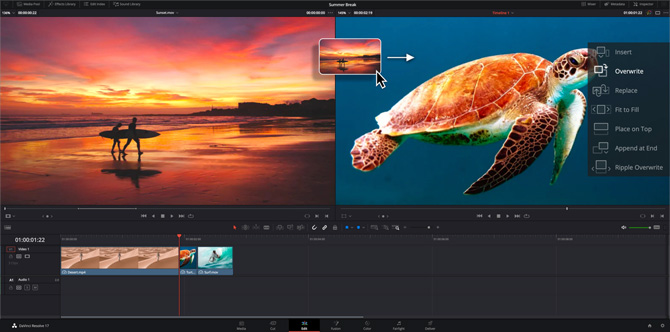
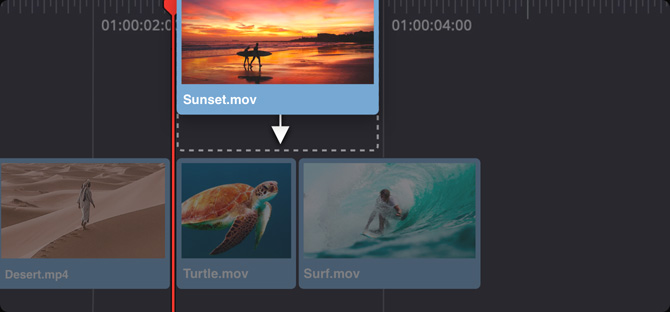
Insert
Inserts a clip into the timeline at the location of the playhead and pushes everything else down to make room for it. If the playhead is in the middle of a clip, it will split the clip and place the new clip in the middle.
Overwrite
The overwrite edit is one of the most common types of edits. When you perform an overwrite, it will place a new clip on the timeline at the location of the playhead, writing over whatever clip or clips were there before.
Replace
Replaces a single clip on the timeline with one of the exact same length. The "out" point of the clip you are editing into the timeline will be changed so it fits perfectly, making it the same duration as the one it replaces.
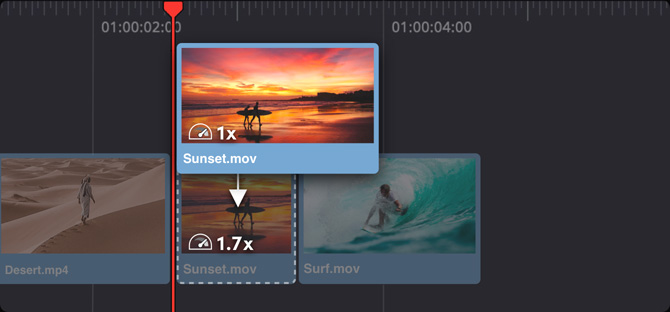
Fit to Fill
Fit to fill takes the portion of the clip that you have marked and adds a speed change to speed it up or slow it down. The speed change is automatically calculated so it fits into the space you have selected on the timeline.
Place on Top
The place on top command puts the clip you’re adding to the timeline on the next available video track at the location of the playhead. Place on top is great for adding titles, graphics or creating picture in picture effects.
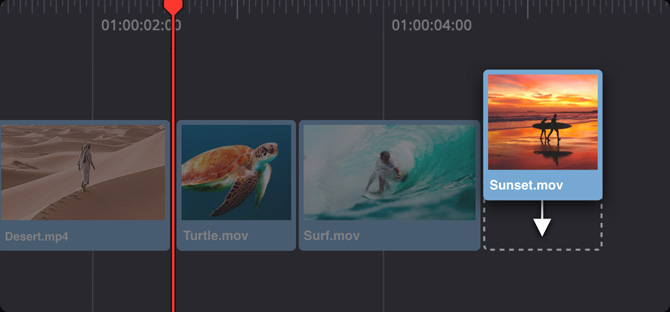
Append at End
Append at end places the source clip after the last edit on your timeline, regardless of where the playhead is located. You can also use it to add multiple clips from the media pool to the end of your timeline all at once!
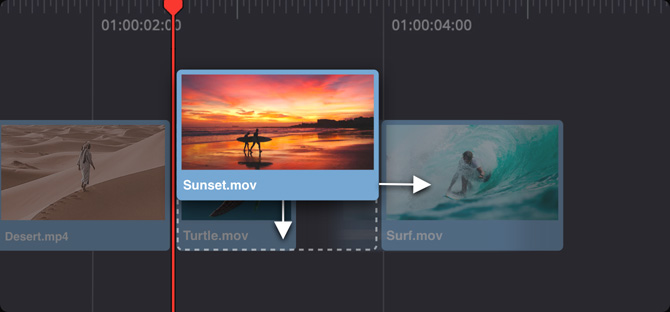
Ripple Overwrite
Ripple overwrite replaces a shot of one length with a shot of a different length. Longer clips replace the clip in the timeline and push everything down to make room, while shorter clips pull things in so there are no gaps.
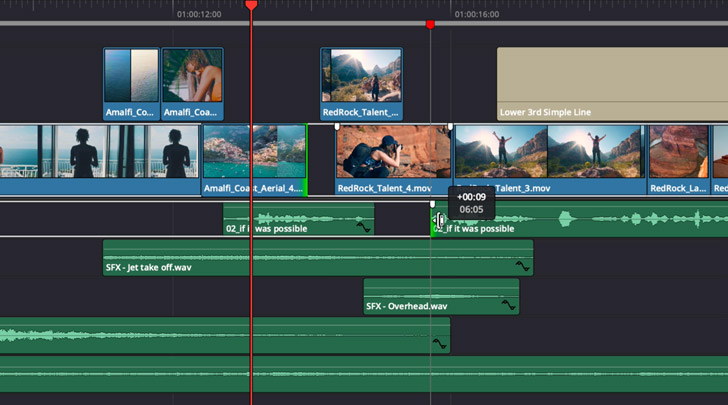
Automatically Trim and Tighten
Trimming lets you adjust the timing between clips so you can fine tune your edit. The smart trim tool automatically switches between ripple, roll, slip and slide based on the location of the mouse pointer. This makes DaVinci Resolve faster because you don’t have to waste time going back and forth to switch trimming tools. Select the trim icon in the toolbar, then click anywhere inside a clip or at the edge of a clip on the timeline. You’ll see the cursor change to different types of trim tools as you move your mouse. This is known as context sensitive trimming. You can trim during live playback, hear audio while trimming and even trim multiple points on different tracks at the same time!
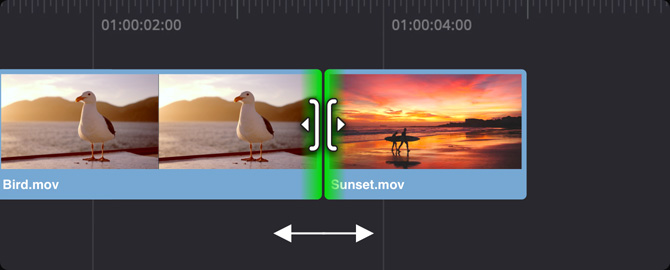
Roll
A roll trim works on both the left and right sides of an edit at the same time. While one side is shortened, the other side is extended by the same number of frames so the overall length of your timeline remains the same.
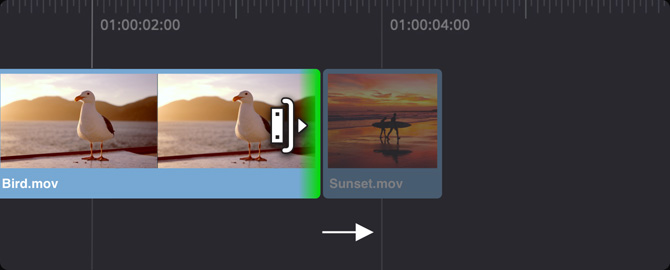
Ripple
Rippling will extend or shorten the beginning or end of a clip. When you ripple an edit point, everything to the right of the edit is pushed down the timeline or pulled in to accommodate the clip’s new duration.
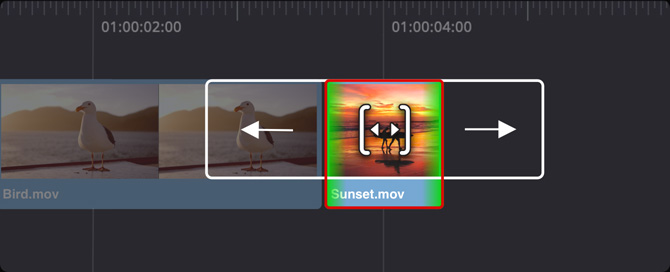
Slip
Slipping changes the portion of a clip that you see in the timeline by moving its "in" and "out" points. The white outline shows the full source clip duration, so you can fine tune it without affecting the surrounding edit.
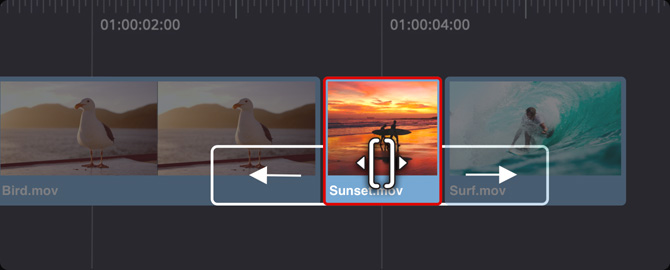
Slide
Sliding changes a clip’s position on the timeline without changing its length. The clips on the left and right get shorter or longer as you slide the clip in the middle. You can think of a slide like a roll between 3 clips.
Transitions and Effects Library
The effects library has extensive broadcast quality transitions and special effects plug-ins. Simply click the effects library icon at the top left of the page to open it, select the effect you want and drag it onto a clip in the timeline or onto the cut point between clips when adding transitions. Transition duration can be changed by dragging the edges of the transition in the timeline or by changing it in the inspector at the top right. The effects library features over 100 different transitions such as wipes and dissolves, along with over 80 GPU and CPU accelerated effects, including blurs, flares, warps and more! Plus you can add 3rd party OpenFX plug‑ins for even more creative options!
Incredible 2D and 3D Titles
To create 2D or 3D titles, open the effects library at the top left of the screen, find the text generator or Fusion title template you want, and drag it into the timeline above your video tracks. Then use the inspector to type your text and adjust parameters such as font, size, color and more. The basic title generators let you build simple titles and lower thirds from scratch. The subtitle generator can be used to create perfectly timed subtitles. There are also more than 100 Fusion title tools, which are professionally designed, pre-built 2D and 3D animated titles that you can customize to create professional looking cinematic titles without having to be a motion graphics expert!

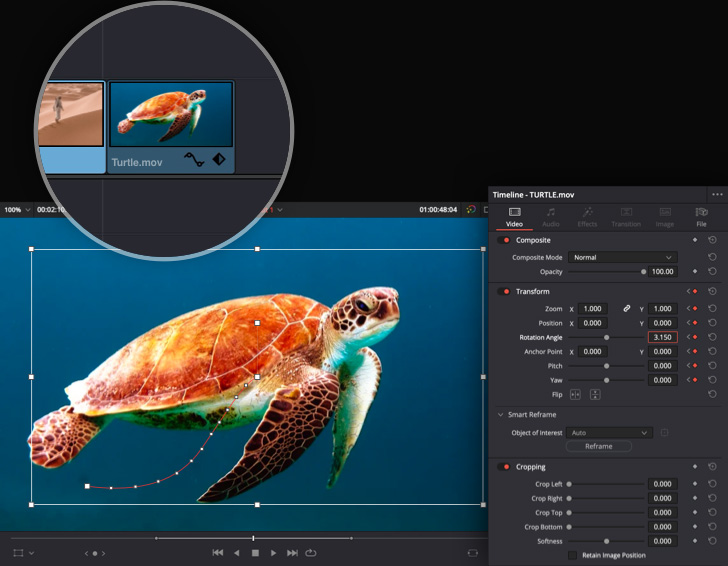
Animate Any Clip or Effect Setting
Clip settings can be viewed in the inspector at the top right of the screen. You can change or animate any setting over the clip’s duration using the diamond keyframe buttons. Simply select a clip to see its parameters, adjust a setting, click the keyframe button, move the playhead to a different frame and repeat the process! You can also use the on screen controls to animate common transform parameters such as position, size and rotation. For even more control, click on the small keyframe and curve icons on the animated clips in the timeline to open the keyframe and curve editors. These allow you to move keyframes, adjust timing and set animation ease controls for virtually all parameters.
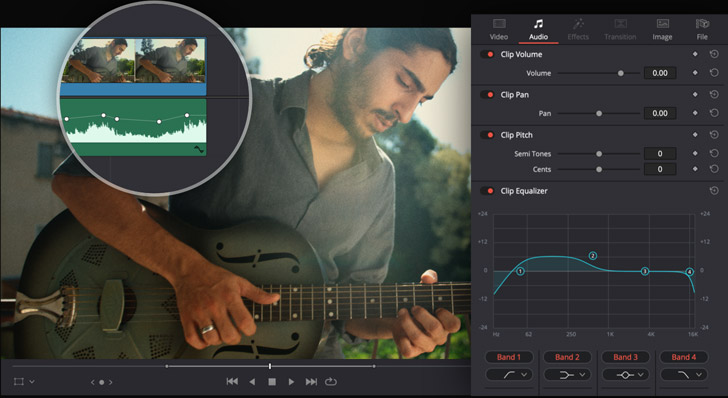
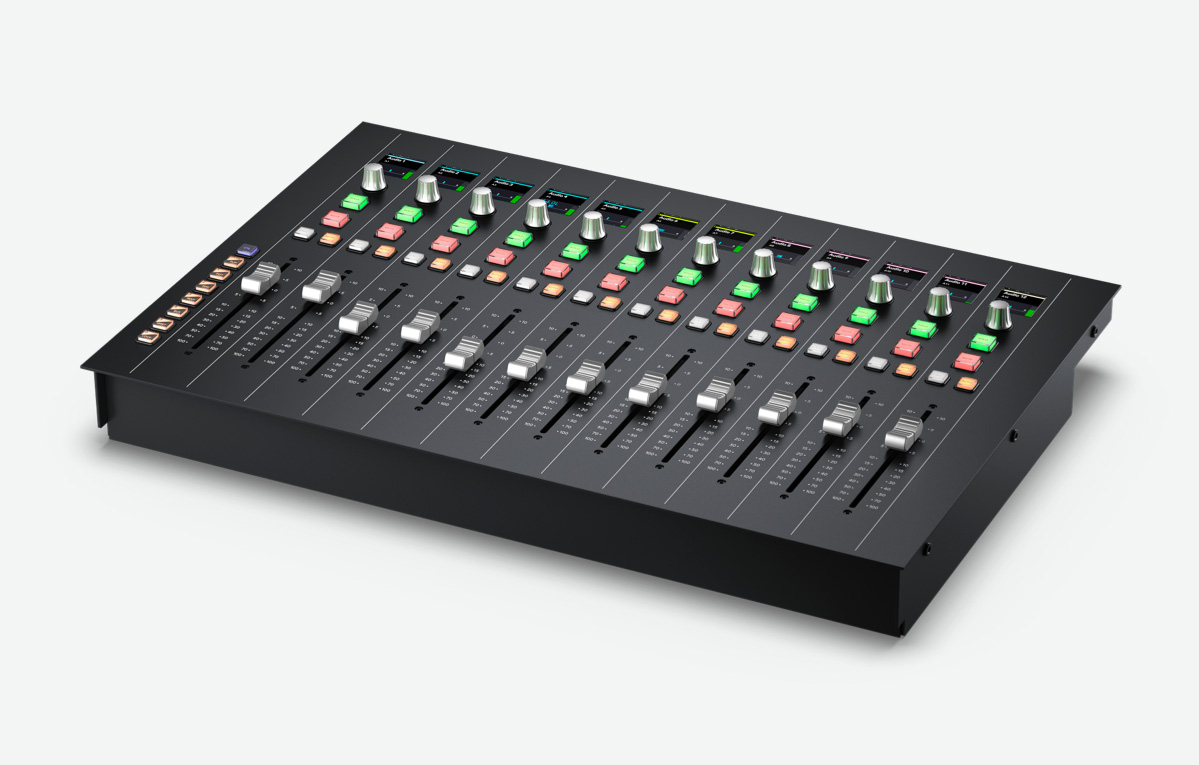
Create a Final Audio Mix
The edit page features a complete set of professional Fairlight audio controls and plug-ins. You can set levels of an audio clip in the timeline by clicking on the level bar in the middle of the clip. The inspector features a level slider too, along with controls for panning, pitch and a full 6 band parametric equalizer. To change the level on an entire track, simply adjust the track’s fader in the mixer. The mixer has visual meters that let you monitor signal levels, ensuring the audio is not too quiet or loud. There are also over 25 Fairlight FX in the effects library that you can use to clean up dialog, remove hum and more. Plus you can switch to the Fairlight page at any time for even more options!
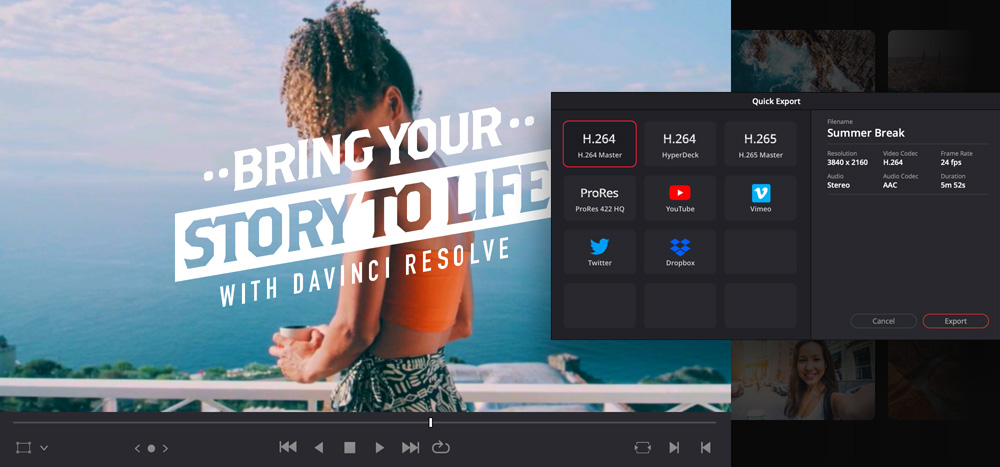
Deliver for Web, Broadcast or Cinema
The Quick Export option is the fastest way to deliver a file. To output your program, go to the file menu and select Quick Export for one click access to the most popular delivery options. If you enter your account information, quick export will render and upload the finished video to your YouTube, Vimeo or Dropbox accounts, all in a single step! You can also create your own custom presets that will show up in the quick export window. Simply switch to the Deliver page, adjust your settings, and save it as a new preset! DaVinci Resolve can deliver files in a wide range of formats for the web, television broadcast, online streaming and even digital cinema packages for theatrical distribution.
Fine Tune Your Edit with Advanced Creative Tools!
Once you have mastered the basics, the edit page offers an incredibly rich set of features that give you total creative control over every aspect of your work! You will be able to create a polished final audio mix, add speed ramps, work with advanced editing and trimming tools for more sophisticated projects, transcribe clips for subtitles or text based editing, use facial recognition to organize clips, create picture in picture effects, work with multi-cam footage, and much more! Plus, DaVinci Resolve works with just about every type of video and audio file, and gives you a variety of different ways to manage your footage, which is especially useful when you are working on larger projects.
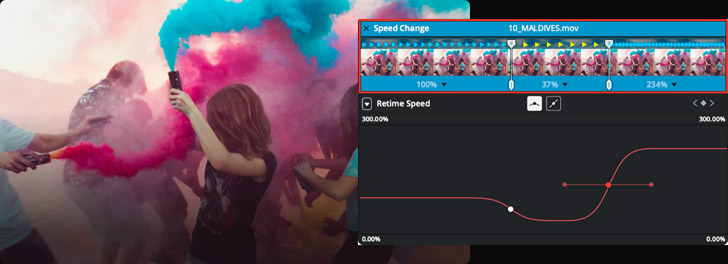
Dramatic Speed Ramps
The retime control command lets you create fast or slow motion footage from any clip. Variable speed changes, or speed ramps, allow the playback speed to change over time. For example, an action clip may start at normal speed, ramp down to slow motion for a few seconds, and then speed back up. You can create speed ramps in the timeline using the graphical curve editor for both frame position and playback speed. Simply move frames to any point in time and adjust the speed between them! Control the quality of retimed footage by choosing between optical flow, frame blending and nearest frame rendering. DaVinci Resolve Studio has advanced speed warp for incredibly fluid, crystal clear quality!
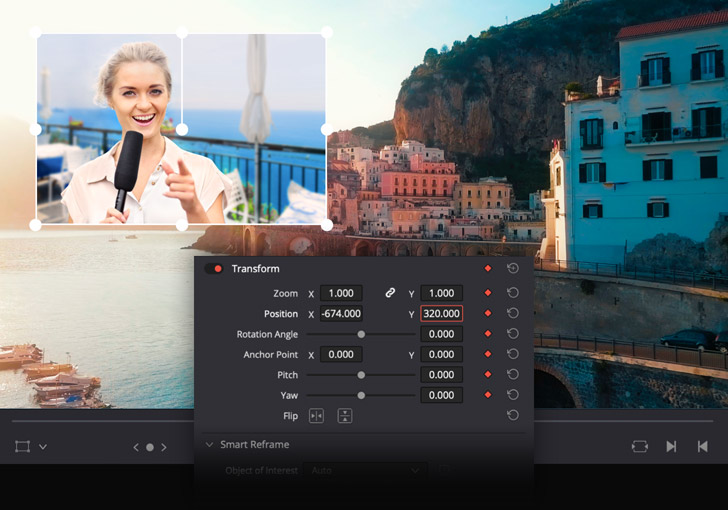
Picture in Picture Effects
You can create picture in picture effects using the on screen controls in the viewer or by adjusting clip transformation settings in the inspector. The on screen controls can be enabled in the pop up menu at the bottom left of the timeline viewer. Just stack two clips in the timeline, select the one on top, and use the on screen controls to resize and reposition the clip anywhere in the frame. You can animate the effect by clicking the diamond keyframe button in the inspector, moving the playhead and then changing the position, rotation or scale of the clip. You can even drag a drop shadow from the effects library onto the clip in the timeline to make the picture in picture stand out!
Dynamic Zoom
Dynamic zoom is an incredibly easy and fast way to reframe and add gentle push in or pull out animations to any shot. Dynamic zoom is ideal for adding extra drama and interest to shots which would otherwise be just static. Best of all, you don’t have to know anything about animation to use it! Just select a clip in the timeline, then turn on dynamic zoom in the inspector. When you have selected the clip, green and red boxes will appear in the viewer over your image. The green box shows where the shot will be framed at the beginning of the clip and the red box shows where it will be framed at the end. Simply drag and resize the boxes to your desired start and end positions, then press play!

START
END
Image Stabilization
The inspector features built in stabilization and lens correction controls for every clip in the timeline. The edit page uses image warping and translation to smooth out or even lock down unwanted camera motion in a clip, while preserving the motion of individual objects in the frame. You’ll see options for camera lock, zooming, crop ratio, smoothing and strength in the inspector. These let you determine how much stabilization you want to apply. For example, you might just want to remove a camera bump or two, naturally reduce the slight shakiness often found in handheld shots, or lock it down entirely so it looks like a static shot. Just choose your settings and click the stabilize button.

Before Stabilization

After Stabilization
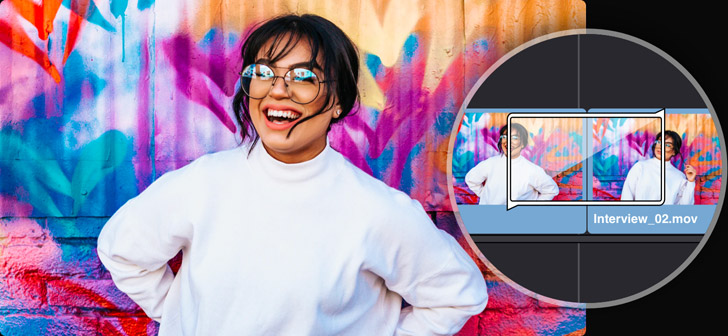
Smooth Jump Cuts
Jump cuts occur when you have two different parts of the same clip next to each other on the timeline. For example, if you cut a sentence or phrase out of the middle of an interview clip you’ll end up with a cut that visually jumps from the interviewee sitting in one position to a slightly different position. Normally, you would try to cover these types of cuts with another camera angle or B roll, because they’re visually jarring. The smooth cut transition uses advanced optical flow image analysis to remove the jump cut so it looks like one continuous take. It is applied like any other transition. Just drop it between two clips on the timeline and adjust the duration until it’s perfect!
Professional Trimming
The edit page features more advanced trimming tools than any other system! You get context sensitive cursor tools, as well as dynamic JKL trimming which lets you trim during looping playback. Asymmetric trimming is perfect for quickly opening or closing gaps in the timeline because it lets you trim in different directions at the same time. You can also select and trim multiple clips on the same or different tracks. There are track targeting, locking, and sync tools in the headers at the left of the timeline so you can manage sync relationships when working on complex multitrack edits. Plus, there are trim commands that let you quickly extend or shorten an edit, trim to the playhead and more!
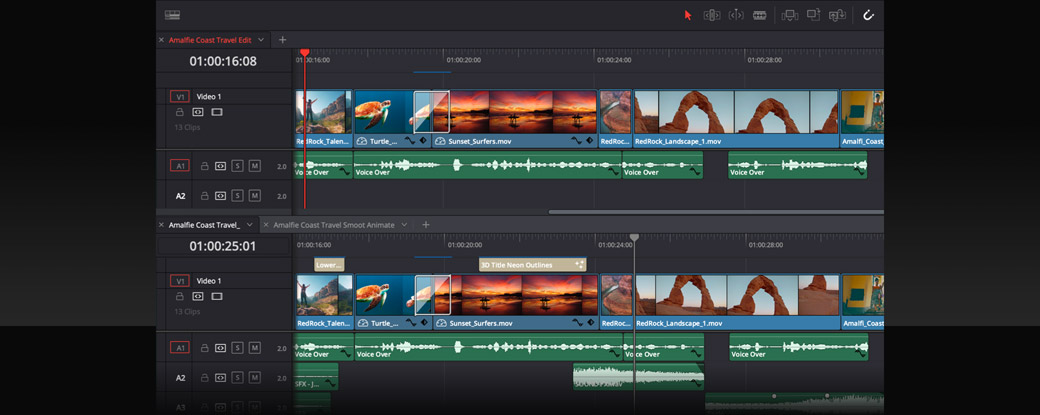
Stacked and Tabbed Timelines
The fastest way to edit clips and scenes between timelines is to use the stacked and tabbed timeline features. Simply click the timeline view options icon at the top left of the timeline window to activate tabs. Timelines can be stacked vertically so you can drag and drop clips between them, or tabbed across the top of the timeline window so you can quickly switch to a new scene, copy the clips you need, switch to another timeline and paste them in! This lets you have multiple timelines open at the same time, which is essential when you’re working in larger, more complex projects or when you’re working with assistant editors and other collaborators in the color, Fusion or Fairlight pages.
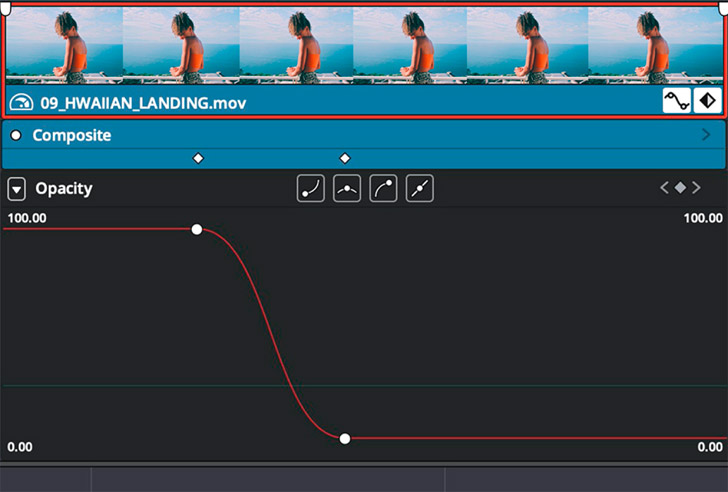
Timeline Curve Editor
Animation doesn’t just refer to moving objects! Any setting can be changed over time. For example, you can animate the opacity of a clip from 100% to 0 over the course of a few seconds. When you do this in the inspector, the rate of change is constant, or linear. The curve editor lets you see keyframe positions and animation curves directly under each clip in the timeline. Simply click the keyframe icon on the left hand side of the toolbar to open the curve editor. Using the list on the left side, select the parameter you want and use the bezier tools to create your own custom ease in and out curve. Keyframes can be copied, pasted, moved in groups and edited as needed.
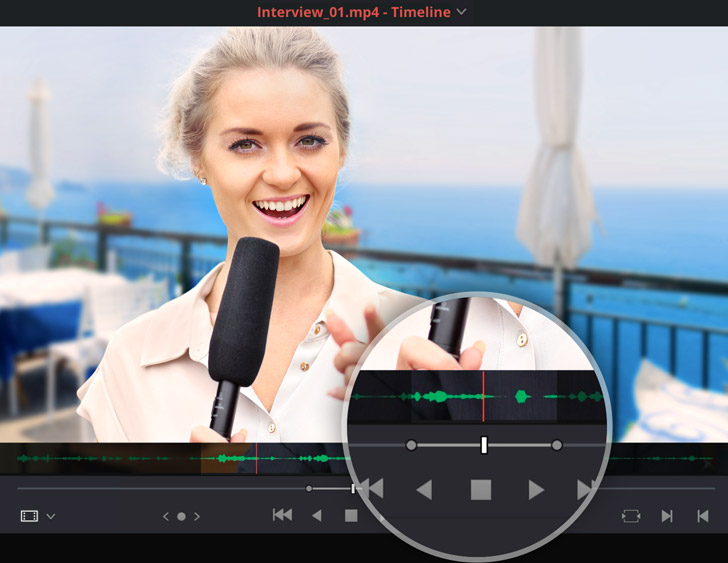
Audio Overlays and Scrubbing
A visible audio waveform in the source viewer simplifies the process of marking interview and dialogue clips! Click the option menu, which looks like three dots, at the top right of the viewer to enable audio waveform overlays. This allows you to quickly navigate to different parts of a clip based on spikes, silent areas or other visual cues in the audio waveform. Tape style audio scrubbing makes it possible to understand dialog while playing back at slower speeds. The combination of tape style scrubbing and audio waveform overlays lets you quickly and precisely find the parts of the clip you want. It’s also easier to create split edits where the audio starts before or after the video.
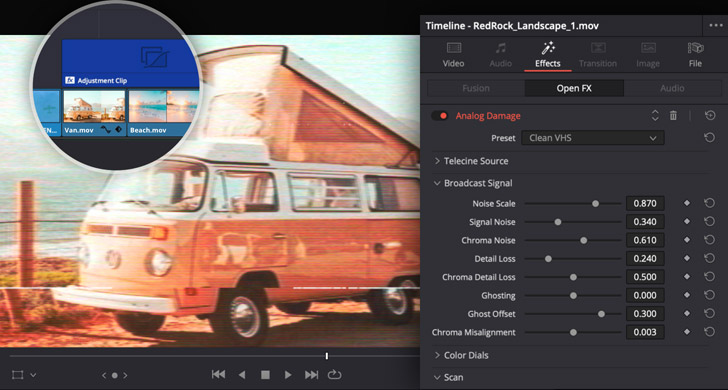
Adjustment Clips
Adjustment clips make it easy to add an effect or color correction over multiple clips in the timeline. They work from the top down, so any effect you add to an adjustment clip will be applied to all the clips below it. For example, if you want to add the same analog film look to a series of clips in the timeline, drag a new adjustment clip from the effects library and place it on a higher video track over your clips. Trim it to the desired length, add the analog damage effect and adjust its settings in the inspector. All of the shots under the adjustment clip will have the same effect! You can even custom name adjustment clips and drag them back into a bin in the media pool for use later!
Multicam Editing
While the cut page features super fast syncing and smart multicam edit tools for fast turn around projects, the edit page features a full multicam interface with everything you need for editing larger, more complex projects with 4, 9, 16, 25 or more cameras. The multicam viewer lets you see all cameras playing back at the same time. There are also keyboard and mouse controls for fast cutting and switching with separate audio or video only options, and highly accurate syncing via audio waveform, timecode or in/out points. Once edited, you can refine your trim points and change clip angles in the timeline. You can even step into the multicam clip to trim and color correct angles independently!
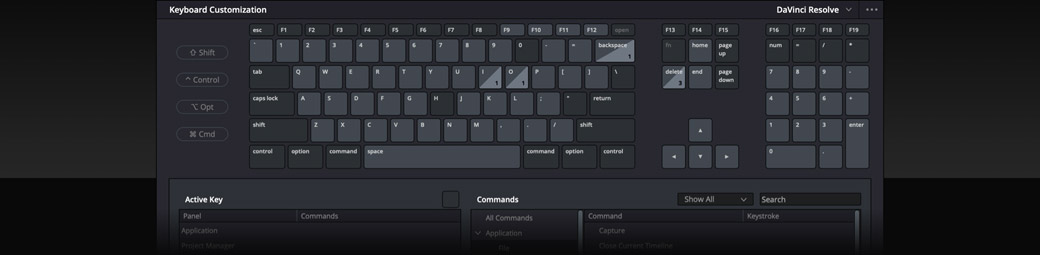
Custom Keyboard Shortcuts
DaVinci Resolve lets you customize and save your own keyboard shortcuts. There are even built in presets for other application shortcuts, which makes it easier if you're switching to DaVinci Resolve from other editing software! Virtually every command and tool, including context sensitive menu items, can be assigned a keyboard shortcut. Simply select keyboard customization from the DaVinci Resolve menu at the top left of the screen. The visual interface lists all available commands and currently assigned shortcuts. Press on any key to see what is in use and what else is available. Once you're done, you can save your own preset and even export it for use on other DaVinci Resolve systems!
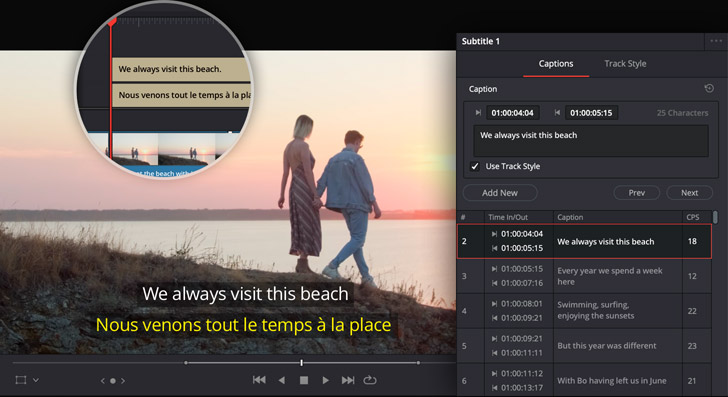
Subtitles and Closed Captioning
The edit page includes an intuitive set of tools for closed captioning and subtitles including support for importing timed text TTML, SRT, XML and embedded MXF/IMF subtitles. You can relink subtitle entries in the media pool or create them from scratch, without the need for expensive third party software. Subtitles appear in the timeline above of your video tracks and can be moved and trimmed like any other media. You can switch between subtitle tracks for different languages and add multiple captions per track. In the inspector, adjust track styles, change font, color, size, position and more! Subtitles can be rendered into the final video or exported as separate TTMLs, SRT or VTT files.
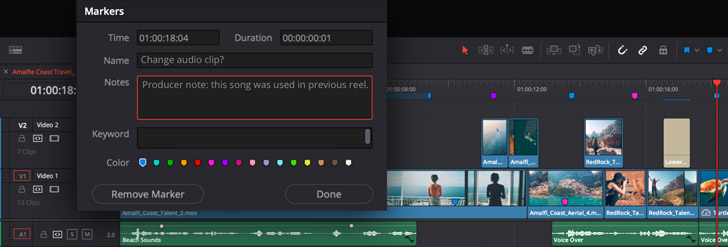
Markers and Annotations
Markers are small indicators on a clip or timeline that can act as reminders about things you need to work on, shots that you like and more. Markers can be color coded, have a title, text description and keywords, and they can be set to any duration you'd like. Annotations are on screen notes or images used to leave comments or feedback on clips. You can enable annotations in the pop up menu at the bottom left of the timeline viewer. There are tools for highlighting, drawing and even typing or adding basic shapes. Markers and annotations help to keep you organized when working on larger projects and when collaborating with others. Annotations can even be shared with remote collaborators.
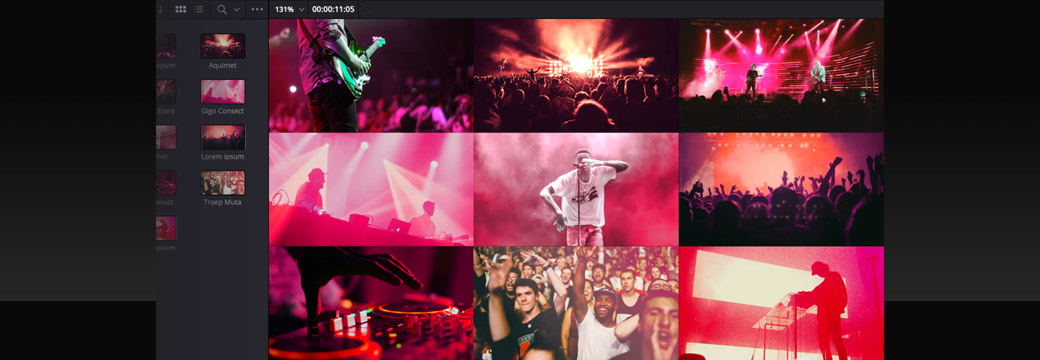
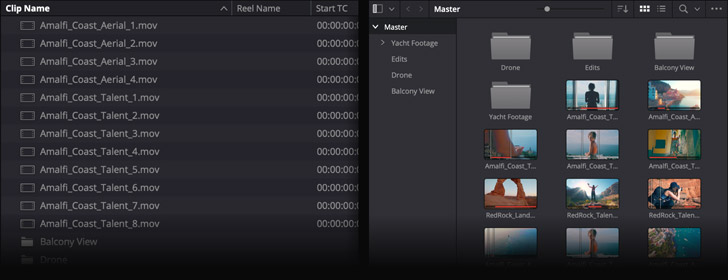
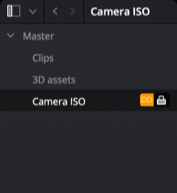
Organize Media In Bins
When you add clips into the media pool, you can create folders called "bins" to organize them. Select "New Bin" from the file menu and then simply drag the clips you want into the bin. Making bins is as easy as creating folders on your hard drive! The media pool has buttons to switch between icon and list view, along with a search tool for finding media, and a sidebar that displays the master bin hierarchy. You can also create smart bins that automatically sort footage based on metadata such as camera, date, scene and more. DaVinci Resolve Studio even features advanced facial recognition technology powered by the DaVinci Neural Engine to automatically create bins for individual characters!
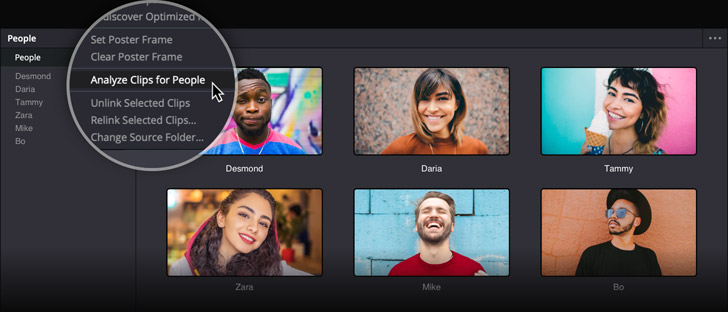
Advanced Facial Recognition
DaVinci Resolve Studio features advanced facial recognition technology that helps you automatically organize footage into bins based on facial features of the people in each scene. Simply select a group of clips, right click and within AI tools choose "Analyze clip for People.” The DaVinci Neural Engine uses AI to detect different faces in your clips and automatically create bins based on the people in each shot. People will automatically appear in the list of smart bins in the media pool sidebar. You can name and manage them from the "people" window in the workspace menu. Facial recognition lets you organize footage faster than ever, leaving you with more time to focus on the edit!
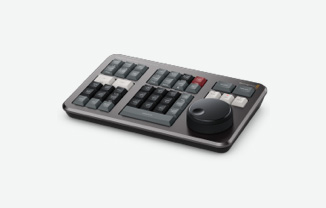
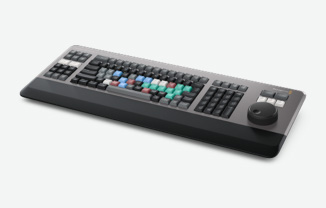
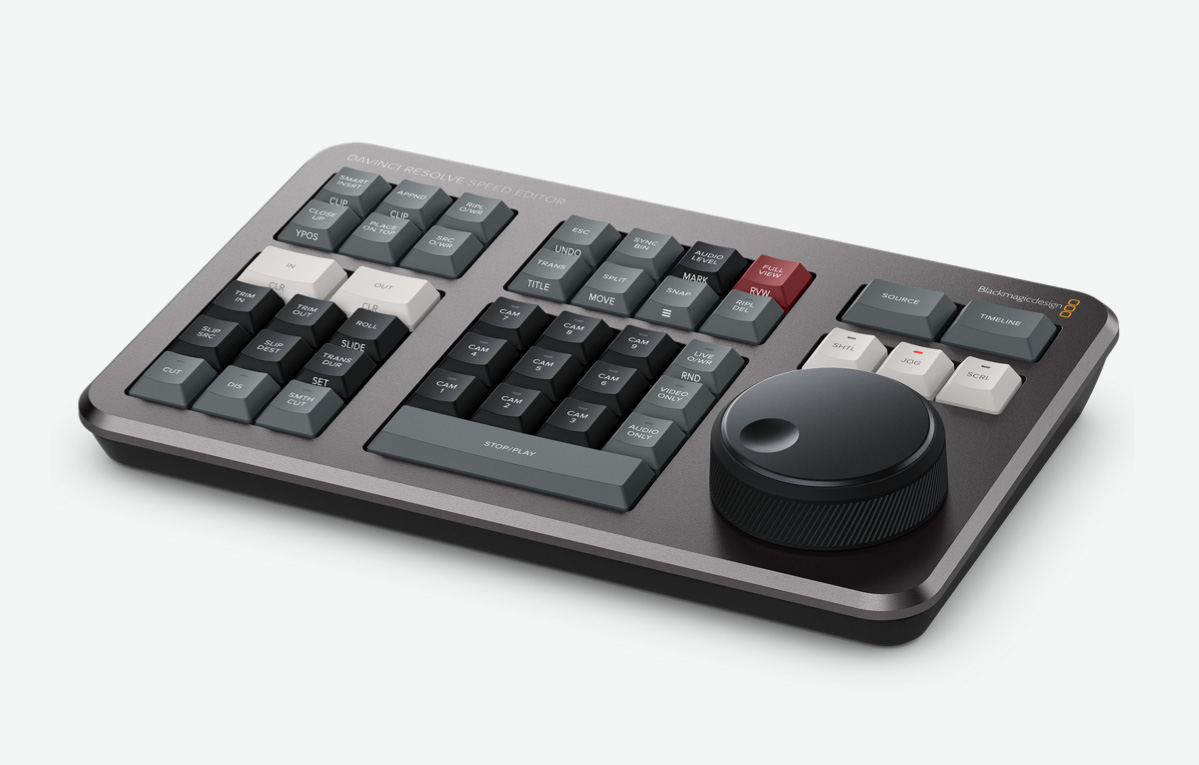
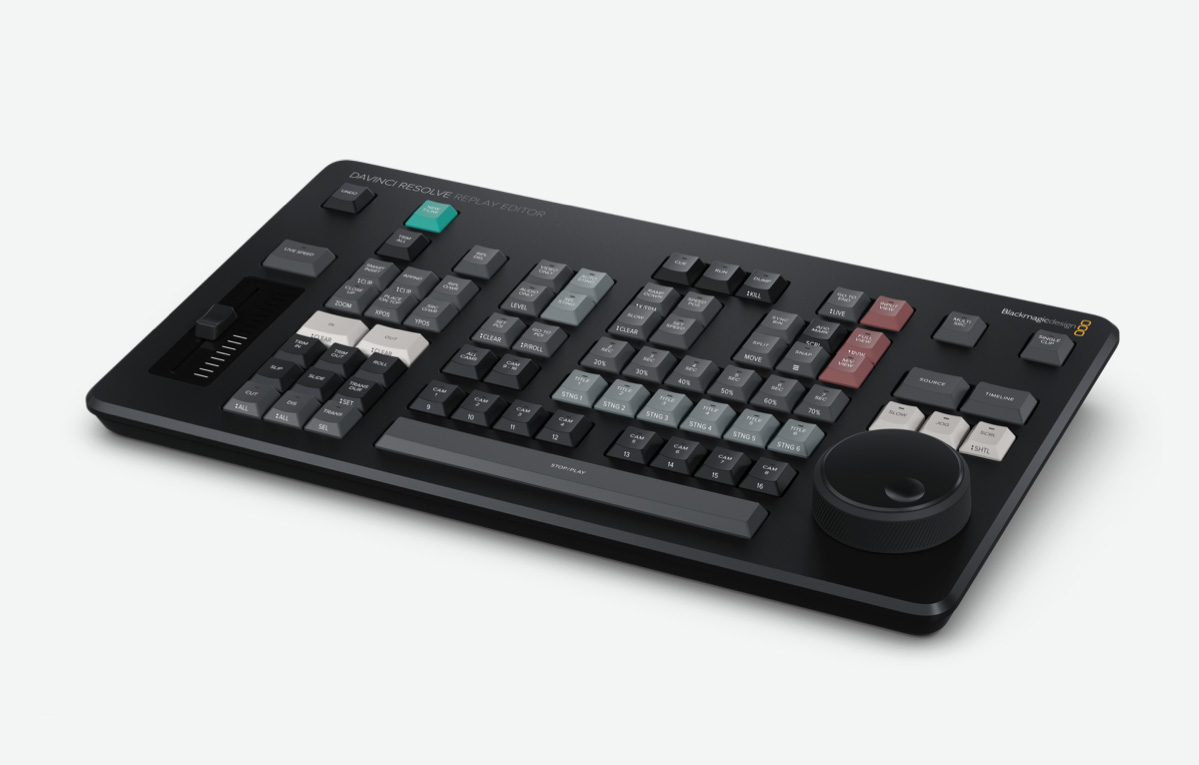
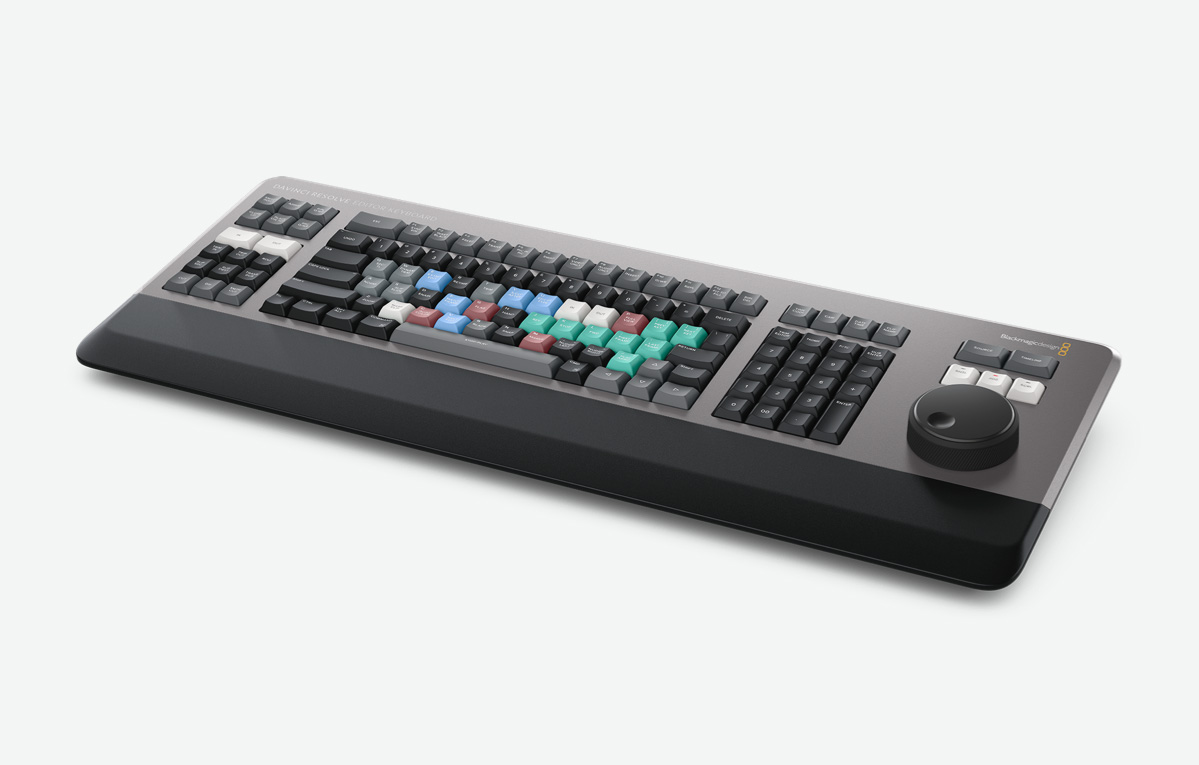
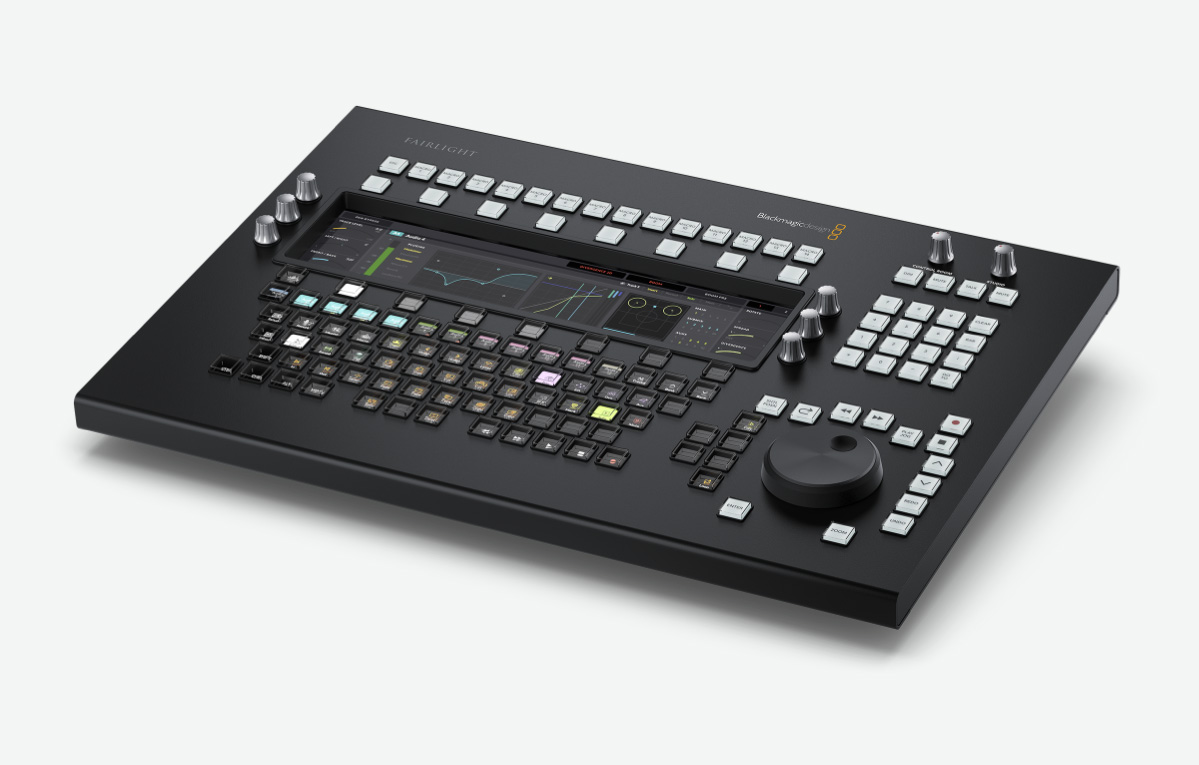
DaVinci Resolve Editor Keyboard
The DaVinci Resolve Editor Keyboard lets you edit with both hands, dramatically speeding up your workflow! It’s a professional keyboard with transport controls on the right side and edit functions on the left side. This means you can use the search dial and source tape buttons with your right hand to locate shots, while simultaneously marking clips and performing edits or live trimming with your left hand. It’s much faster than using a mouse! The keyboard features a machined metal design, durable high quality keys that feel great, and an elegant search dial with electronic clutch so you can quickly locate shots and trim edits live! Everything you need is right at your fingertips!
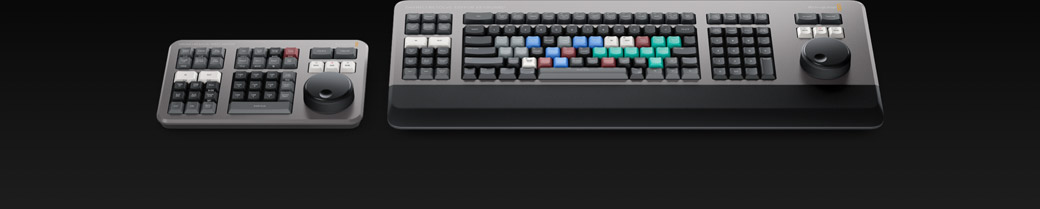
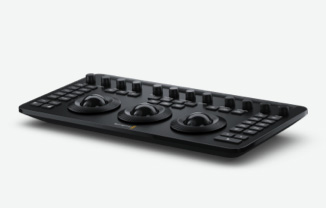
DaVinci Resolve Speed Editor - NZ$749
DaVinci Resolve Editor Keyboard - NZ$1,135
Upgrade toDaVinci Resolve Studio
Upgrade to DaVinci Resolve Studio
Upgrade to DaVinci Resolve Studio for even more creative tools such as 120 frames per second at a massive 32K resolution, support for multiple GPUs and more! You get a full suite of immersive audio tools including Dolby Atmos, plus Dolby Vision, HDR10+ and new HDR Vivid grading and rendering. The DaVinci Neural Engine enables features such as facial recognition, speed warp retiming, and advanced color balancing and matching. Plus you get temporal and spatial noise reduction, motion effects, lens distortion correction, de-interlacing, workflow and media asset management integration, remote scripting API, remote and networked color grading, rendering and encoder plug-in support and more!
Multi User Collaboration
DaVinci Resolve is the world’s only post production software that lets everyone work together on the same project at the same time! Everything is tied together and managed by a powerful multi user database, universal timeline and advanced image and sound processing engines. DaVinci Resolve features bin and timeline locking so assistant editors can prep and organize footage while editors start cutting scenes. Once the edit is underway, colorists and VFX artists can start working on shots while assistants export the cut for review and approval, all while you’re editing! You get shared markers, customizable user cacheing and monitoring, secure built in chat, timeline comparison tools and more!
Update
Notifications
Clips and Bin Locking
Multi User
Timelines
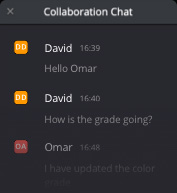
Built In Chat

Blackmagic Cloud
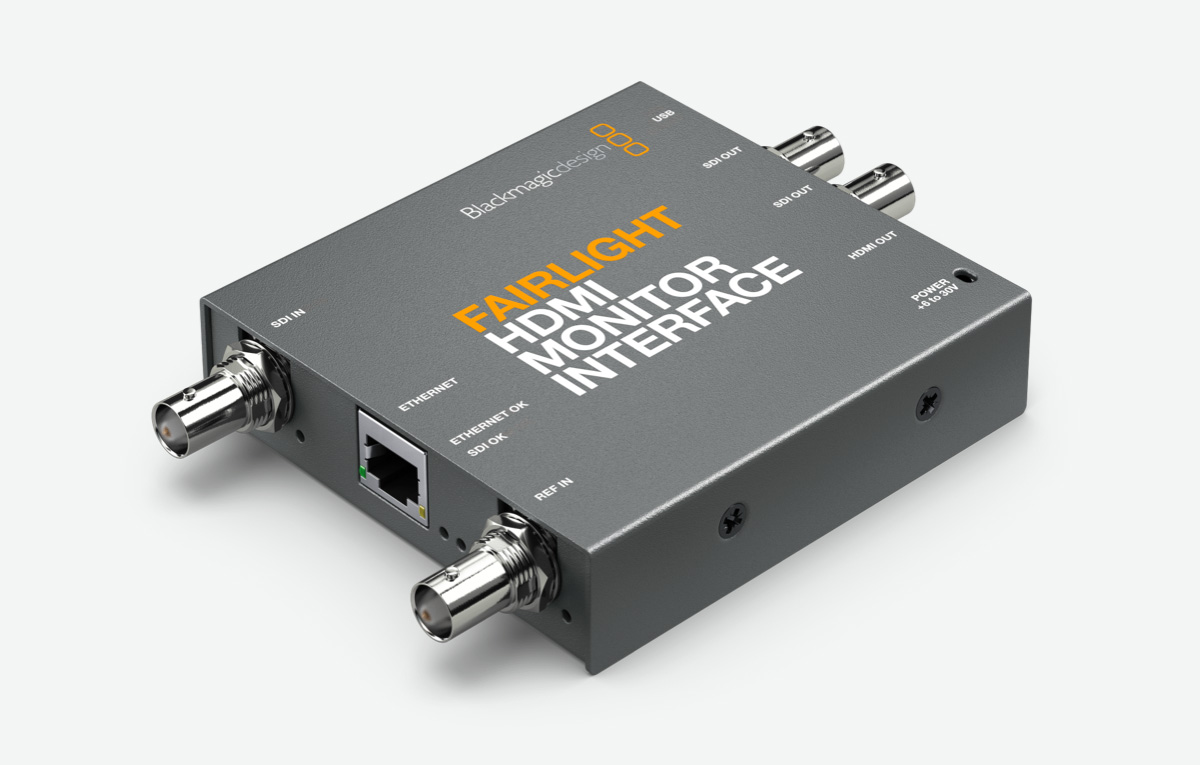
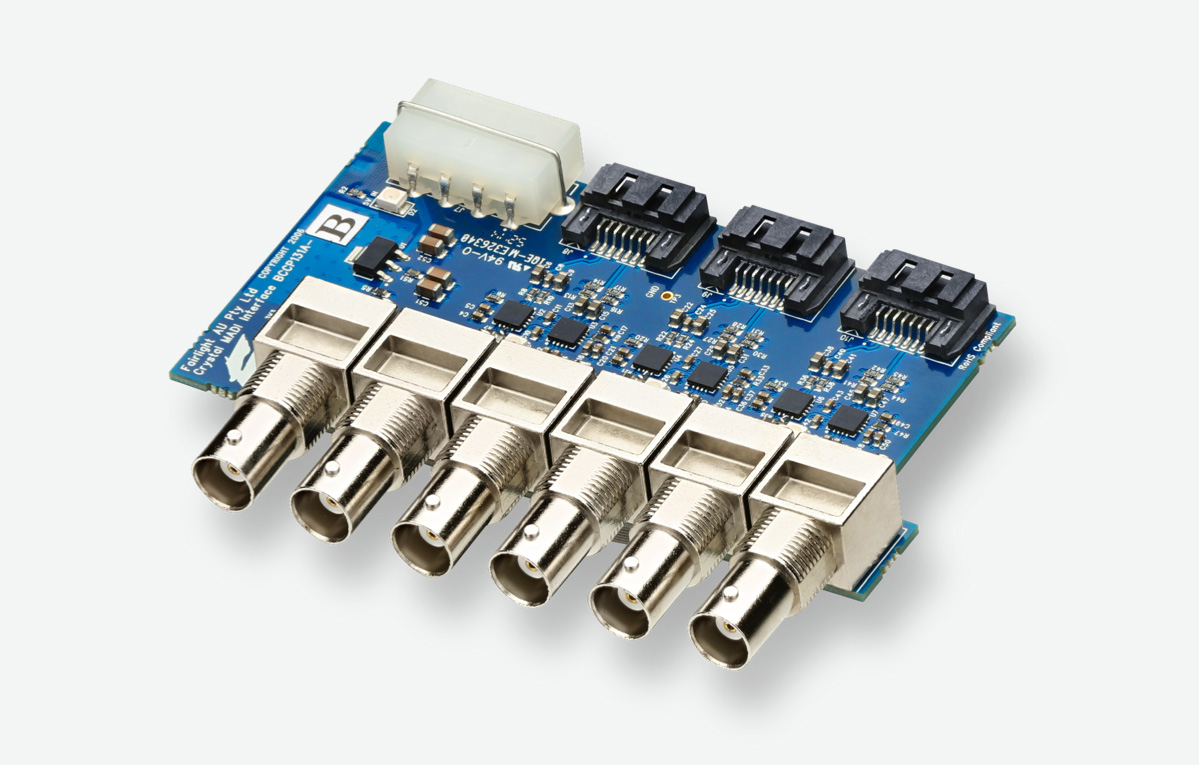
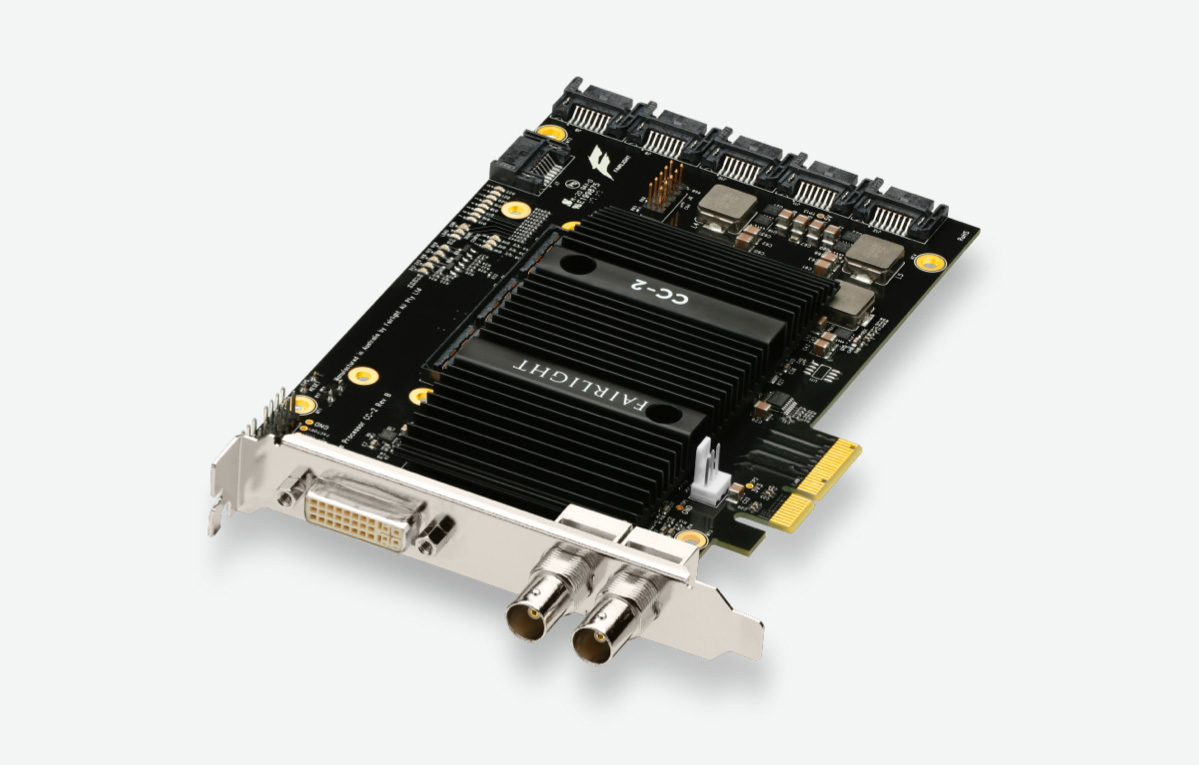
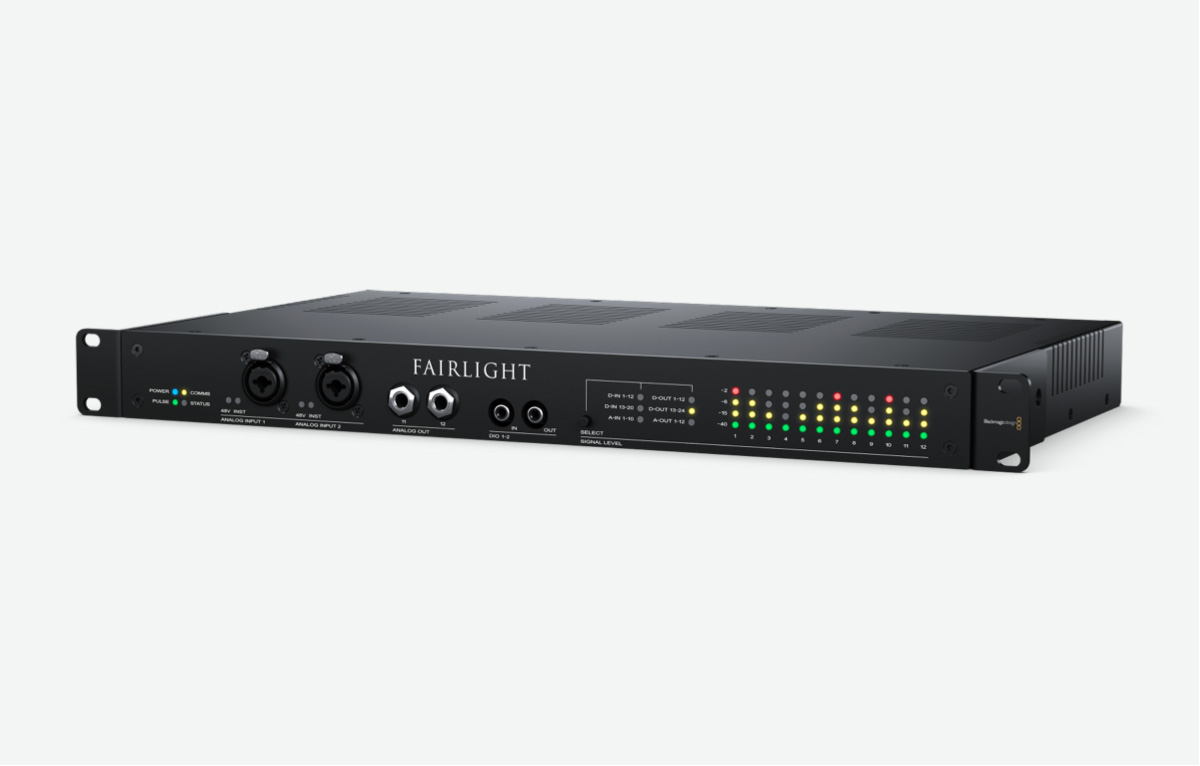
Monitoring and Capturing Solutions
There are many ways to preview your work and capture footage in DaVinci Resolve. For professional capture and playback, Blackmagic DeckLink and UltraStudio products give you frame accurate input and output, standard connections such as SDI, broadcast quality images for color critical workflows, and support for all standard broadcast and film formats. You can choose from a wide range of models that support everything from 10‑bit YUV HD and Ultra HD up to the latest 8K and 12‑bit RGB HDR standards. The free DaVinci Resolve version supports full screen playback on a single screen while DaVinci Resolve Studio adds support for full screen playback on a second attached computer display.


