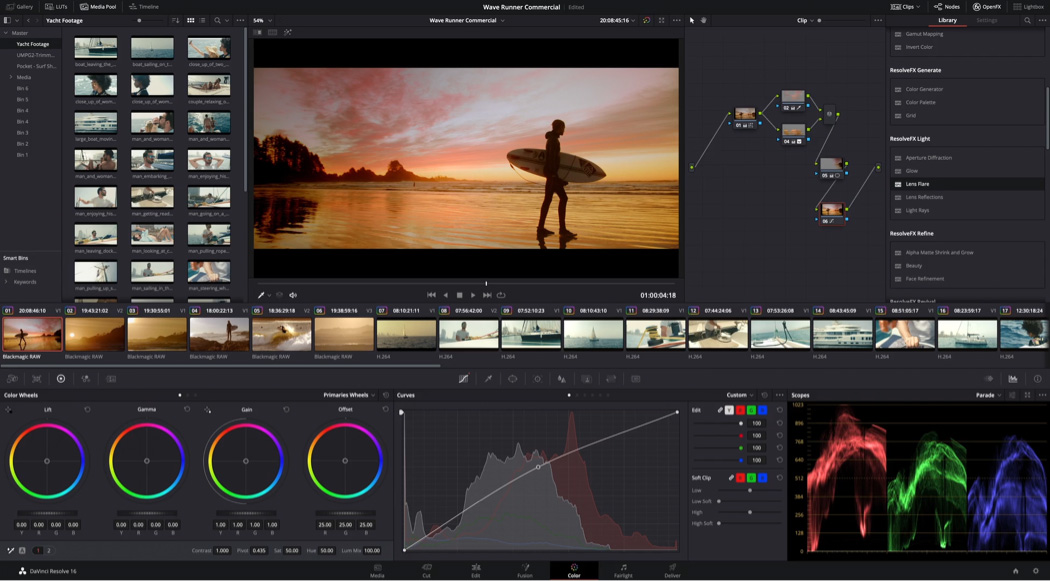
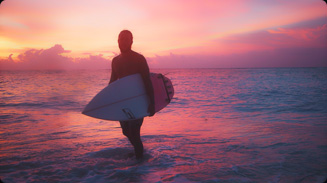
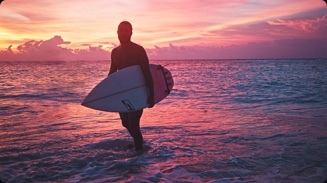
Hollywood's Most Advanced Color Corrector
Hollywood's Most Advanced Color Corrector
The color page lets you manipulate color in creative and artistic ways that dramatically affect the mood of a scene, making it an incredibly powerful part of the storytelling process. Whether you’re a student, online creator or professional Hollywood colorist, you get hundreds of artistic tools in an easy to learn node based interface that makes experimenting with color fast and exciting! You get support for a huge range of formats, including wide color gamut and HDR images, along with DaVinci’s legendary 32‑bit image processing for high quality, professional results. You can balance and match footage from different sources to create stunning, unique images that are impossible on other systems!
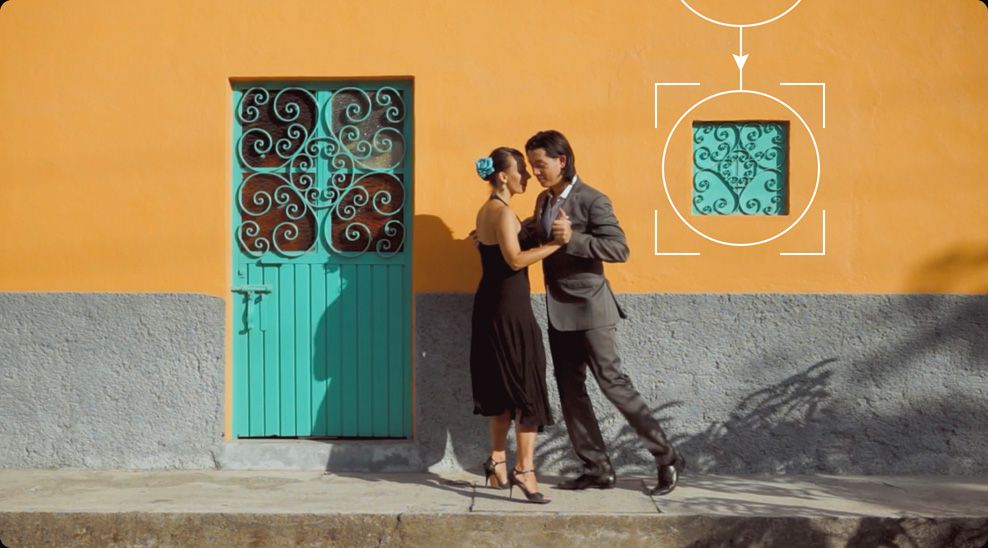
Balance Image Color
Balancing color is the first step in the color correction process. This is done with the primary correction tools, which are located at the bottom left of the screen. Primary tools affect the entire image and you use them to adjust brightness and color levels to remove unwanted tints and to create a neutral starting point. Each wheel is mapped to a different part of the tonal range. You can simply click and drag inside a wheel to adjust that range’s color, then use the master dial below the wheel to change its overall level. This palette also has adjustment controls, primary bars and log controls. Once shots are balanced, you can begin the creative grading process to create unique "looks".
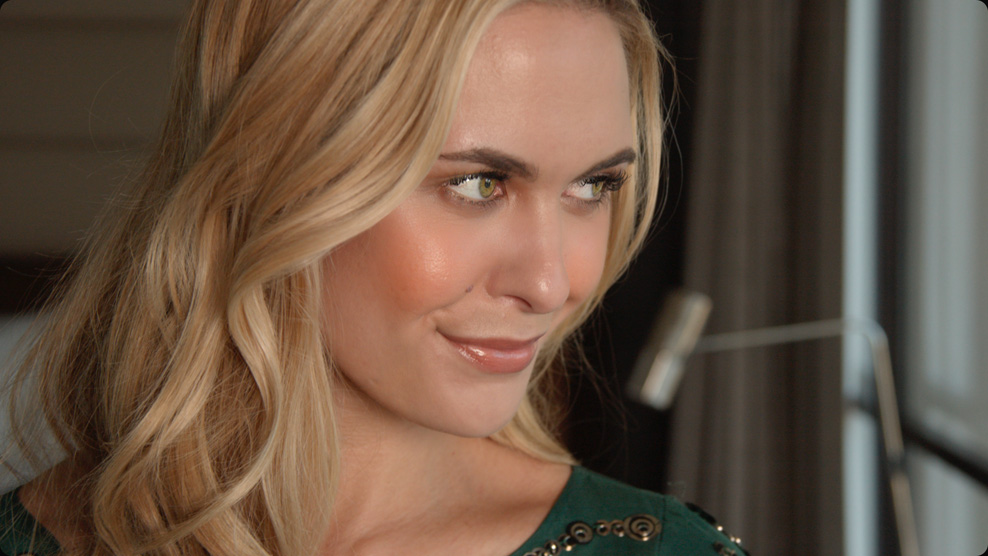
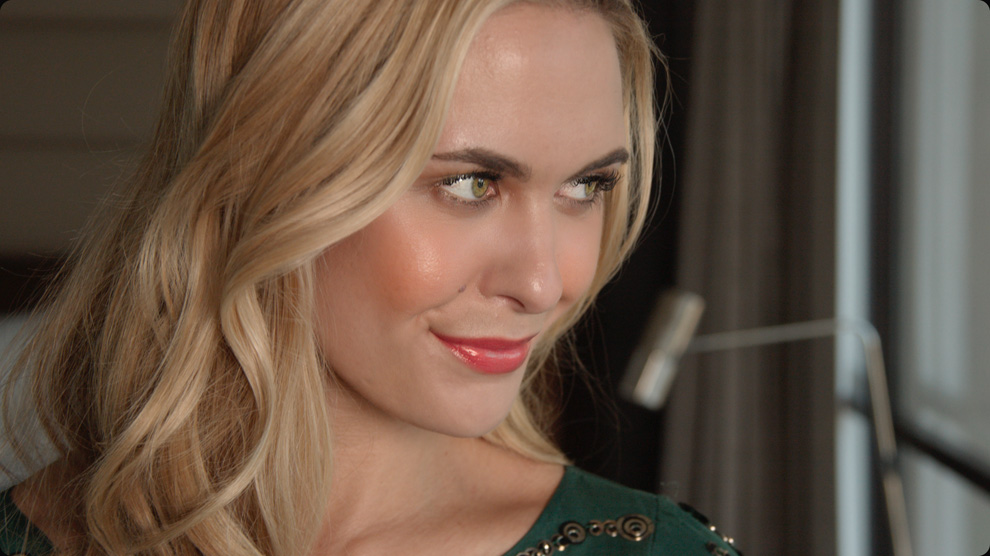
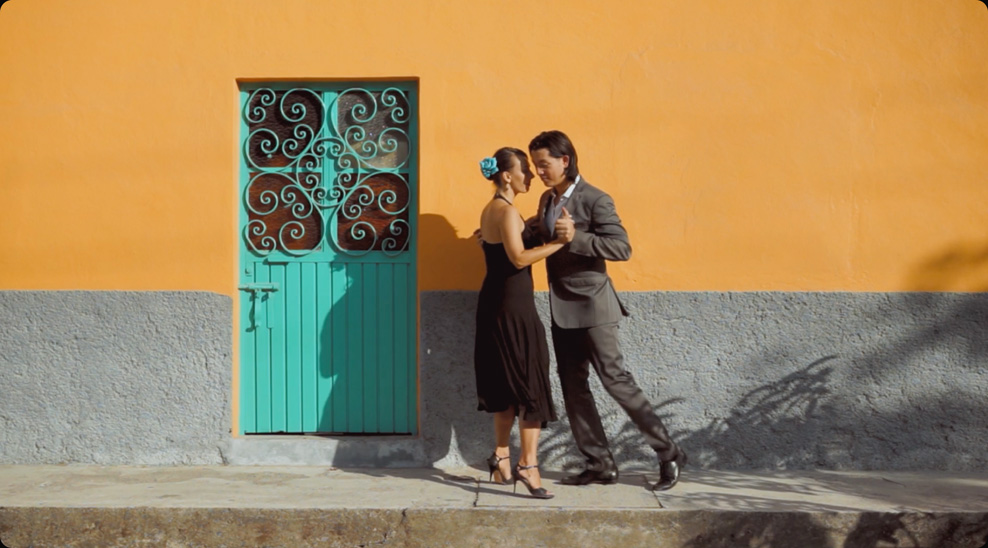
Original Footage
After Primary Color Grading

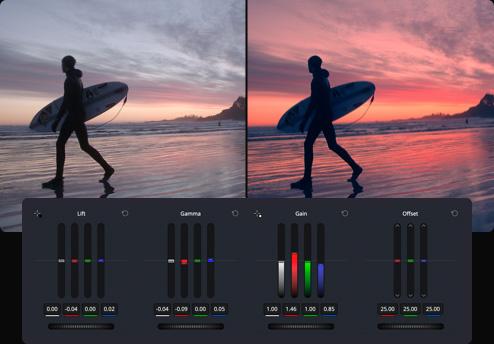
Primary Wheels
The primary color wheels let you adjust balance and brightness in overlapping tonal ranges called lift, gamma and gain (also known as shadows, midtones and highlights). The offset wheel adjusts the whole image.

Original
Original
Original
Color Boost
Temperature
Midtone Detail

Primary Adjustment Controls
The primary palette contains incredibly powerful primary adjustment controls that let you quickly adjust image contrast, saturation, hue, temperature, tint, midtone detail, color boost shadows, highlights and more. They’re an indispensable set of creative tools that you’ll use every day! For example, midtone detail lets you adjust contrast in areas with high edge detail to increase or decrease image definition or sharpness. Color boost, also referred to as vibrance, intelligently adjusts areas of an image with low saturation, resulting in a subtle and more natural looking increase of color. Whatever your grading experience, these tools will help you quickly produce amazing results!
Primary Bars
The primary bars are an alternative to the primary wheels that allow for more subtle changes to individual color channels and luminance. They’re great when you need to make minor adjustments to color and balance.
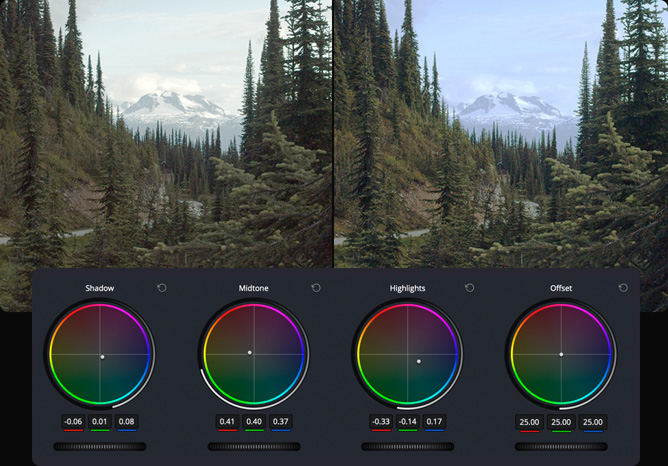
Log Grading
The log grading wheels have more tightly defined tonal ranges for shadows, midtones and highlights than the primary wheels. They’re designed for film style grading and let you adjust one tonal area without affecting others.
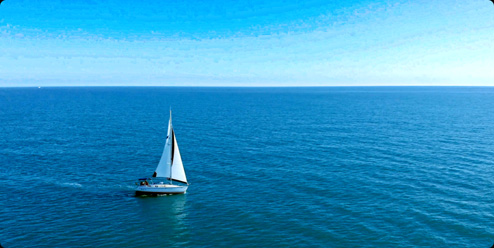
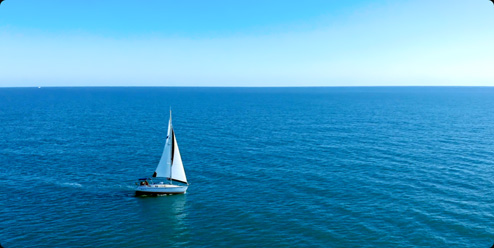
Auto Balancing and Matching
Balanced and matched shots make content from different cameras look consistent. You can use the auto balance tools to quickly balance a group of similar shots. Simply click the auto color button at the left of the color wheels palette to balance the shot’s color and contrast. You can also match the color between different shots. Select a clip, right click on another clip, and select "Shot Match to This Clip" from the menu. Resolve will match the color, contrast and brightness of the clip you’re working on with the one you’ve selected. If a shot contains a chip chart, click on the color match icon in the toolbar, select the type of chart used, line it up on the image and click match!
Original Footage
After Shot Match

Adjust Contrast and Color with Curves
While the primary wheels give you broad control, curves let you sculpt the color and contrast of an image with much finer detail. Curves can be displayed by clicking on the first icon in the center palette. Each curve lets you adjust a customizable region of the image based on hue, luminance or saturation. The default "custom" curves let you adjust red, green, blue and luminance curves independently, while displaying a live histogram to help guide adjustments. There are also five curves that let you select one thing, such as hue, and change another aspect of it such as luminance or saturation. For example, Hue Vs Sat lets you select a hue and then change the saturation of that hue.

Custom Curves
Curves let you adjust luminance and color based on tonal areas you define. For example, you can create smooth cinematic contrast adjustments, boost the red in your highlights while lowering it in the shadows, and much more.

Hue Vs Hue
The Hue Vs Hue curve lets you change any hue to any other hue. It’s great for subtly altering elements that require minor adjustments. For example, a sky that appears a bit too cyan can be made into a richer shade of blue.

Hue Vs Sat
The Hue Vs Sat curve lets you alter the saturation of any hue within the image. This allows you to quickly boost the saturation of elements you want to catch the viewer’s eye, while reducing the saturation of those you don’t.

Hue Vs Lum
The Hue Vs Lum curve lets you alter the lightness of elements of a specific color. It’s ideal for darkening specific hues to add richness and depth, or for lightening colorful elements to which you want to draw attention.

Lum Vs Sat
The Lum Vs Sat curve increases or decreases saturation in different tonal areas of the image with a nice smooth falloff. For example, you can boost saturation in the midtones while reducing it in the shadows to add depth.

Sat Vs Sat
The Sat Vs Sat curve is used to adjust a specific range of saturation without affecting the rest of the image. Simply click in the viewer to choose a value and increase saturation to make it "pop" or decrease to tone it down.
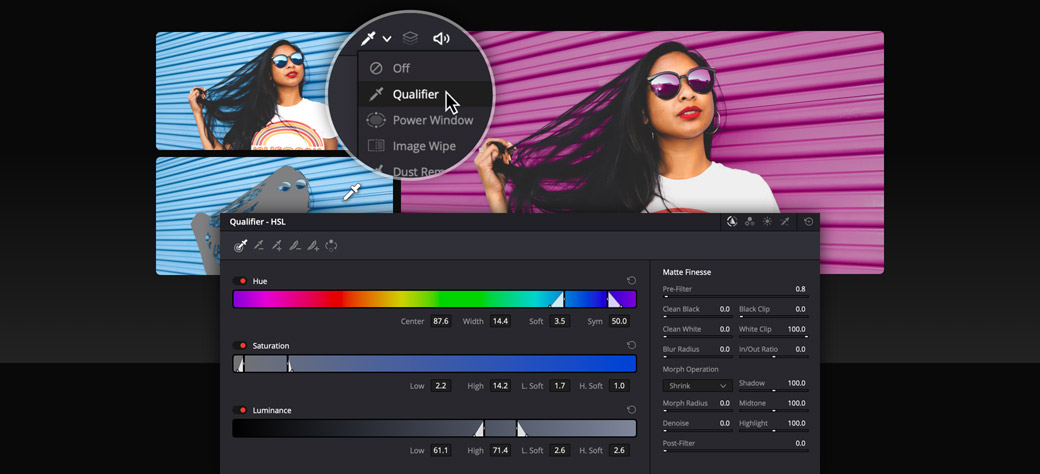
Secondary Color Correction
Selecting a specific area for color correction is called "secondary grading." For example, you might want to change the color of a shirt without affecting the rest of the image. The qualifier palette lets you select and adjust part of an image based on hue, saturation or luminance. To start, click the eyedropper in the toolbar and then click and drag on the viewer to select the area you want. The selection is highlighted in the hue, saturation and luminance strips. Click the magic wand icon in the viewer to see the selection or "key". Use the controls in the qualifier palette to enhance the selection, then use the wheels, curves and other tools to adjust the image until it’s perfect!
Original Footage

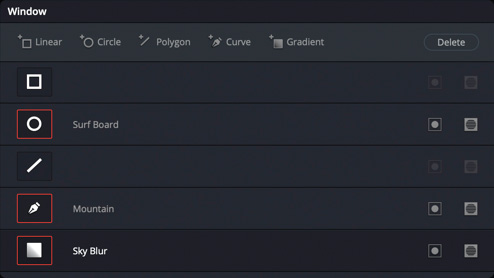
Target Objects Using Power Windows
While qualifiers target an area of the image based on color, luminance, or saturation, Power Windows let you define a selection by drawing shapes around specific objects in a scene. When you click on the Power Window icon, the palette shows you different geometric shapes, along with a pen tool and a gradient tool. Click on the icon for the shape you want and it will appear in the viewer. Drag the on screen controls to adjust its size, soften the edges, and place it exactly where you want. There are also options for manually adjusting size, pan, rotation, softness and much more. Once it’s set, you can apply color corrections to the area inside or outside of the shape!
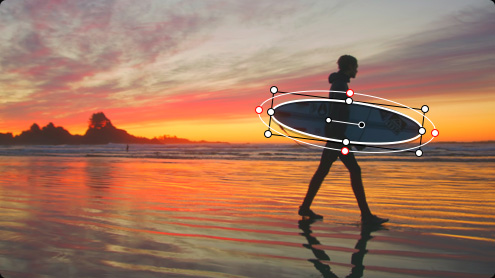
Circle
Curve
Gradient
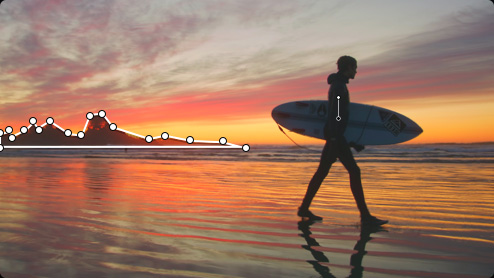
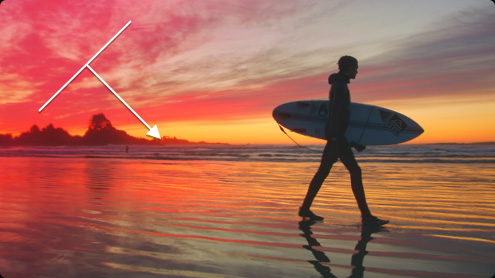
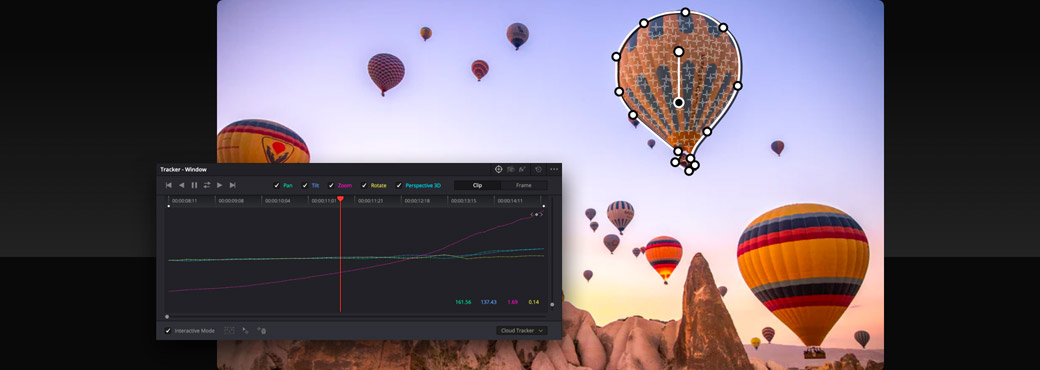
Track and Follow Objects
The tracker lets you automatically animate Power Windows to follow moving objects in a scene. To open the tracker palette, click on the cross hair icon in the toolbar. You’ll see a playhead, along with options for analyzing the pan, tilt, zoom, rotation, and 3D perspective of the shot. With your Power Window still selected, choose the options that best match the camera’s movement, move the playhead to the beginning of the clip, and click the track forward button. The clip is analyzed and the Power Window will be automatically animated to follow the object in your shot! The tracker can also be used to stabilize images or to attach effects, such as a lens flare, to specific objects in a scene.
Work with Nodes
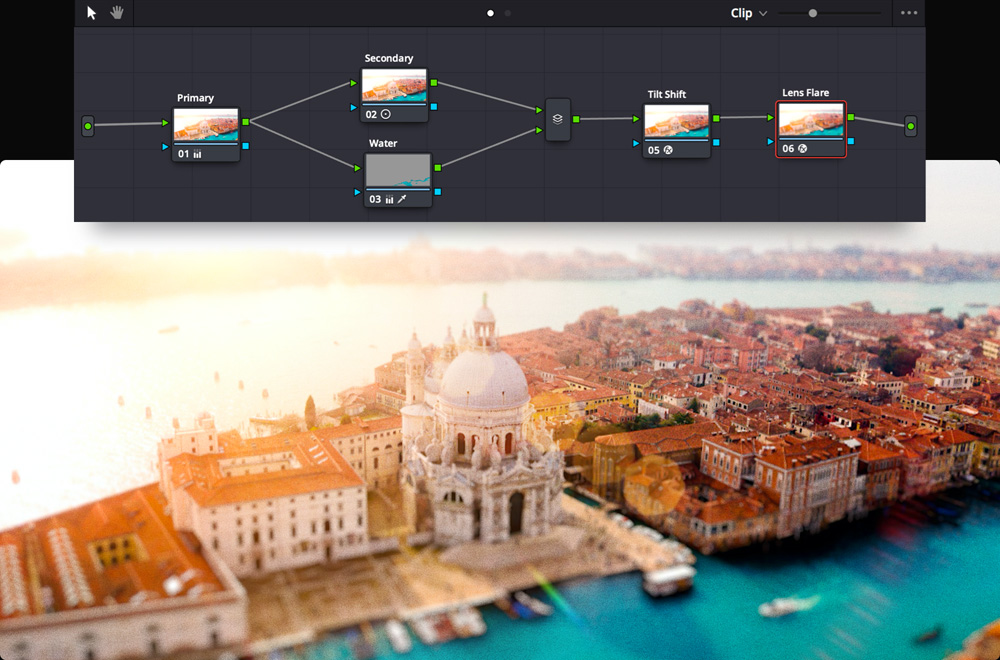
Nodes are the building blocks of color correction in DaVinci Resolve. The first node is usually used for image balancing, while additional nodes are used for more creative work. For example, your first node may be a primary correction, the second might isolate and improve the sky, and a third node could smooth out skin tones. Nodes let you create unique looks without compromising image quality as you would grading with layers. The node editor at the top right is like a flow chart. The image starts at the left and is passed through each color correction or effect node until it reaches the output on the right. Nodes can be connected by dragging the output of one to the input of another.
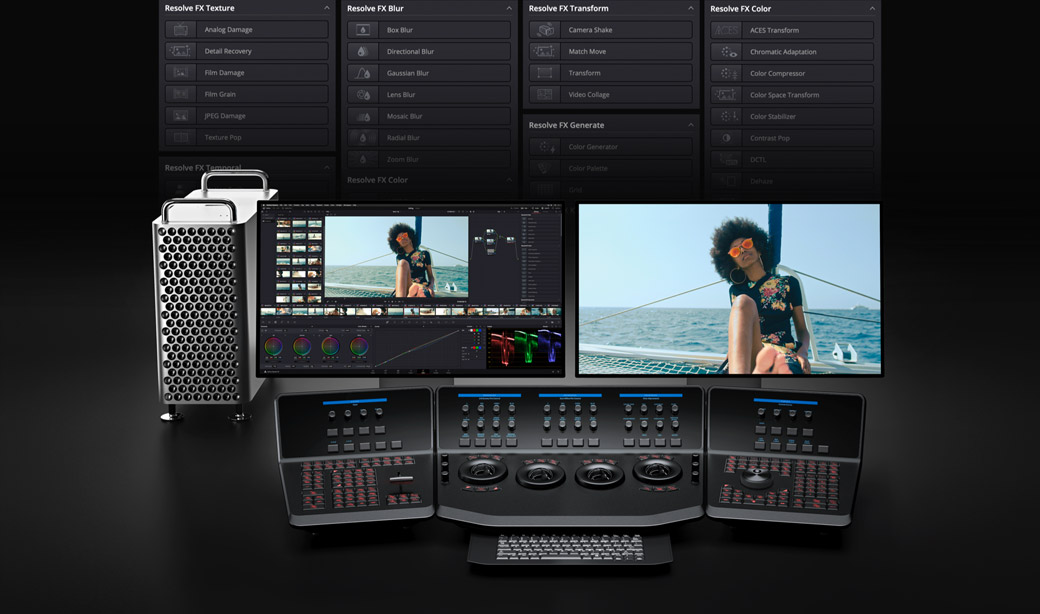
Enhance Images with Resolve FX
The color page features a library of over 90 GPU and CPU accelerated Resolve FX plug-ins that you can use to enhance images and add effects. They’re organized by category in the Open FX library at the top right of the screen. There are a variety of blurs, color effects, glows and lens flares, vignettes, refinement and beauty tools, image restoration, sharpening, stylize, texture, transformation and warpers that you can add to any shot. To add an effect, drag it to any node. The library will switch to an inspector showing you the settings for that plug-in. You can adjust and keyframe different values similarly to the edit page! Third party Open FX plug-ins also show up in the library.
Original Footage
With Resolve FX
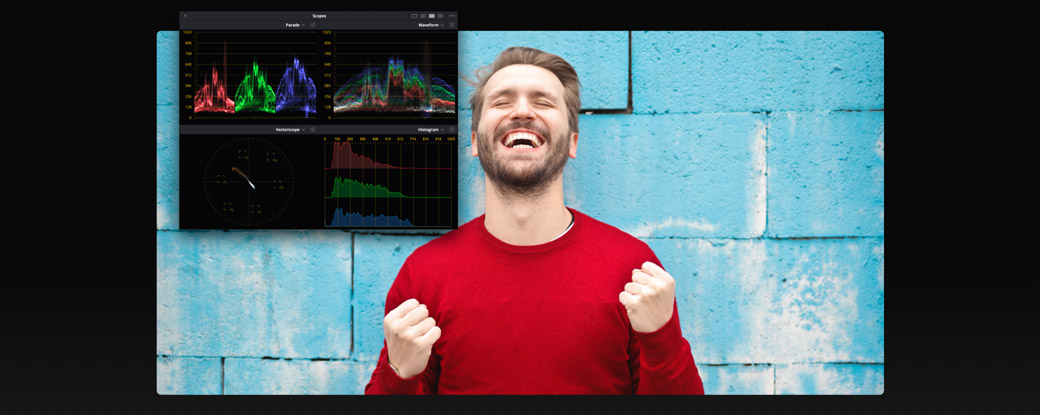
Professional Scopes
Color is displayed inconsistently on every screen, and even our eyes can interpret an image differently under various lighting conditions. Professional scopes give you a consistent way to see image data. The scopes palette, located at the bottom right of the screen, features five different scopes that give you objective tools for measuring and evaluating color in an image. They can be used to check tonal ranges, adjust skin tones, balance footage and match clips to one another. Scopes let you see the relative strength and range of color components such as luminance, chrominance, saturation, hue, color gamut, white point, individual RGB channels and more.
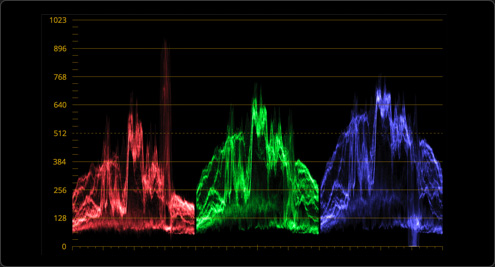
Parade
The parade scope helps you quickly see if one color channel is stronger than the others. It can be set to display multiple waveforms for a variety of video signals in an image such as RGB, YRGB and Y Cb Cr, making it easy to spot and fix imbalances.
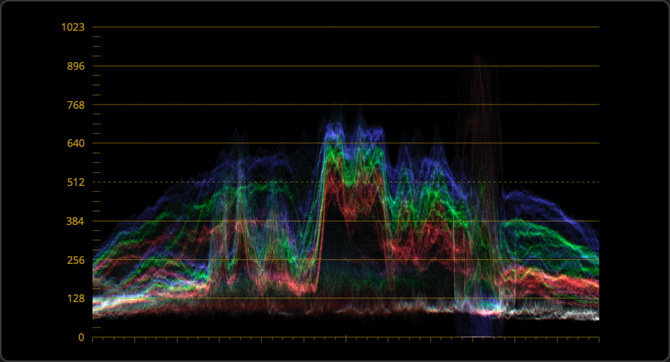
Waveform Monitor
Similar to the parade, the waveform displays the luminance and color values overlaid on top of each other at the current frame. When the colors line up, they appear white, which indicates that each channel has an equal intensity.
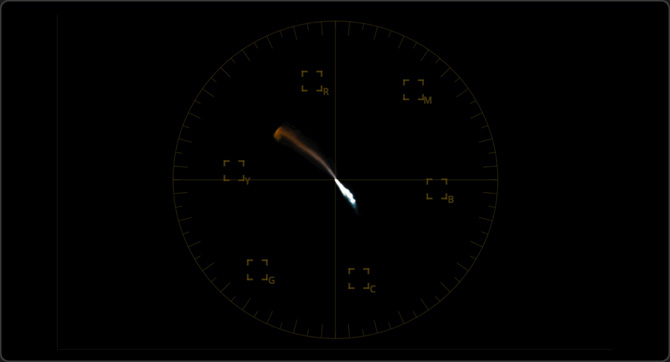
Vectorscope
The vectorscope monitor displays a circular graph of your image data that represents its hue and saturation levels. It is commonly used to check if skin tones are shifted toward unflattering colors such as green, yellow or magenta.
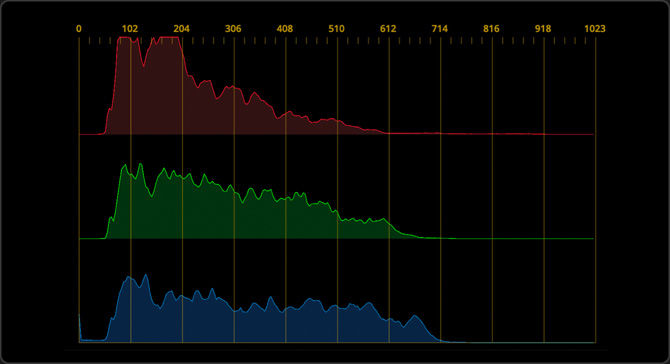
Histogram
This histogram provides a graphical representation of each channel’s tonal distribution. This lets you evaluate tone, understand whether detail has been blown out in the highlights or crushed in the shadows, and to adjust brightness and contrast.
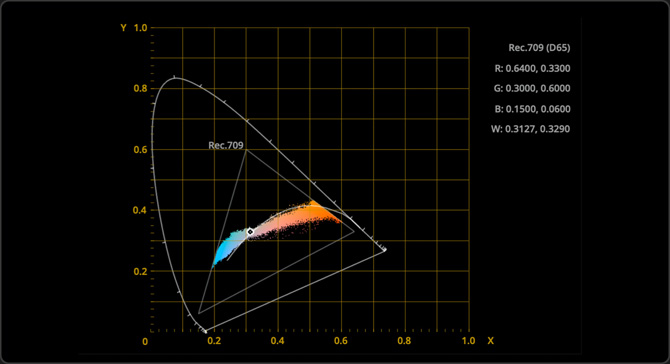
CIE Chromaticity
The chromaticity scope helps determine if colors are within the boundaries of your project’s delivery format as specified in project preferences. For example, when working in HD, colors falling outside of the Rec. 709 HD colorspace triangle will be clipped on HDTVs.
Save, Copy and Re-use Grades
The color page "gallery" lets you organize, share and re‑use grades in several ways to help speed up your workflow. The fastest way to copy a grade is to simply middle click a clip in the film strip to copy its grade to the current shot in the viewer. You can also save grades by right clicking anywhere in the viewer and creating a "still." Stills can be organized into albums and are stored in the gallery, which is located at the top left of the screen. The "Apply Grade" command lets you copy a saved grade to another shot. If you have a series of shots from the same camera, you can select them, right click and create a group. Now, when you grade one of the shots they’ll all be graded!

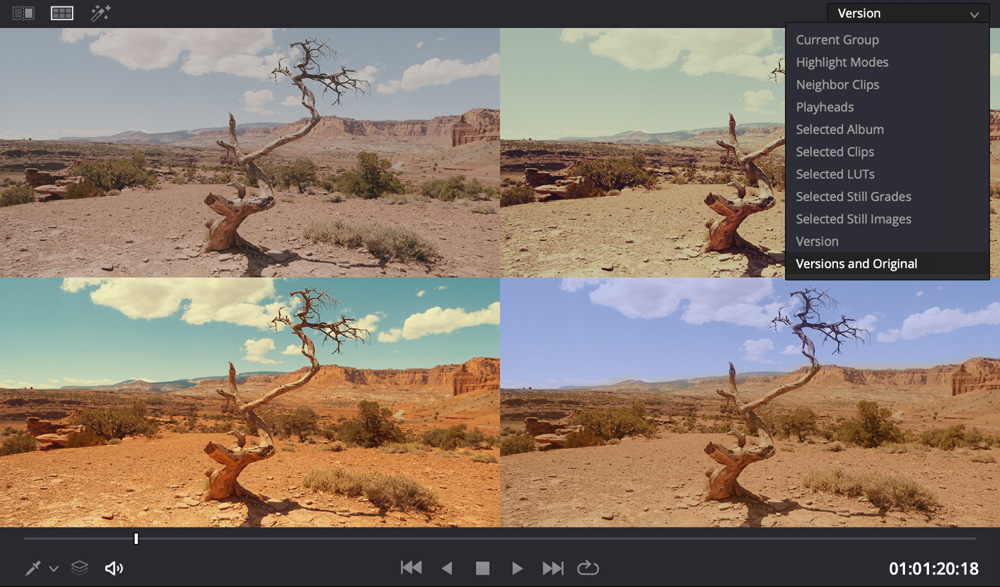
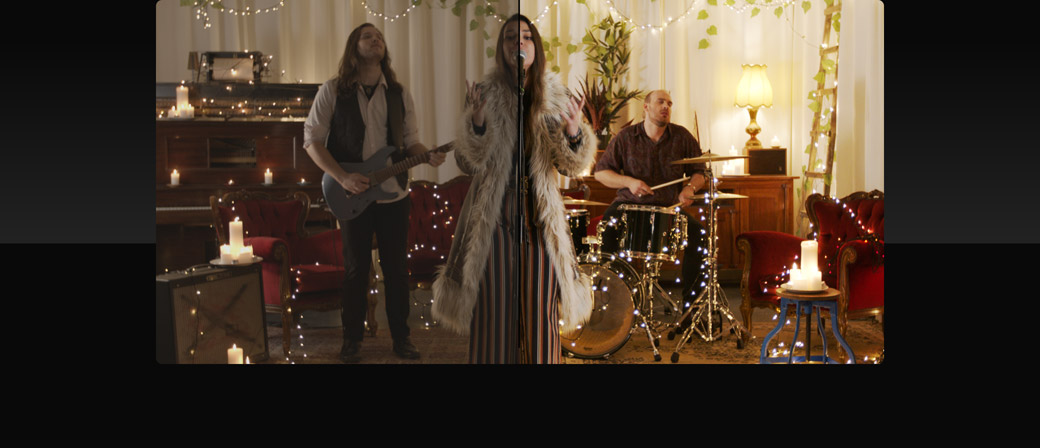
Compare Shots
Using wipe and split screen modes in the viewer is a great way to compare shots. You can compare a string of clips in a scene to each other, to variants of grades in the gallery or to versions of grades within a single clip. Clicking on “image wipe” in the top left of the viewer lets you view frames from two different clips. There are options at the top right for displaying wipes horizontally, vertically, mixed, as an alpha, as a difference matte, and even as a picture in picture. When you click on split screen, it lets you display multiple full frames in the viewer at once, based on a wide variety of criteria, which you can select from the drop down menu at the top right.
Find Mismatched Shots
The lightbox, which can be turned on by clicking its icon at the top right of the screen, displays every clip in your timeline as a thumbnail with grades applied. This is a great way to see how your shots look side by side and evaluate how the grade is affecting the story. It’s also a great tool for spotting differences between shots, or to simply see if there are any shots that you missed! Use the zoom slider to see a range of clips or the complete timeline. As the story progresses, you should see the color palette and the mood of the grade reflected in each scene. Any clip that "pops" out probably needs more attention. Just select a thumbnail and turn off the lightbox to jump to that clip’s grade!

Take Your Grading to the Next Level!
The color page has an extremely versatile and deep set of features designed to help you create great looking images. Whether you’re a video editor that’s new to color, an aspiring colorist, or a seasoned Hollywood colorist, you’ll find creative tools for expressing your vision, along with technical tools that help you work faster and deliver the highest possible quality images. You get a complete color management system and support for the latest HDR formats with tools specifically designed for high dynamic range work. In addition, you get powerful face retouching and beauty tools, paint for removing blemishes or unwanted objects, advanced noise reduction, film grain, restoration tools and more!

Next Generation HDR Grading
DaVinci Resolve Studio features the world’s most advanced tools for grading wide color gamut and high dynamic range (HDR) images. HDR grading is made possible thanks to 32-bit image processing, industry standard HDR output and Resolve color management. You get Dolby Vision, HDR10+ and new HDR Vivid metadata palettes, HDR mode node adjustments, HDR colorspace transforms supporting ST.2084 and HLG tone mapping, and HDR monitoring using built-in scopes. DaVinci Resolve includes a next generation HDR Primary Grading Palette with customizable zone based exposure and color controls, along with perceptually color-constant image processing, giving you total control over HDR grades.
Without HDR
With HDR
HDR Color Wheels
Modern digital cinema cameras can capture 13 to 19 stops of dynamic range, which offers incredible potential for producing imagery that closely mimics human vision. However, extremely bright highlights or very dark shadows can be challenging to balance using traditional tools. The HDR palette allows you to address the different tonal ranges of the image, from shadows and highlights, to super blacks and specular whites. You can also create new color wheels and define your own custom tonal ranges in each image, enabling you to adjust tonality and colors based on the media’s unique requirements. The HDR grading palette gives you a level of creative control that has never been possible before!
Original RAW File
After Color Grading

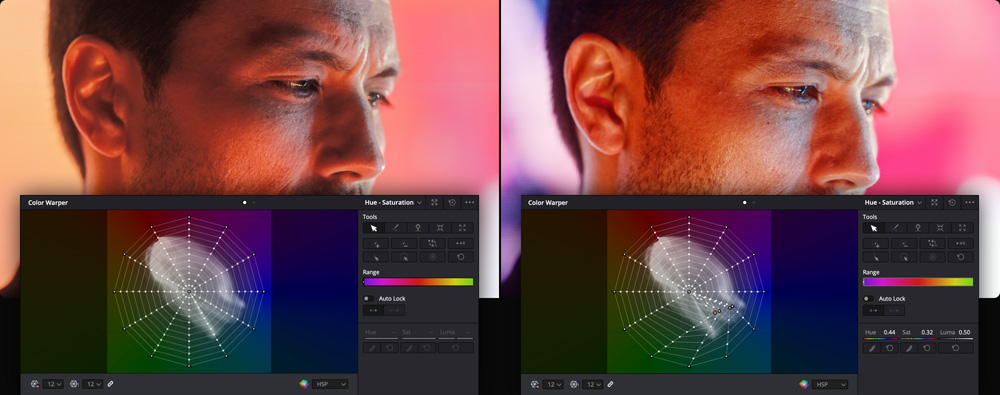
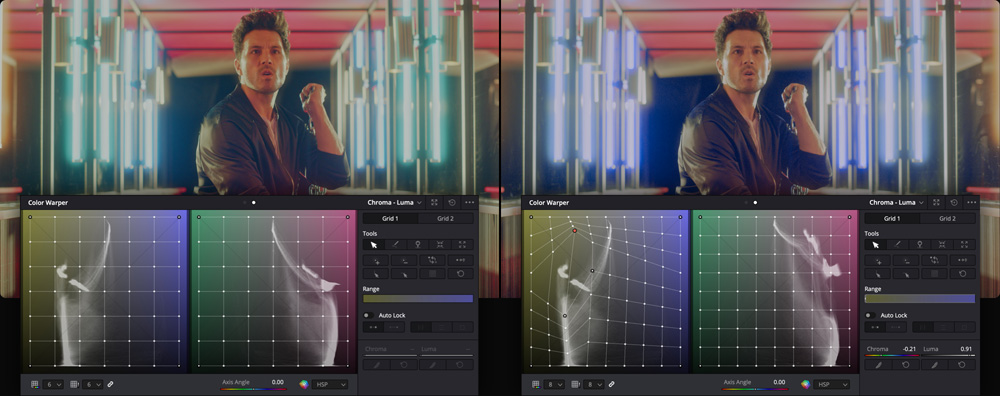
Color Warper
The standard curve tools let you sculpt color and contrast in a variety of creative ways. The new color warper goes even further, allowing you to set a Hue vs. Hue color grade for specific saturations. This lets you give a completely new feel to images! It also allows you to warp color based on luminance, or brightness. When you click the color warper palette, you’ll see a web or grid display of all the hues and saturations in an image. Simply select any hue or range of hues on either the web or directly in the image viewer, then drag that range to another hue and saturation point on the web in the palette. It’s an entirely new, innovative way to transform color in your images!
Before
After
Before
After
Native RAW Image Editing
DaVinci Resolve works with virtually all native camera RAW formats. That means you can work with files directly from the camera’s sensor instead of compressed pixel data. Simply choose a RAW file and click the RAW icon located on the left side of the toolbar. The RAW palette gives you total control over highlight recovery, white balance, gamma, exposure, color temperature, tint, sharpness and more. RAW image processing is completely non-destructive and processes the clips before the node editor input. You’re simply re-interpreting the camera’s original sensor data. This allows you to change things, such as exposure, after the image has been shot, all without affecting image quality!
Original RAW File
After Color Grading

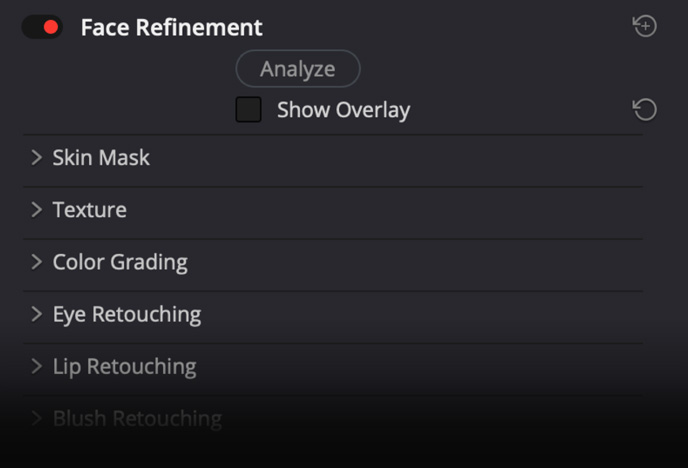
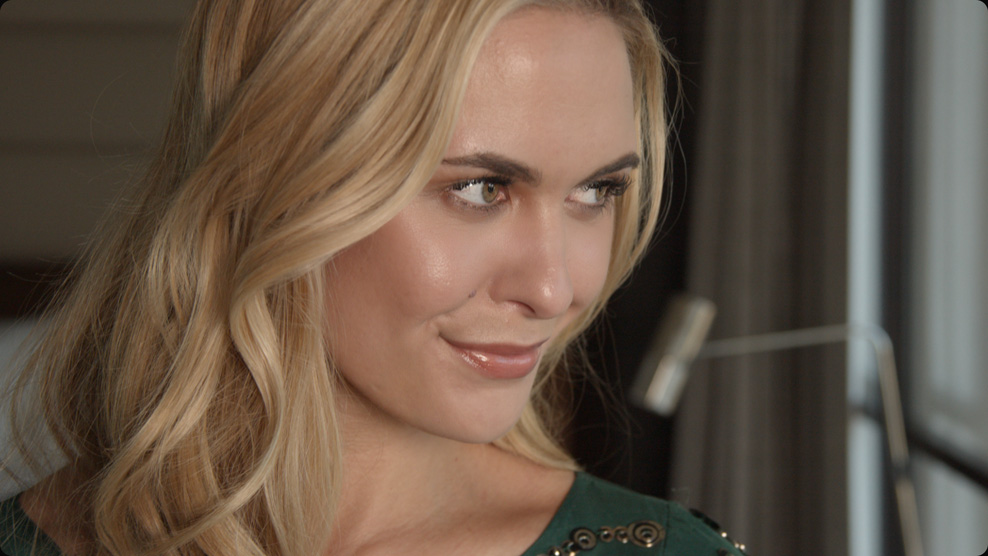
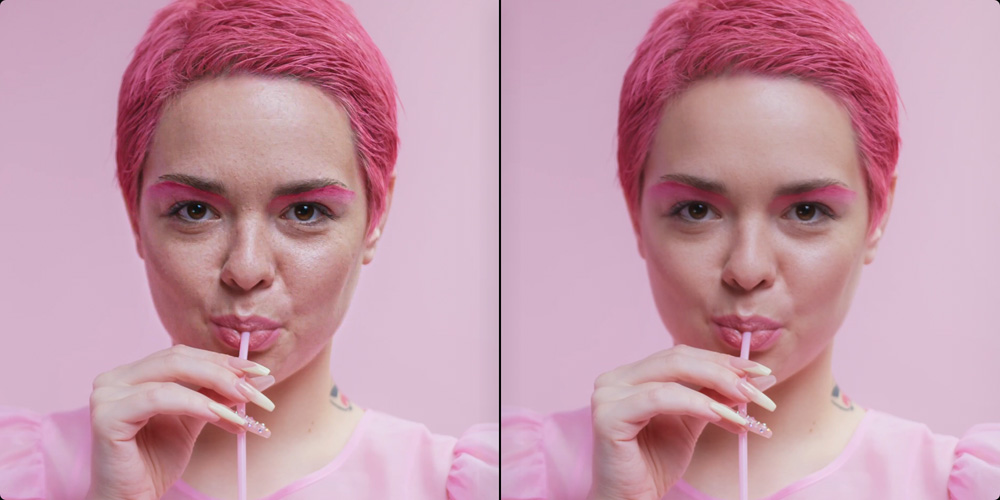
Refine and Retouch Faces
The face refinement tool in DaVinci Resolve Studio will find faces, automatically create masks for different parts of a face, and track them for you! That means you don’t have to manually isolate and track different parts of the the face. This saves you countless hours of work so you can focus on the creative aspects of refining and retouching faces. Simply drag the face refinement plug-in from the library onto a node and click analyze. Once it’s finished, use the sliders in the inspector window to sharpen and brighten the eyes, remove bags, lighten a brow, smooth out the cheeks or forehead, add blush, color lips and more! You can also use the beauty plug-in to gently smooth out skin if needed.
Original Footage
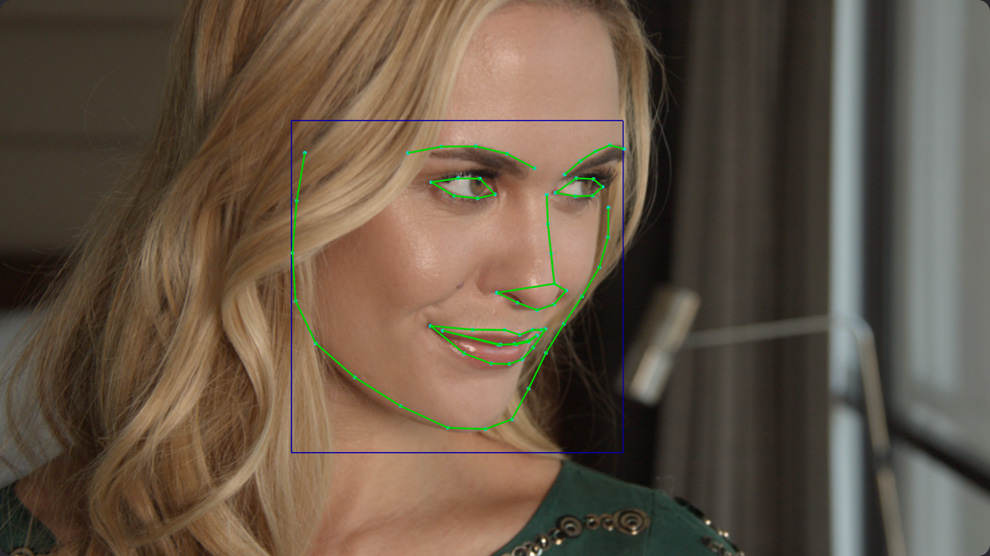
Mask Overlay
Blush Retouching
Lips Retouching
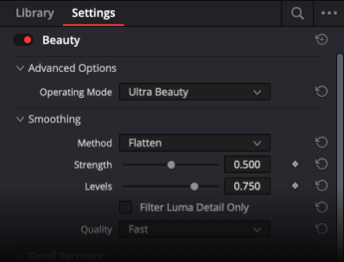
ResolveFX Ultra Beauty
ResolveFX Beauty features an ultra beauty mode that gives you advanced control when performing corrective beauty work. Developed with feedback from professional colorists, the tool features stronger filtering algorithms that produce more natural results. Simply drag and drop the beauty effect on a corrector node, and ultra beauty will activate as the default mode. You can easily address general imperfections with the smoothing parameter without affecting facial features, and then recover texture to produce a result that truly compliments the face. Perfect for scenes with harsh lighting that accentuate imperfections like corporate interviews, or even the bride and groom in wedding videos.
Original Footage
After Retouching
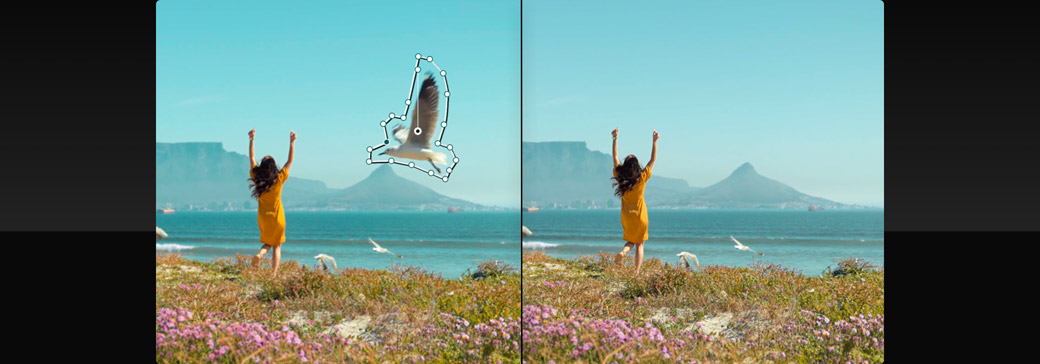
Remove Unwanted Objects
You can remove unwanted objects in a shot using a combination of Power Windows, tracking, and the object removal plug‑in found in DaVinci Resolve Studio. First, draw a window around the object you want to remove and track it. Next, add a new node and connect the alpha channel output from the tracked window into the new node. Finally, add the object removal plug‑in and click on the "scene analysis" button. The DaVinci Neural Engine analyzes the shot, using machine learning and AI to determine how to remove the object from the scene. You can adjust the search range, blend mode and clean plate settings until the object disappears!
Original Footage
With Patch Replacer
Clone Part of an Image
The patch replacer lets you quickly paint parts of an image to clean it up. It’s like an image clone or rubber stamp tool that copies pixels from one location to another. It’s perfect for removing blemishes, painting out a piece of garbage, or hiding a small mark in an otherwise clean shot. Just drag the patch replacer from the plug‑in library onto a node. The two on screen controls show the area you're cloning and the part of the image it’s being applied to. Adjust position and size by dragging the on screen controls. Other settings such as the shape, softness and replacement detail, can be changed in the settings inspector. Add an FX tracker to attach it to a moving shot and you’re done!
Before
After
Mix RGB Color Channels
The RGB mixer lets you adjust the presence of red, green and blue within the color channels of an image. Simply drag the sliders to increase or decrease the amount of color in any given channel and use the buttons at the bottom left to swap the color channels. The RGB Mixer can be used to modify LUTs, experiment with color casts or to tweak the appearance of on screen graphics. It’s also effective for working with black and white imagery. Click the "Monochrome" checkbox and then adjust the luminance of the RGB channels. You can achieve dramatic and elegant artistic results such as making trees look white against a black sky simply by raising the green channel and reducing the blue.
Original Footage

Monochrome
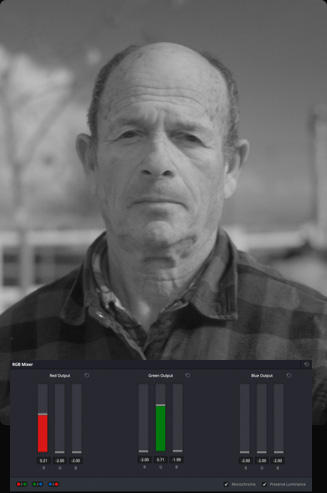
With RGB Mixer
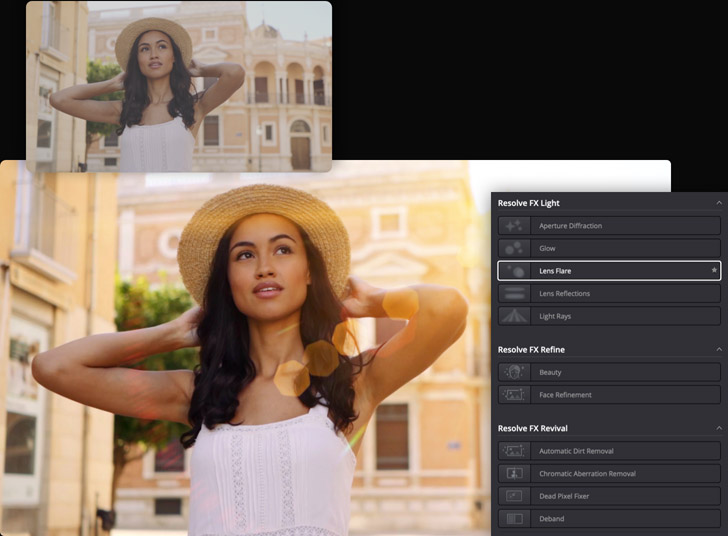
Incredible Light Effects
In addition to color correction and creative grading tools, the color page features plug-ins and tools for adding extremely realistic, organic lighting effects to your footage. You get individual tools for aperture diffraction, glows, lens flares, lens reflections and light rays. Simply drag a Resolve FX light tool from the library onto an empty node and adjust its settings. You can use them to create subtle light bleeds, gentle light bounces off of a lens, heavenly glows, or dramatic lens flares that look like they were all shot in camera. There are even pre-sets that allow you to simulate the golden hour of late afternoon sun, instantly create car headlights, sci‑fi flares and much more!

Light Rays
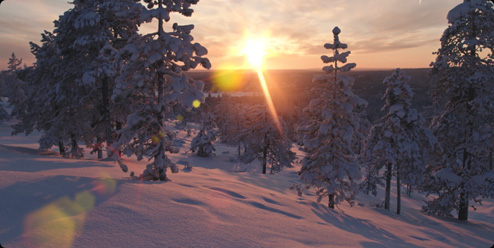
Lens Flare
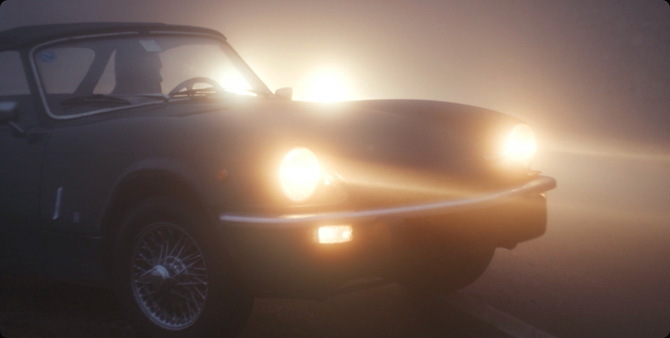
Aperture Diffraction
Lens Reflection
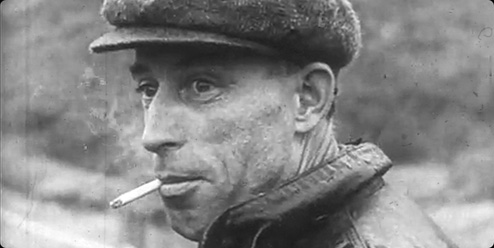
Image Restoration Tools
The color page has 8 unique image restoration tools in Resolve FX Revival. Simply drag and drop any of them onto a node to use them. There’s an automatic dirt removal tool for reducing or eliminating dirt and scratches, along with a dust buster plug‑in for removing dust and a deflicker plug‑in, all of which are great for cleaning up old film scans. The chromatic aberration plug‑in can reduce color fringe and artifacts caused by inferior lenses, the dead pixel fixer removes dead or stuck pixels, and the deband filter will smooth out pixelated gradients from digital cameras and highly compressed footage. The object removal and patch replacer let you quickly paint small objects out of an image.
Original Footage
After Restoration
Original Footage
With Deband Filter
Advanced Noise Reduction
The color page features some of the world’s most advanced temporal and spatial noise reduction, enabling you to clean up noisy images and dramatically improve clarity. They’re located in the motion effects palette at the bottom left. Temporal and spatial reduction can be applied in varying amounts to the chroma and luma noise in an image. Temporal noise reduction analyzes multiple frames to isolate the unwanted noise from the details you want to keep. Spatial noise reduction lets you smooth out areas of noise within a single frame, while preserving detail so it doesn’t become too soft. In general, it’s better to start with temporal and slowly add spatial until you get the results you want.
Original Footage
After Noise Reduction

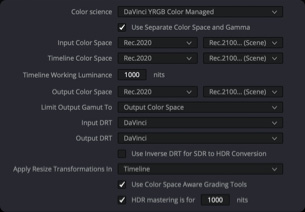
Professional Color Management
Color management lets you control the conversion of color between digital film cameras and scanners, computer monitors, broadcast displays and digital cinema projectors. The goal is to achieve more consistent decoding of the camera images and the display of colors across various formats and monitors. DaVinci Resolve supports its own system of color management and the Academy Color Encoding System (ACES) as defined by the Academy of Motion Picture Arts and Sciences. To set it up, open project settings from the file menu and click on color management. You get options for setting up color science, along with input, timeline and output color transformations, tone mapping, LUT application and more.
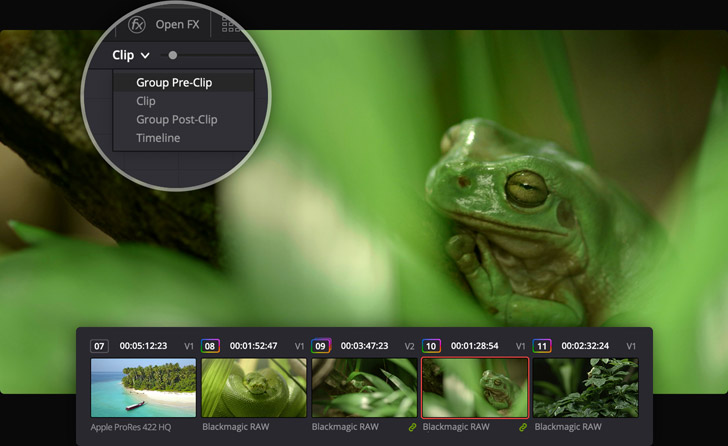
Grade Faster with Grouped Clips
Speed up your workflow by separating different parts of the grading process into groups of clips with similar needs. Normally all grades happen at the clip level. When you use groups, you can grade the group before the individual clip grades, as well as after it. For example, you can place all clips from a particular scene into their own group then use the pre‑clip group mode to balance all of the clips. Then use standard clip mode to address the unique requirements of each shot within that group. You can grade the group after individual clip grades to apply specific looks or effects to the whole group. Group grading saves you time as you can change a grade on one clip and they all change!
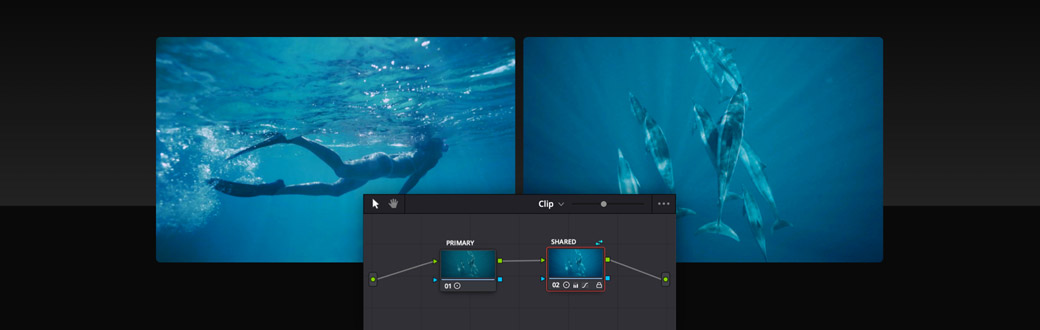
Share Grades on Multiple Clips
Shared nodes offer the same functionality as standard corrector nodes, with the added ability to be active on multiple clips at the same time. Begin by creating a corrector node and apply some changes such as a creative look, a vignette for an interview, or a secondary color correction in a wide shot. Then, right click and save the node as a shared node with a unique label. From now on, this shared node will be available any time you right click in the node editor and select “add node”. By default, shared nodes are locked to prevent accidental changes across multiple clips. Once unlocked, you can make changes that will transfer across all of the other clips sharing the same node.
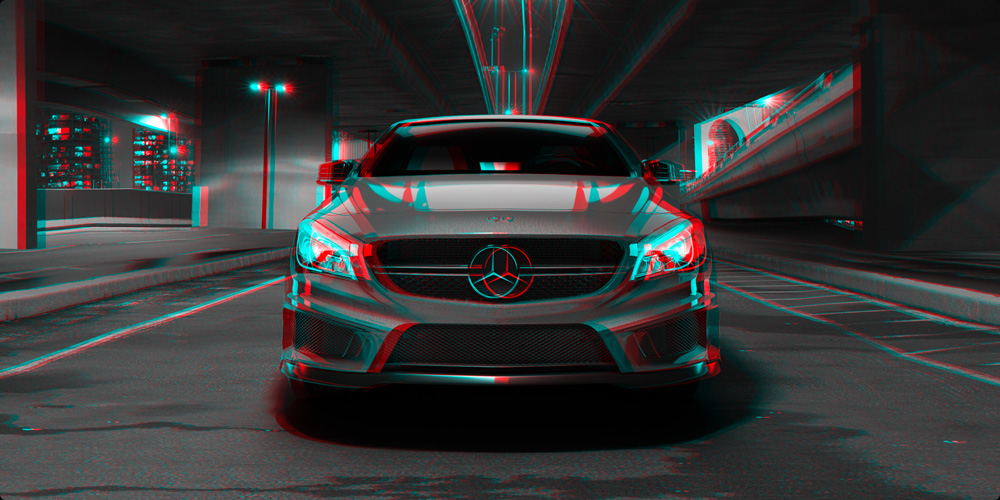
Stereoscopic 3D
DaVinci Resolve's stereoscopic tools support a variety of industry standard 3D workflows. Capture and format raw 3D video, edit stereoscopic clips and grade the resulting program to deliver spectacular 3D imagery. Use the stereoscopic palette to adjust stereo specific properties to ensure that every clip is uniquely optimized for 3D viewing. The stereo align feature can even automatically correct camera alignment for left and right eye images for more accurate convergence in 3D space. When working with UltraStudio or DeckLink capture and playback devices, you can set preferences to display one or both eyes on a single output monitor or dual displays with perfect synchronization between eyes!
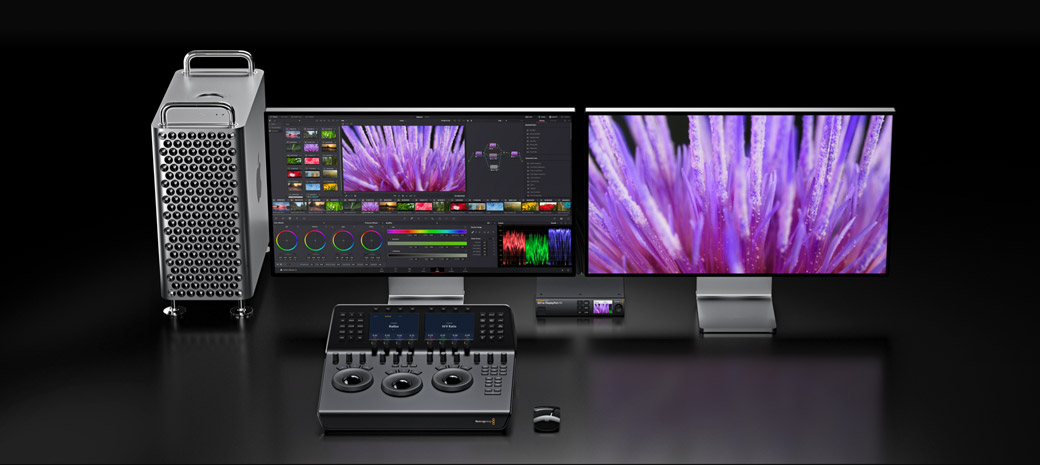
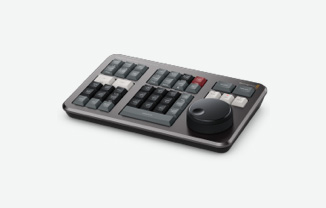
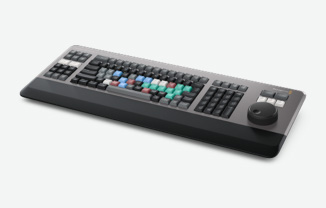
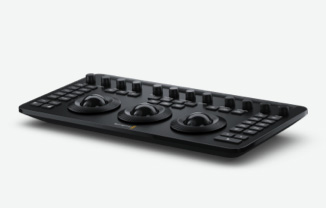
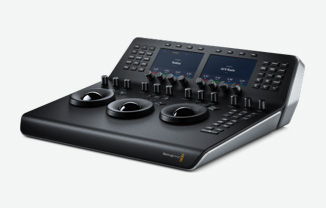
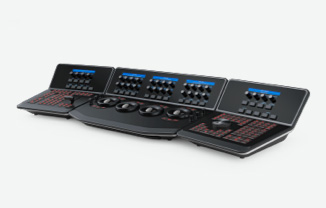
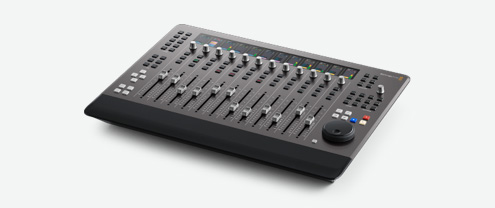
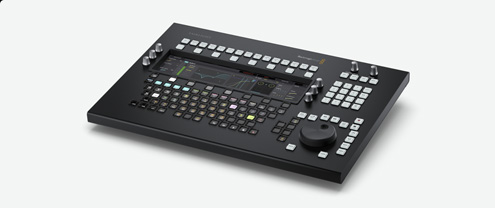
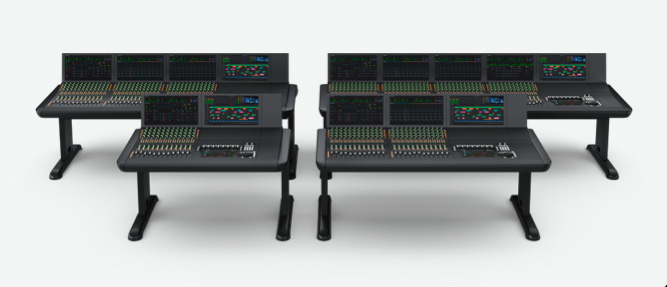
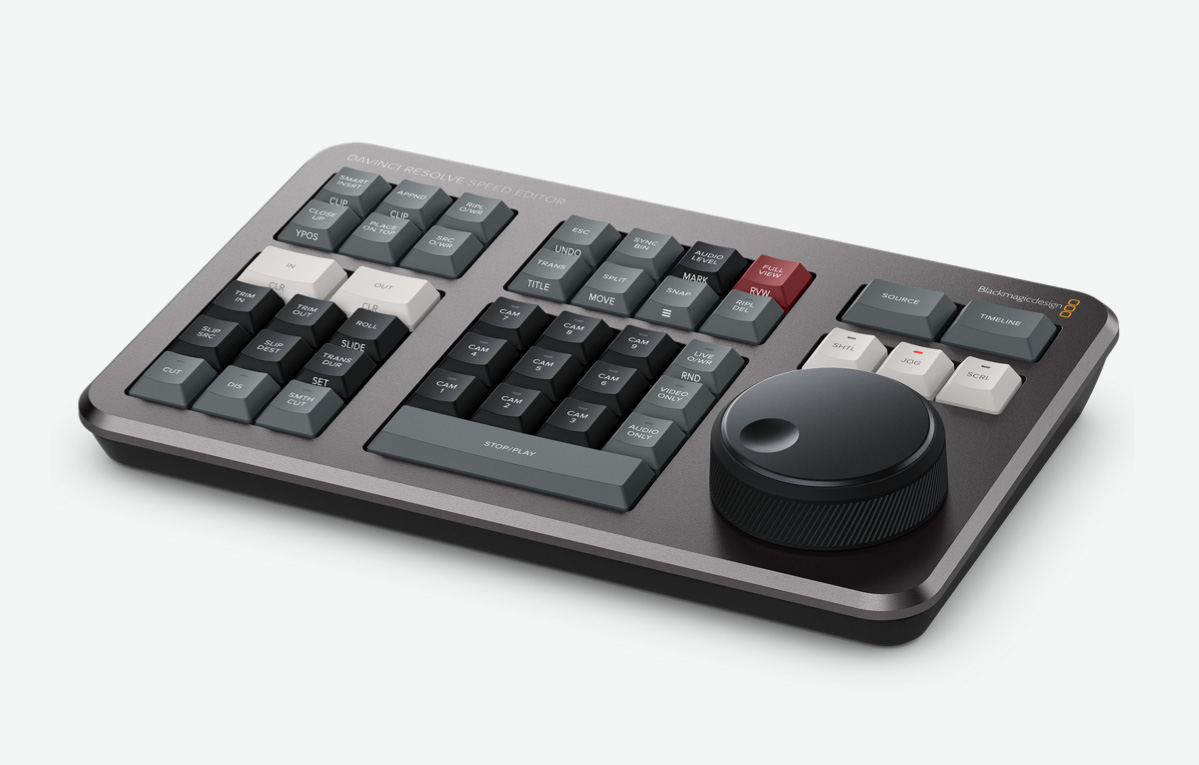
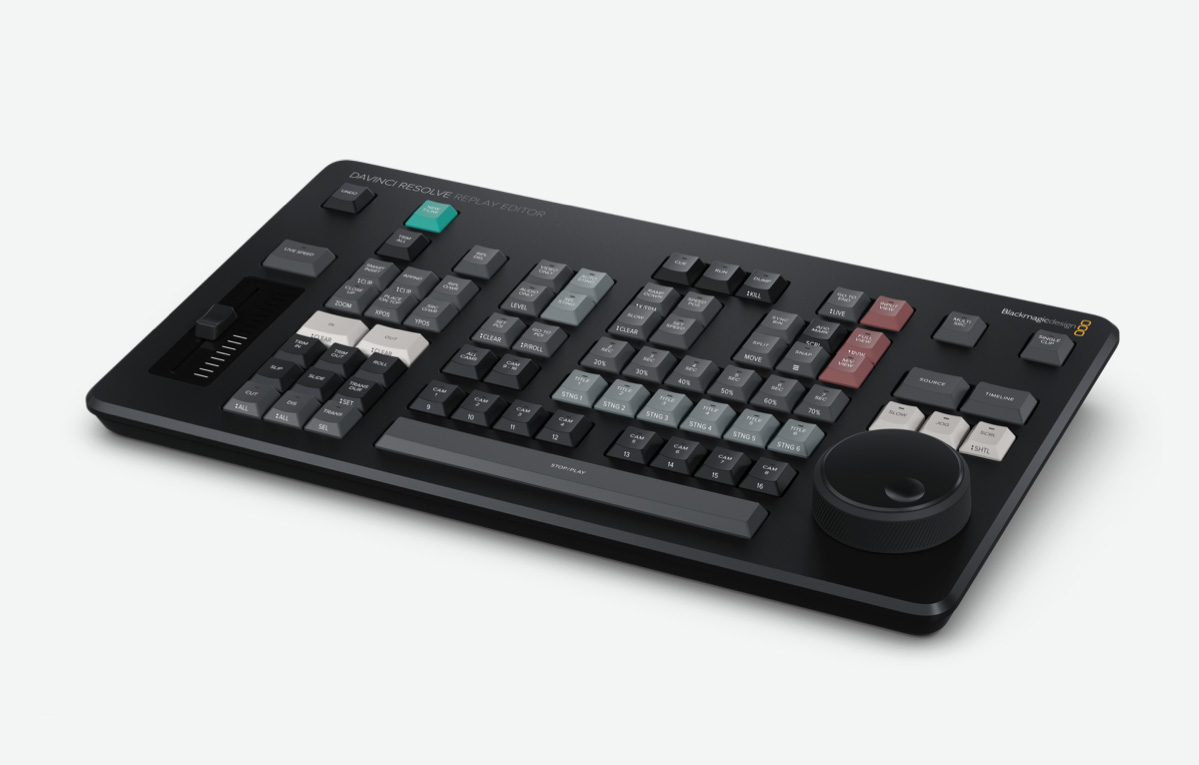
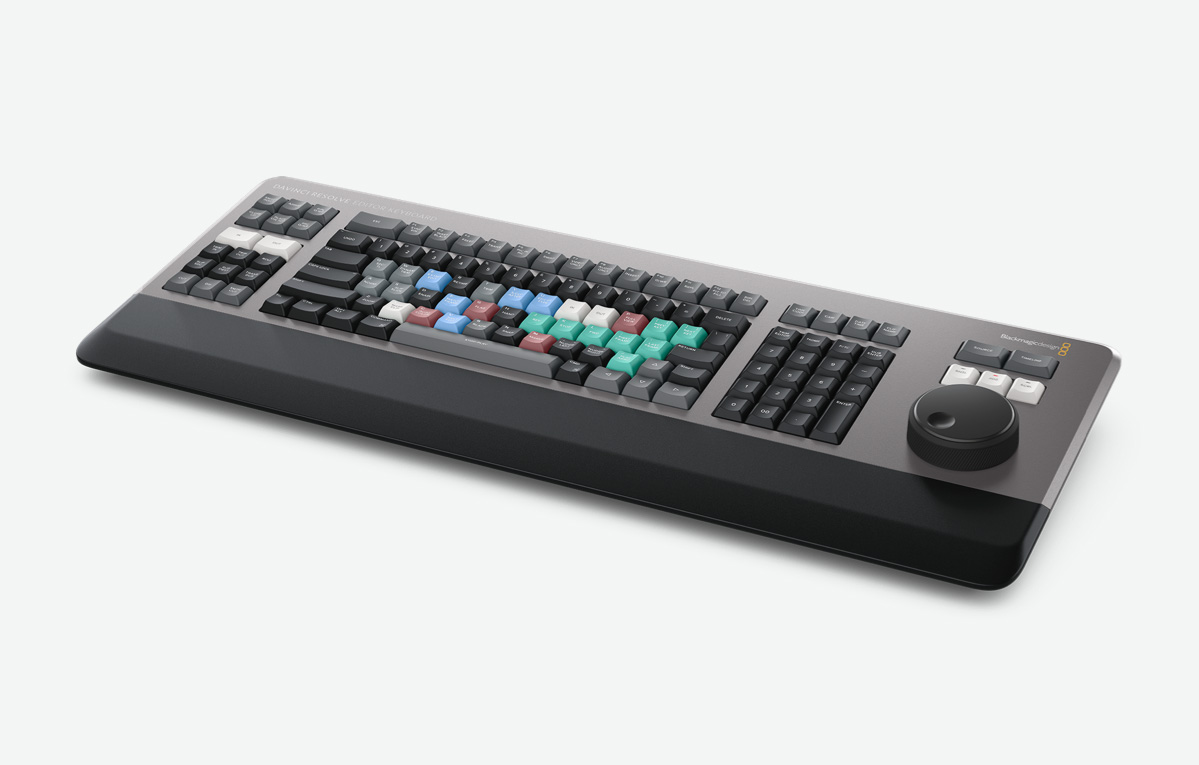
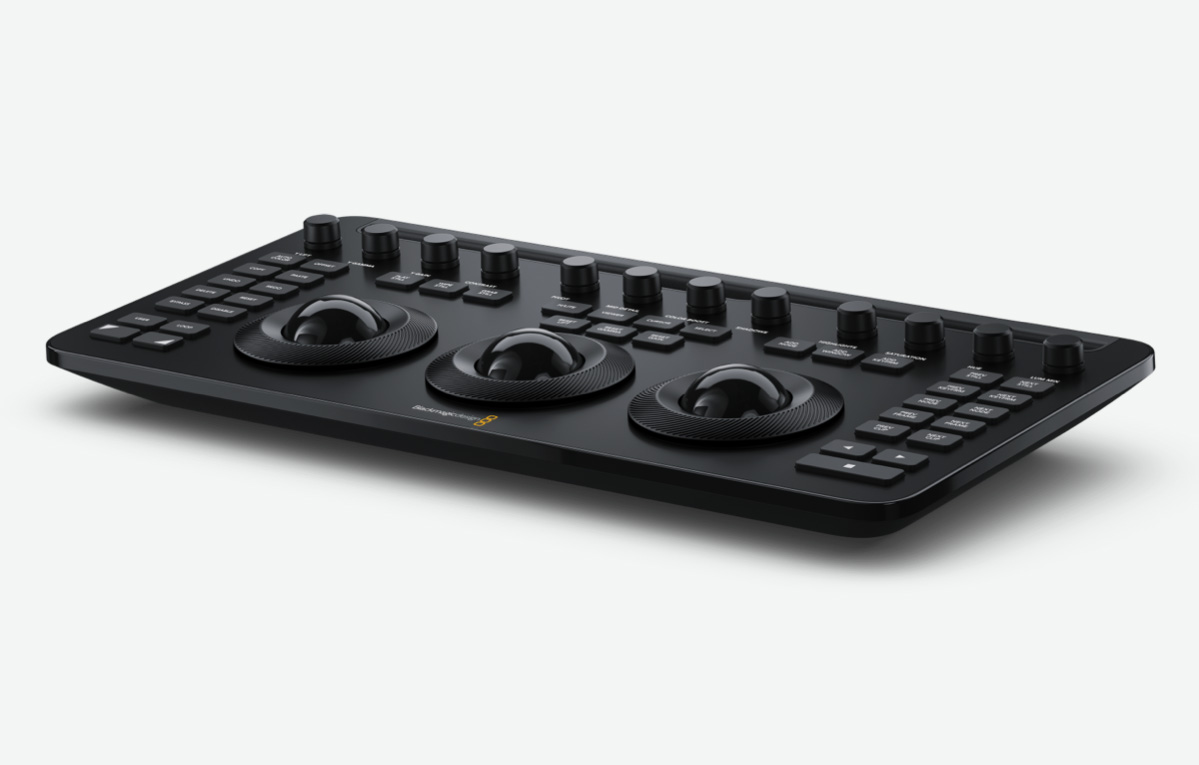
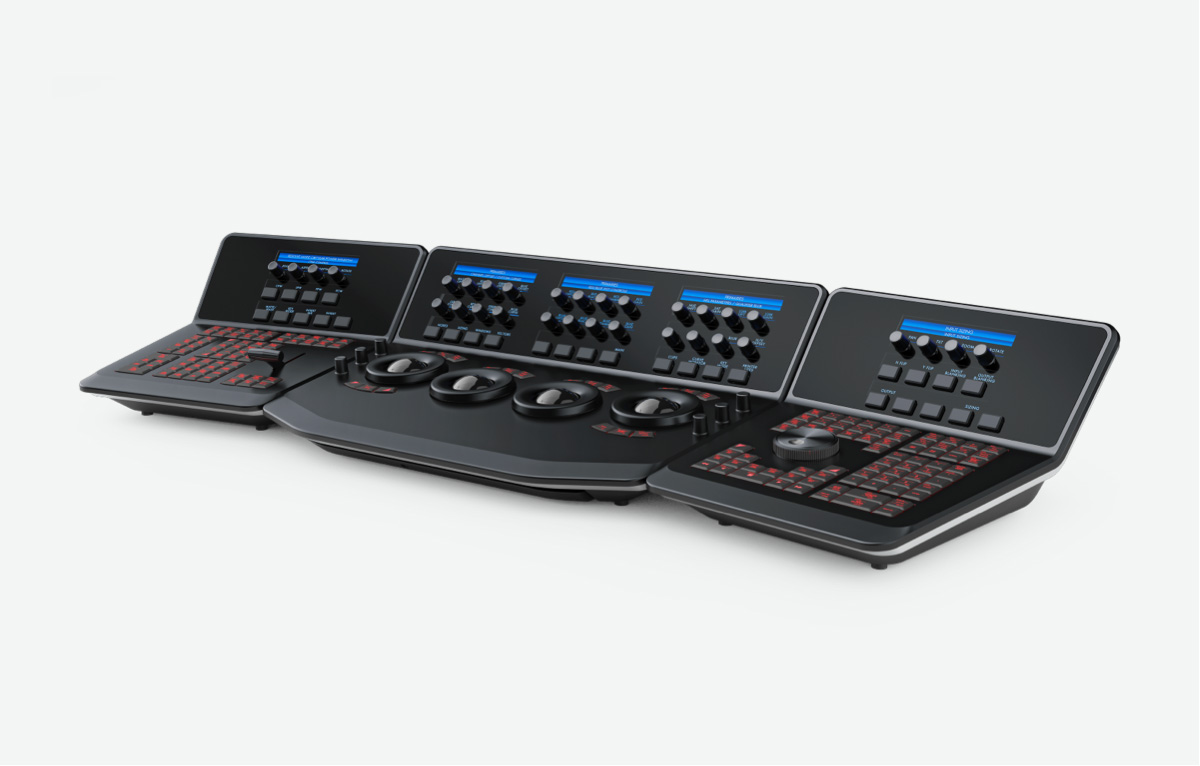
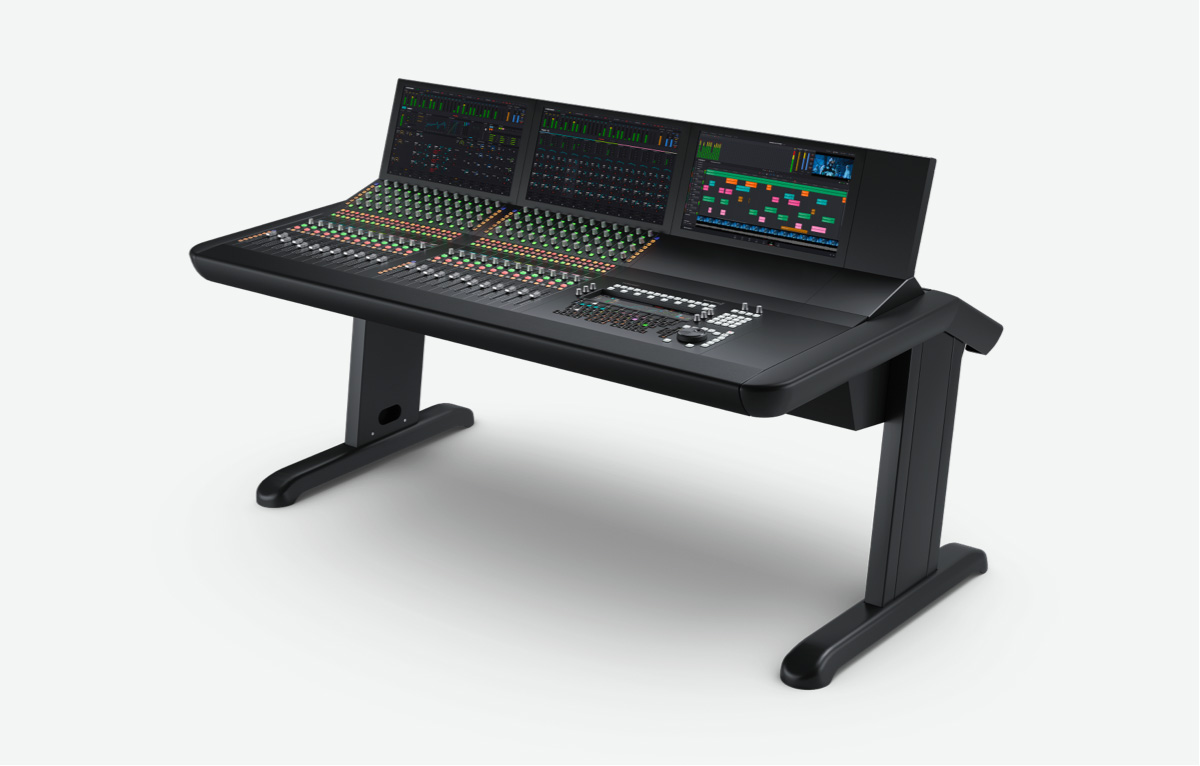
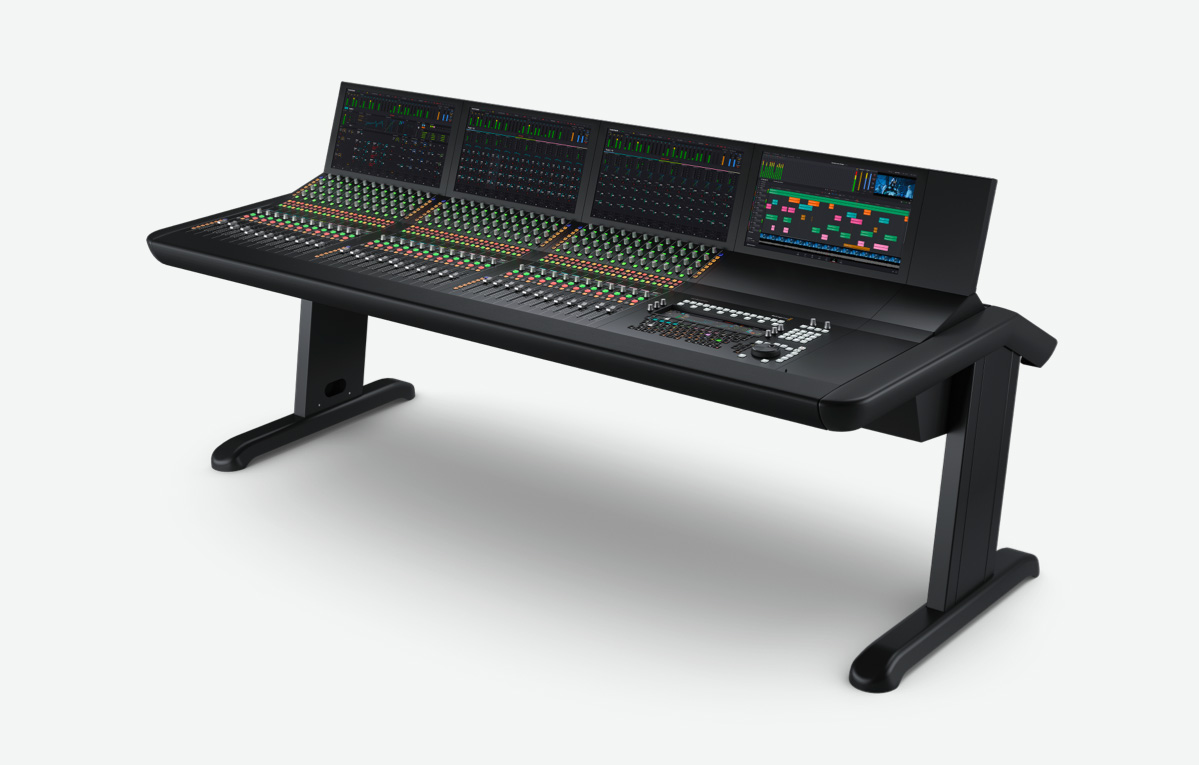
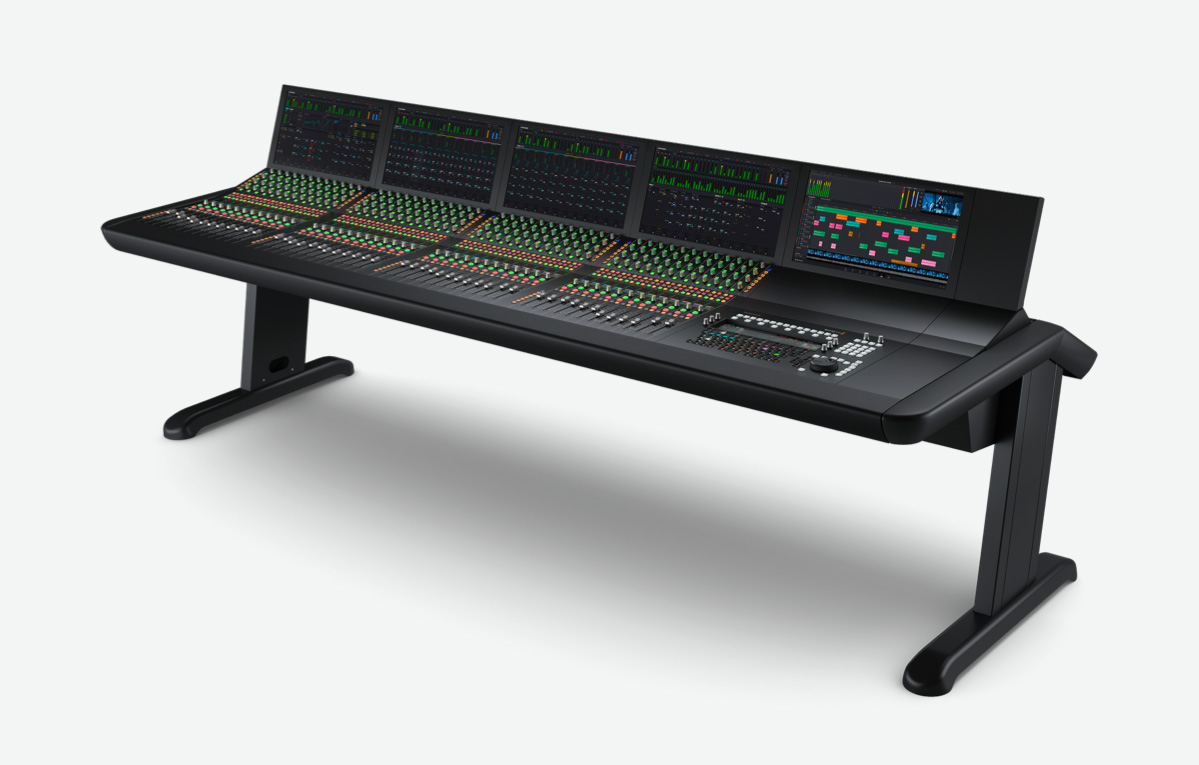
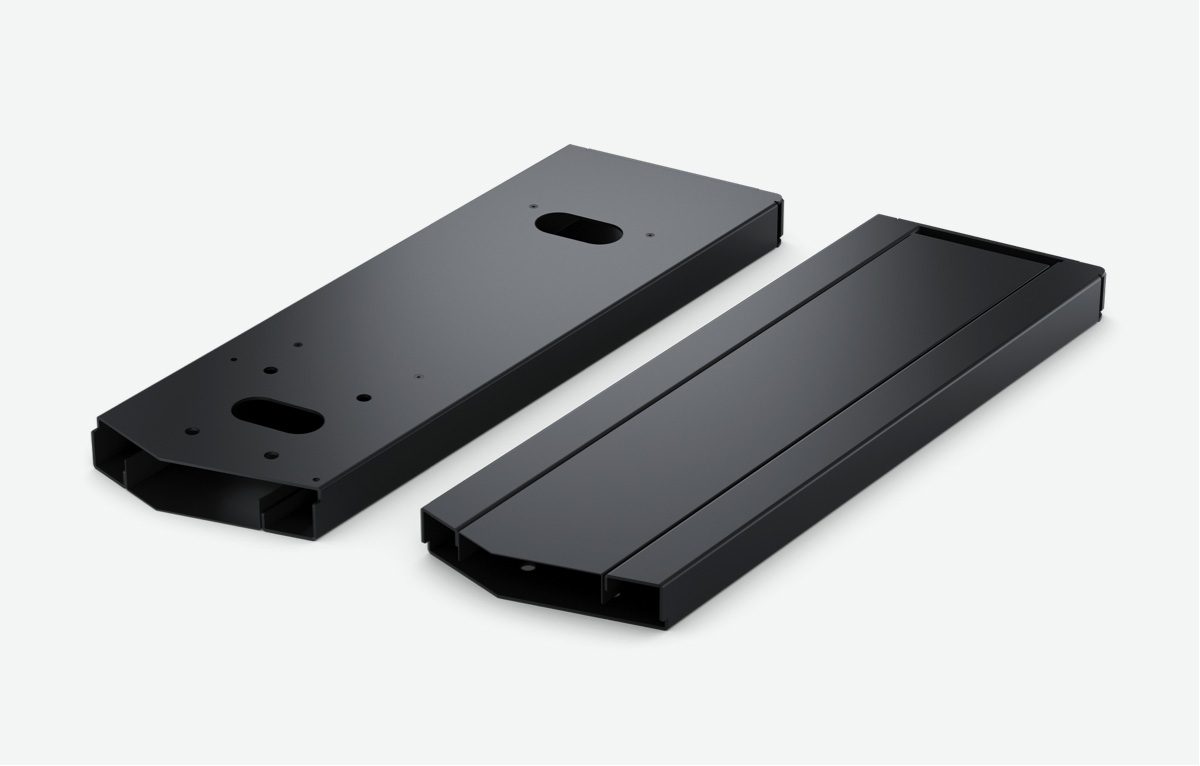
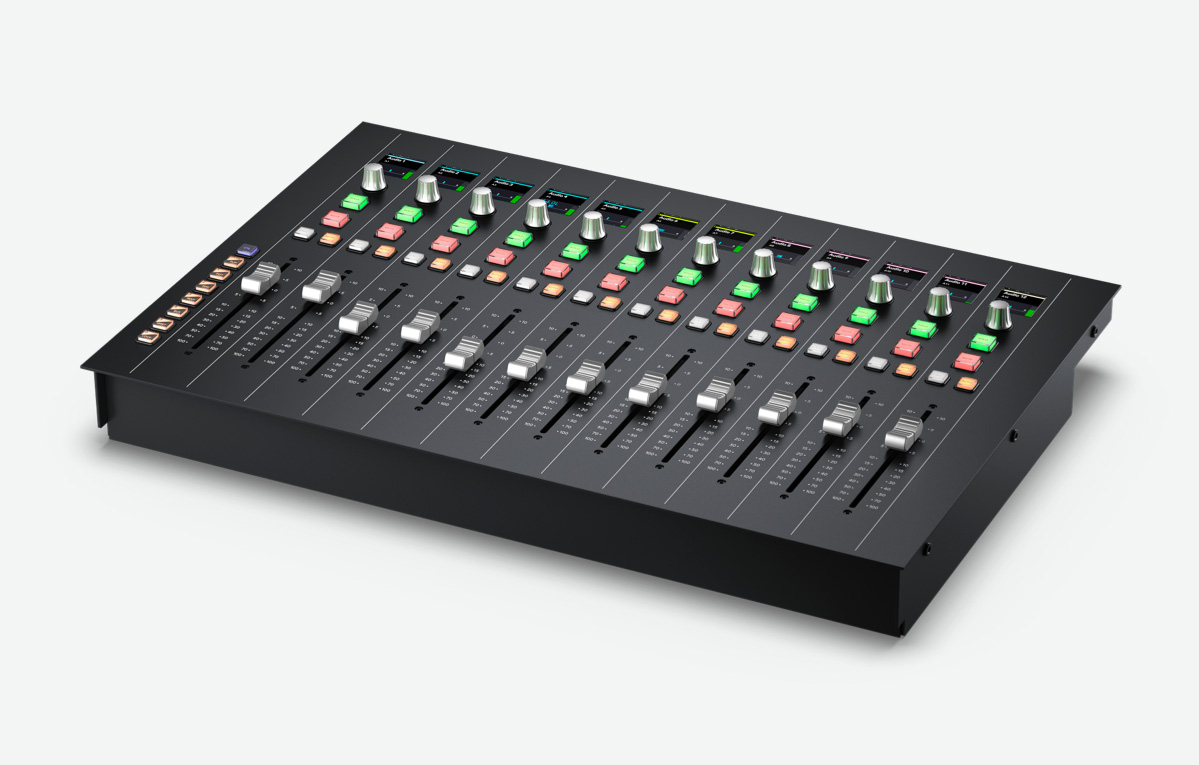
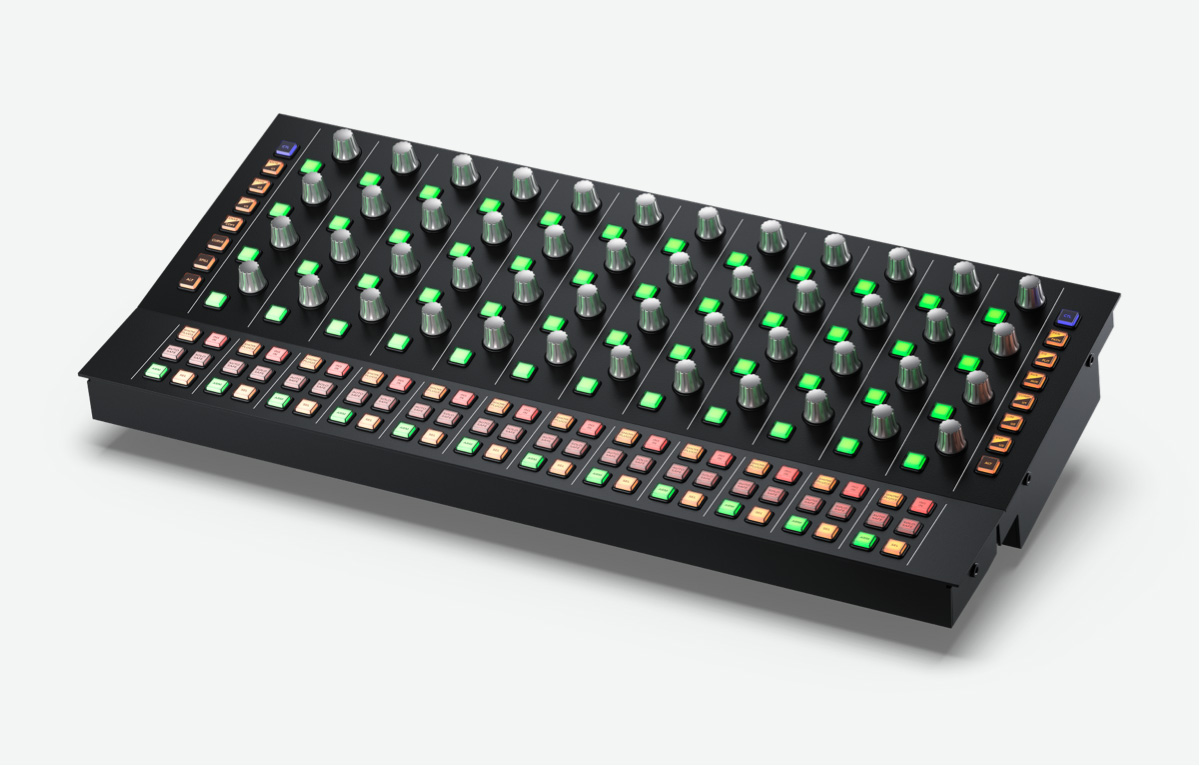
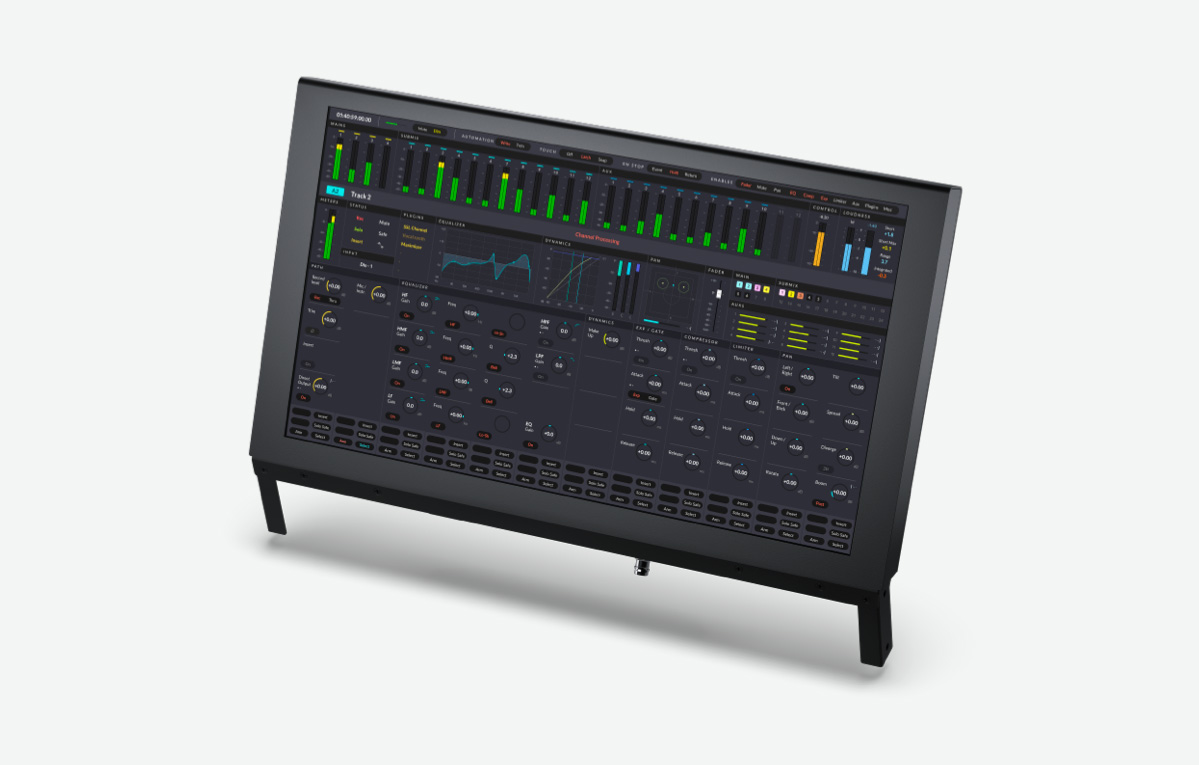
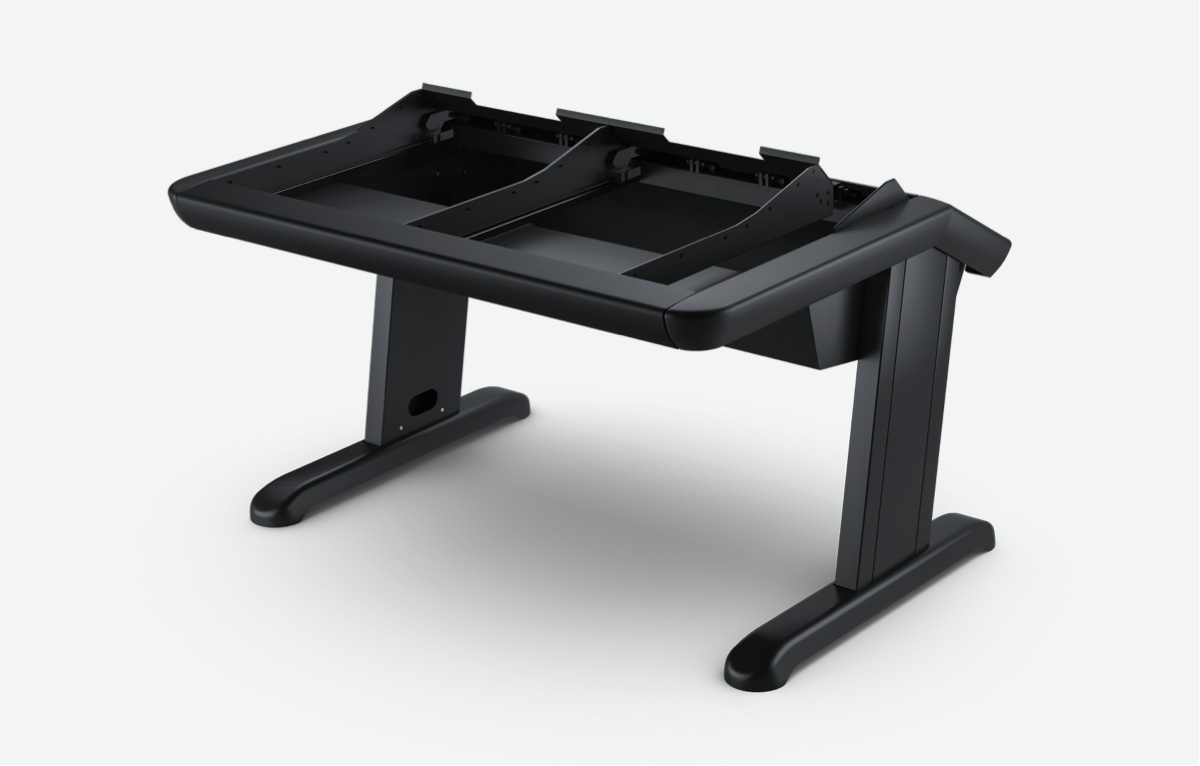
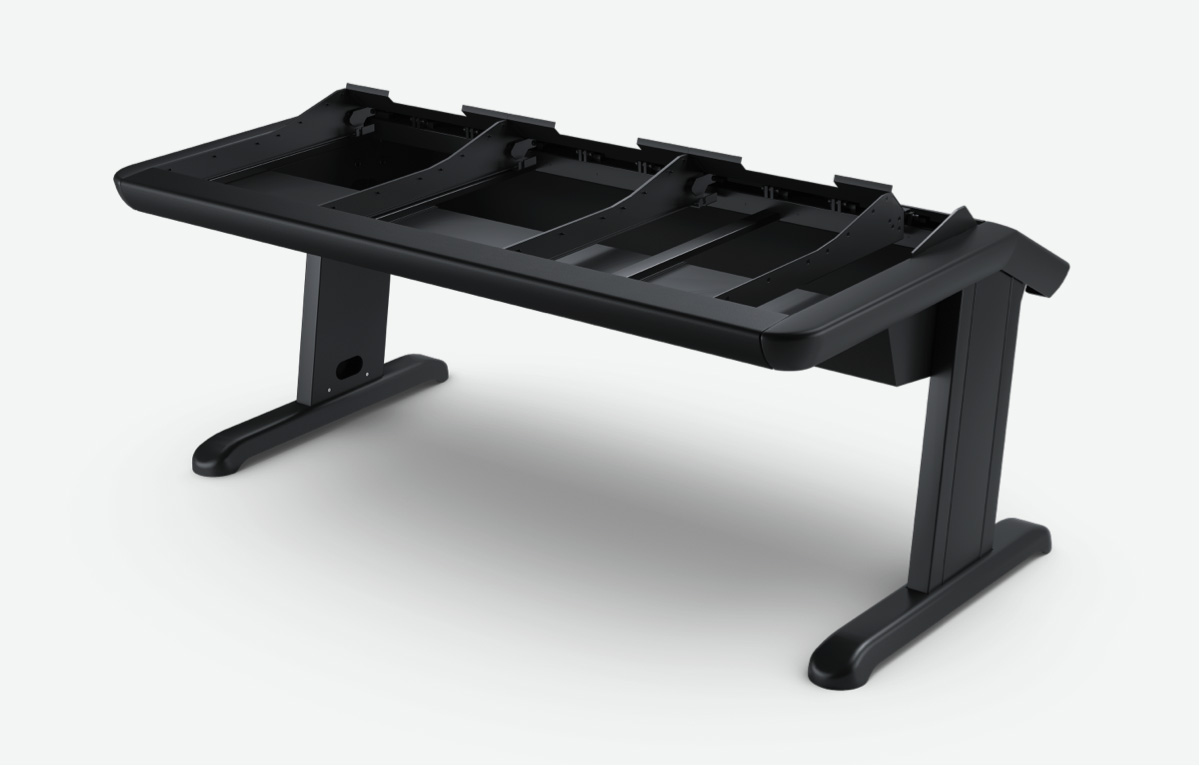
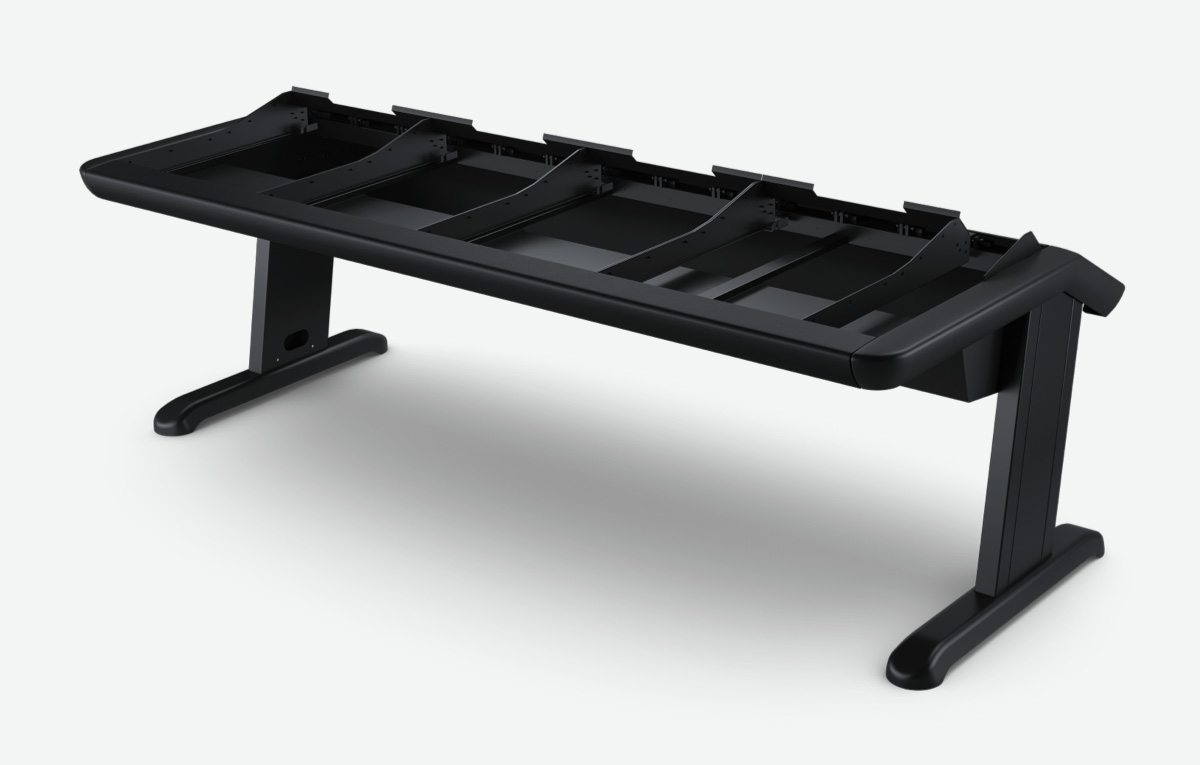
DaVinci Resolve Color Control Panels
DaVinci Resolve color panels let you adjust multiple parameters at once, so you can create unique looks that are simply impossible with a mouse and keyboard. The incredibly small DaVinci Resolve Micro Panel is great for new colorists that are just getting started or anyone that needs a portable panel. It features three high quality trackballs that correspond to the color wheels, knobs for primary adjustment controls and buttons for playback and navigation. The DaVinci Resolve Mini Panel features additional controls and screens for accessing virtually all palettes and tools, including the ability to move Power Windows. The DaVinci Resolve Advanced Panel allows every feature and command to be mapped to a specific button!

DaVinci Resolve Mini Panel
DaVinci Resolve Micro Panel
DaVinci Resolve Advanced Panel
Upgrade to DaVinci Resolve Studio
Upgrade to DaVinci Resolve Studio
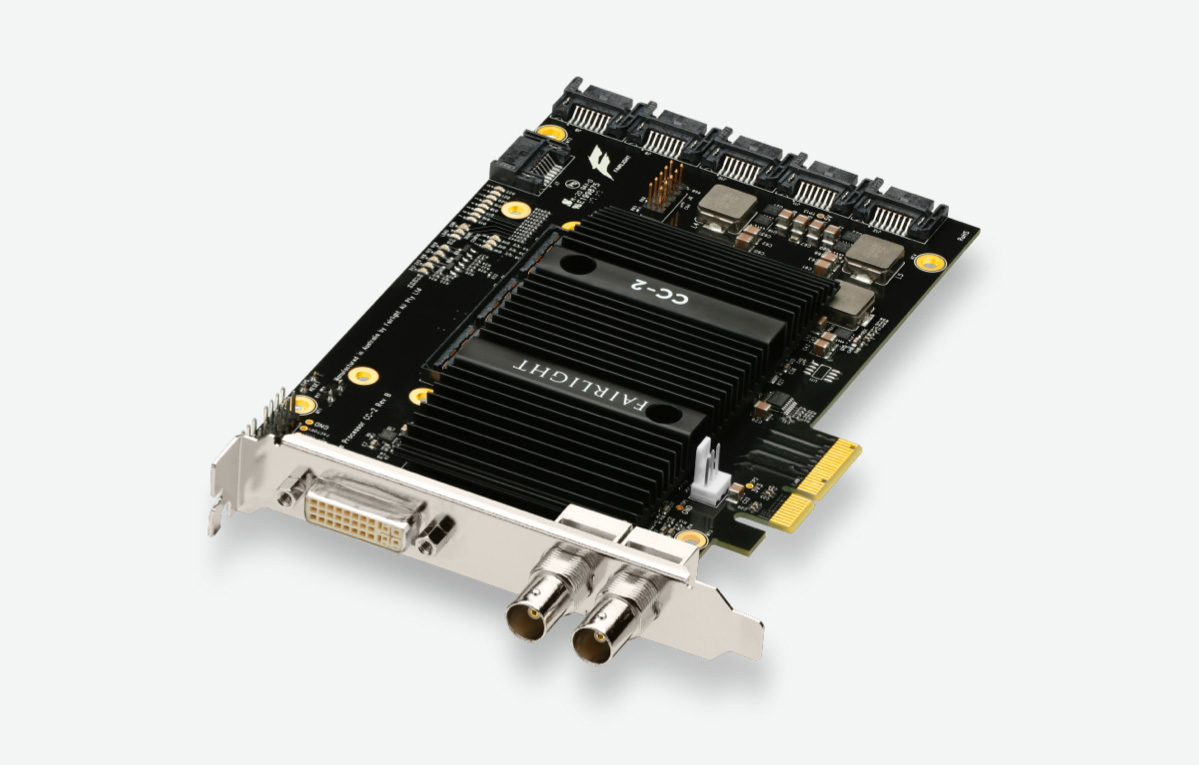
Upgrade to DaVinci Resolve Studio for even more creative tools such as 120 frames per second at a massive 32K resolution, support for multiple GPUs and more! You get a full suite of immersive audio tools including Dolby Atmos, plus Dolby Vision and HDR10+ grading and rendering, as well as the DaVinci Neural Engine which enables features such as facial recognition, speed warp retiming, and advanced color balancing and matching. Plus you get temporal and spatial noise reduction, motion effects, lens distortion correction, de‑interlacing, workflow and media asset management integration, remote scripting API, remote and networked color grading, rendering and encoder plug‑in support and more!
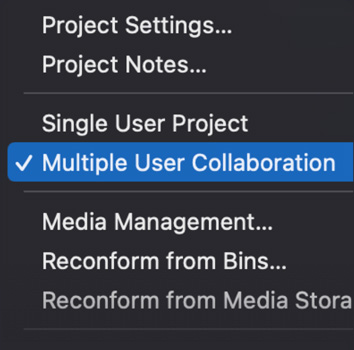
Multi User Collaboration
DaVinci Resolve is the world’s only post production software that lets everyone work together on the same project, at the same time! Built on a powerful multi user database, you get a universal timeline that lets colorists start grading while the editor is still cutting picture. You no longer have to wait for editorial to “lock” the picture before you start working on color and, best of all, you’ll never have to conform again because you’re working on the same timeline. That means you’ll have more time to be more creative! DaVinci Resolve features bin and timeline locking, shared markers, customizable user cacheing and monitoring, secure built in chat, timeline comparison tools and more!
Update Notifications
Clip and Bin Locking
Multi User Timelines
Built In Chat
Blackmagic Cloud
Monitoring and Capturing Solutions
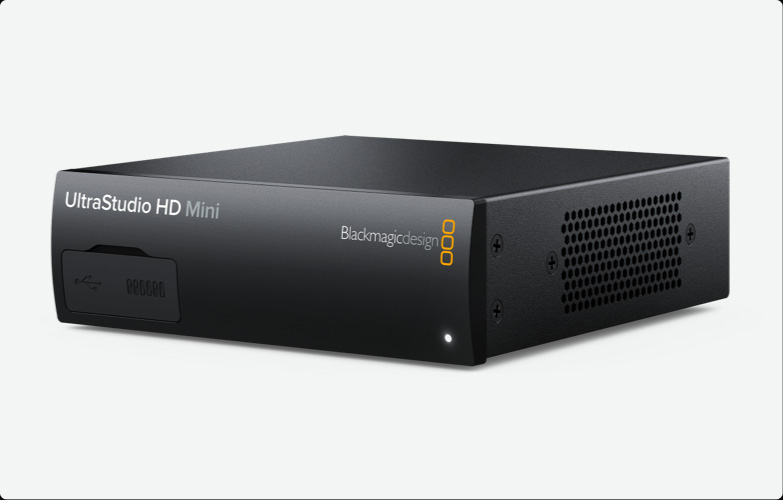
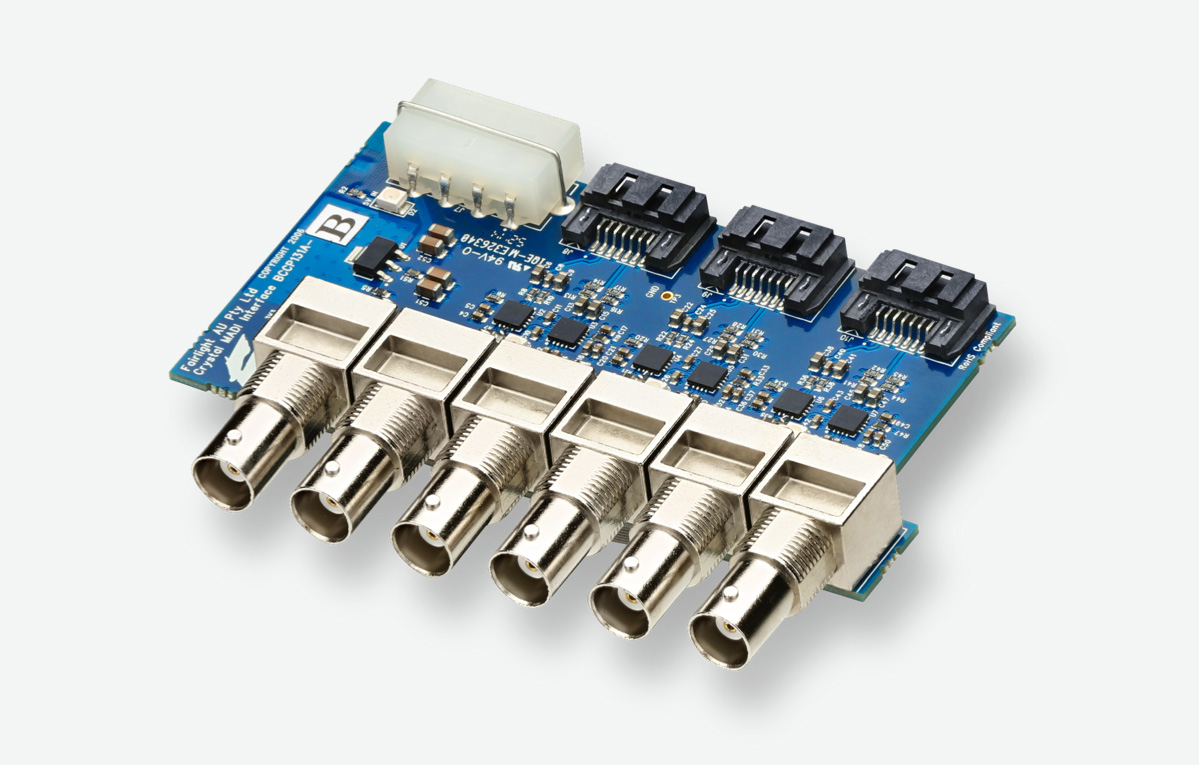
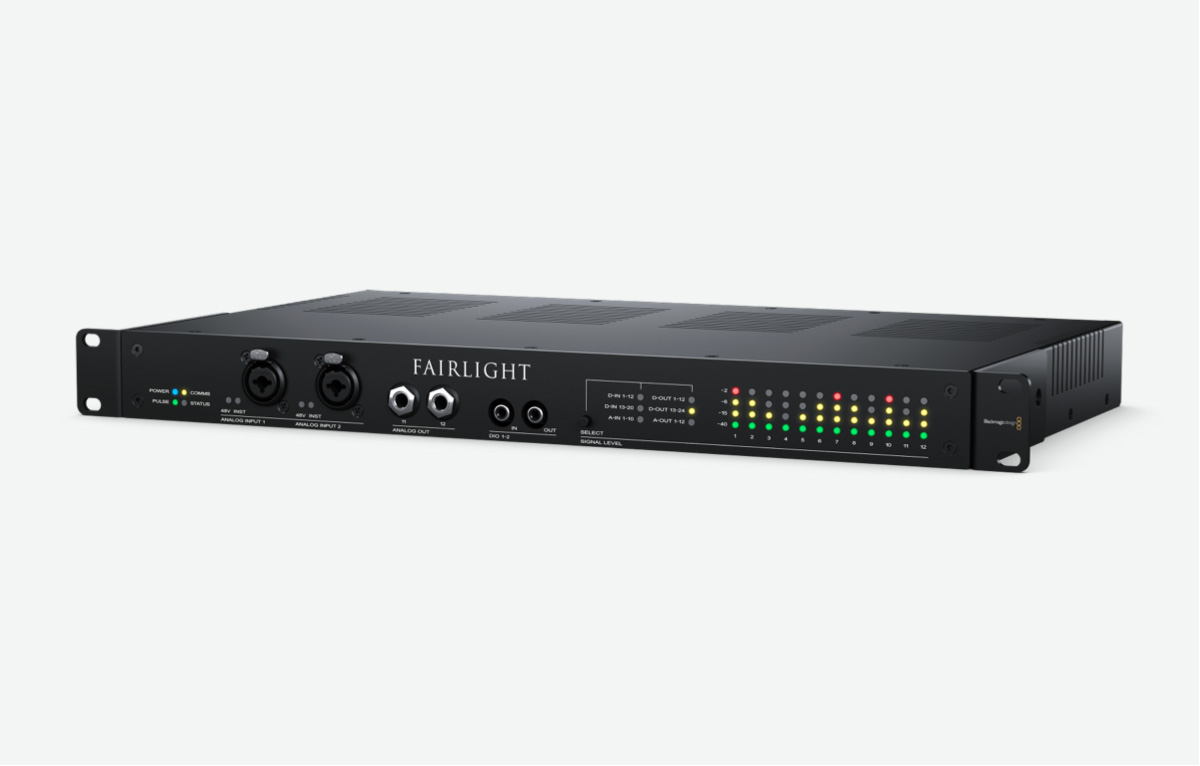
There are many ways to preview your work and capture footage in DaVinci Resolve. For professional capture and playback, Blackmagic DeckLink and UltraStudio products give you frame accurate input and output, standard connections such as SDI, broadcast quality images for color critical workflows, and support for all standard broadcast and film formats. You can choose from a wide range of models that support everything from 10‑bit YUV HD and Ultra HD all the way up to the latest 8K and 12‑bit RGB HDR standards. The free DaVinci Resolve version supports full screen playback on a single screen while DaVinci Resolve Studio adds support for full screen playback on a second attached computer display.


