Status
The indicators across the top of the screen show various camera settings and they can also be changed, just by touching the specific setting. An easy to use adjustment palette will then be displayed!

Blackmagic Camera unlocks the power of your iPhone, iPad, Android phone or tablet by adding Blackmagic’s digital film camera controls and image processing! Now you can create the same cinematic ‘look’ as Hollywood feature films. You get the same intuitive and user friendly interface as Blackmagic Design’s award winning cameras. It’s just like using a professional digital film camera! You can adjust settings such as frame rate, shutter angle, white balance and ISO all in a single tap. Or, record and upload directly to Blackmagic Cloud in industry standard files up to 8K! Blackmagic Cloud lets you collaborate on DaVinci Resolve projects with editors anywhere in the world, all at the same time!
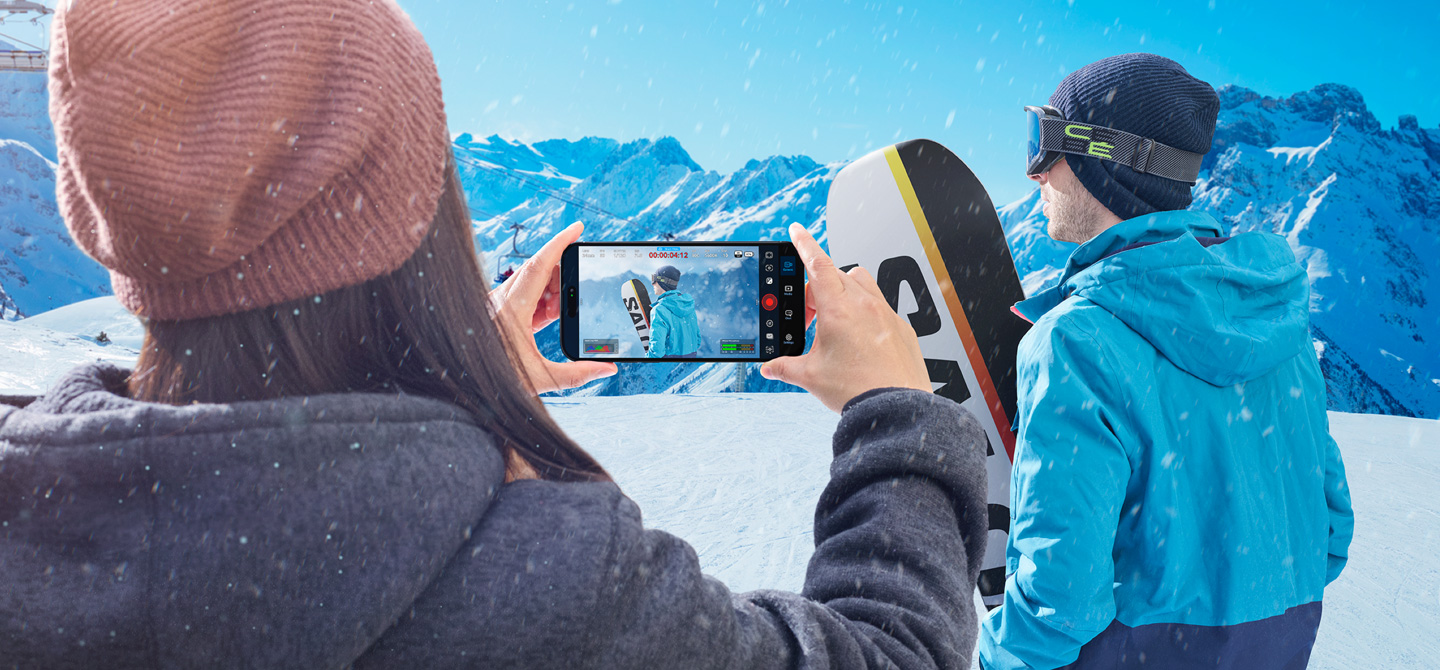
Blackmagic Camera puts the professional features you need for feature film, television and documentaries in your pocket. Now you can create YouTube and TikTok content with a cinematic look, and broadcast quality ENG! Imagine having a run and gun camera on hand to capture breaking news whenever it happens! Or use Blackmagic Camera as a B Cam to capture angles that are difficult to reach with traditional cameras, while still retaining control of important settings. Best of all, recording to Blackmagic Cloud allows you to get your footage to the newsroom or post production studio in minutes. Whatever content you’re creating, Blackmagic Camera lets you capture digital film quality anywhere!

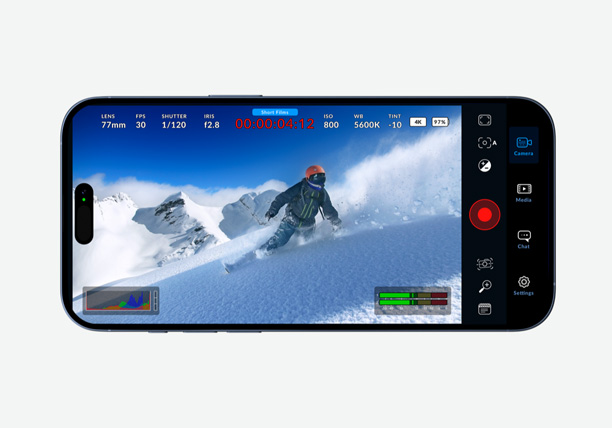
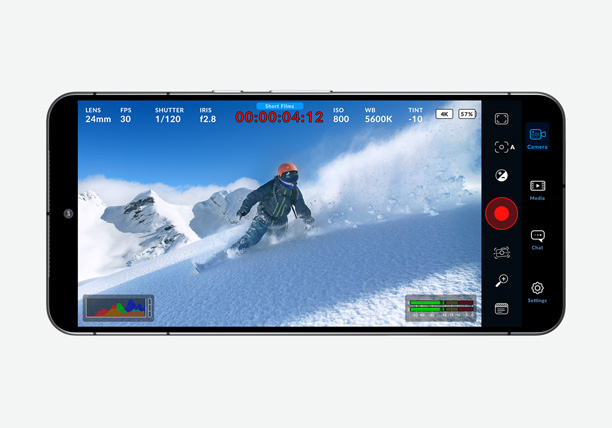
Blackmagic Camera has all the controls you need to quickly setup and start shooting! Everything is interactive, so you can tap any item and instantly change settings without searching through confusing menus! The heads up display, or HUD, shows status and record parameters, histogram, focus peaking, levels, frame guides and more. Show or hide the HUD by swiping up or down. Auto focus by tapping the screen in the area you want to focus. You can shoot in 16:9 or vertical aspect ratios, plus you can shoot 16:9 while holding the phone vertically if you want to shoot unobtrusively. There are also tabs for media management including uploading to Blackmagic Cloud, chat and access to advanced menus.


The heads up display, or HUD, has the most important camera controls such as lens selection, frame rate, shutter angle, timecode, ISO, white balance, tint, histogram and audio levels. You can adjust settings such as exposure by touching the ISO indicator, or you can change the audio levels simply by touching the audio meters. It's that easy! Everything is interactive, so if you tap any item you can instantaneously change its settings without having to search through complex menus! You can clear the heads up display to reveal the full screen image by swiping up or down with your finger.

The indicators across the top of the screen show various camera settings and they can also be changed, just by touching the specific setting. An easy to use adjustment palette will then be displayed!

Lens lets you select a lens for your shot. Cell phones often have multiple rear lenses ranging from wide angle to telephoto, plus a front lens. Iris is automatically set based on your lens choice.

Zoom gives you up to x8 magnification using presets, or you can manually adjust the zoom by scrolling the scale by up to 15x. Tap the zoom icon to hide the display and return to full screen view.

The frames per second adjustment is normally set based on the post production delivery format. You can adjust the frame rate from the preset 24 fps up to 120 fps depending on your device.

Shutter speed lets you adjust for varying light conditions or control the amount of motion blur in your image. You can set it manually or choose from suggested speeds by scrolling the speed dial.

The timecode indicator will show you either the duration of your recording or the time of day. During recording the timecode will turn red, and display the embedded timecode playing back the clip.

If you have selected a DaVinci Resolve project to record to from the media tab, the name of this project will be displayed above the timecode in the HUD.

The red ‘on air’ icon will be displayed when Blackmagic Camera is being used in the program feed, and will remain blank when not on air.

ISO adjusts the image sensor’s sensitivity to light. A setting such as ISO 100 is suited to outdoors, with higher values great for low light situations. Tap the ISO icon to access the ISO settings.

White balance lets you adjust for different temperatures of light. Common presets include sunlight, overcast and fluorescent light, or you can set it manually. You can save settings by locking them.

The resolution you set in your record settings is shown in the status display, so you can check if you are shooting in 720p, 1080p, 4K, Open Gate or up to 8K at a glance. It also shows the aspect ratio.

The histogram helps check exposure. The left side shows shadows and the far right shows highlights. If the edges of the histogram come to an abrupt stop, adjust exposure to ensure you’re not clipping.

Storage indicators show the remaining recording time on your device’s internal memory in hours, minutes and seconds. Turn on the storage indicator display by accessing setup menus in the settings tab.

When live streaming, you can see the service it is being streamed to, a duration counter that shows the duration of your stream, and the data rate using megabits per second.

When you are uploading to Blackmagic Cloud, the upload indicator displays the name of the clip as well as the upload speed, the percentage of the clip that is uploaded and time remaining to complete.

You can monitor the recording levels of the internal microphone or external sources using the audio meters. To avoid distortion, peak audio levels should fall in the upper end of the green zone.


Touch to focus allows you to auto focus your lens in any region of the image. Tap the screen in the area you want to auto focus. Touch and hold to lock the focus and exposure.

The record button lets you stop and start recording. Tap it once to begin recording and tap it again to stop. When recording, the button and timecode at the top of the screen turn red.

The Zebra display will draw diagonal lines over areas of your image that have excessive exposure level. The variable control when used with the histogram lets you see the best exposure for any scene.

An extremely powerful feature, focus assist adds a colored highlight to fine image detail, so you can see what parts of the image are in focus. This allows manual focus to be used for cinematic looks.

The grid control adds on screen markers for framing and positioning items in a shot. There is a range of on screen markers including a rule of thirds grid, crosshair and a center dot.

When shooting digital film, other aspect ratios are often used. On screen overlays include 1.85:1, 2.35:1, 2.39:1 and 2.40:1 for theatre release. Or use 9:16, 1:1 and 4:5 for social media!

Safe area guides let operators ensure important image content does not get too close to the edge of the screen, otherwise it could be cut off when viewed on consumer grade televisions.

False color overlays colors to represent different exposure values. Pink represents optimum exposure for lighter skin tones, while green is good for darker skin tones, and red is overexposed.

Illuminate your scene with the phone light. Adjustable brightness allows setting just the right amount for creative control.

Rack focus lets you gradually pull focus between 3 preset focus points. Tap the screen in the area you want to focus, then tap the preset number. Press the play icon to cycle through the presets.

Auto exposure adjusts ISO and shutter angle to achieve the best exposure for your image. You can simply tap anywhere on the screen to quickly set that as your auto focus area.

Zoom gives you up to x8 magnification using presets, or you can manually adjust the zoom by scrolling the scale by up to 15x. Tap the zoom icon to hide the display and return to full screen view.

LUTs let you preview a specific "look" so you can see what it will look like after it has been color corrected. Depending on your device, a LUT icon is displayed in the top left of the LCD.

Image stabilization prevents shaky footage and helps make your video look more professional. Tap to select which level of stabilization you wish to use for smoother motion.


You can create, store and recall camera configurations as presets so you can quickly change between setups for different scenes, or import the one preset into many cameras so they all have the same settings.

Metadata makes sorting and processing footage in post production easier. The slate lets you add additional details such as shot type or project name. Swipe left or right to change the pages.

When you have remote cameras you can control and monitor on another phone, tablet or even a MacBook Pro. Setup your cameras and then access directly from the camera HUD screen.

Three function buttons on the right of the screen HUD allow user action selection or a preset or toggling of a frequently used action such as a lens selection or shutter value change.

The settings tab unlocks the full power of your device’s camera, with quick access to advanced settings such as monitoring, audio, camera setup, recording and more! The record tab allows control over video resolution and recording format including H.264 and H.265. On iPhone and iPad you can also use Apple ProRes as well as AAC, IEEE Float and PCM audio formats. Professional audio options include VU or PPM meters, plus you can add external microphones! There are also options for anamorphic de-squeeze and lens correction settings. You also get professional monitoring tools such as zebra settings for checking exposure, focus assist, frame guides and more. Or add 3D LUTs to recreate film looks!

If you’re positioning a phone in an area that’s hard to reach, or shooting with multiple devices using Blackmagic Camera, you can get full control using remote camera control! Simply set your device to be the controller, and you can change settings for all Blackmagic Cameras using the same network. Plus you can view each camera’s shots in a multiview! You can also start and stop recording on all devices with a single press. It’s easy to capture an event with multiple roving cameras using nothing more than an iPhone, iPad, Mac, or Android device! You can even instantly share the footage with editors anywhere in the world using Blackmagic Cloud, even as the cameras are still recording.


The Blackmagic Camera Apple Watch companion app lets you remotely control and monitor your iPhone from almost anywhere on set or on location. It’s perfect for situations where your iPhone is mounted out of reach or in a position where physically touching it would cause camera shake. Setup is easy as all you need to do is install the companion app through the Watch app on your iPhone. Then from your wrist, you can monitor framing and audio levels, start and stop recording and adjust key settings including exposure, focus and LUTs. You can even change lenses and control zoom! It’s a simple way to control and monitor Blackmagic Camera without ever needing to touch your iPhone!

When shooting with multiple devices, Blackmagic Camera lets you keep your footage perfectly in sync with support for timecode input from an external generator. Simply connect a Bluetooth timecode generator such as Tentacle Sync and Blackmagic Camera will automatically detect timecode and lock the internal generator. Now each device can start and stop recording independently, while storing perfect timecode sync in the file metadata, allowing powerful multi camera workflows for music festivals, weddings and interviews. Best of all, DaVinci Resolve will automatically find and sync the shots from all cameras so you don't need to waste time sorting through thousands of shots!

Stream directly from Blackmagic Camera to popular platforms such as YouTube, Facebook and Twitch, or even to broadcast news gathering, all without additional hardware! Setup is fast and easy as you simply select your streaming platform and enter the stream key directly in the app. You can even create a custom stream to a broadcast TV station! The Blackmagic Streaming Utility lets you create your own presets, including resolution and quality settings, and import them into Blackmagic Camera. That means you get a fully self-contained solution for streaming in digital film quality to the world, whether you’re going live online or delivering a professional broadcast feed.

The Blackmagic Camera media tab has all the controls to browse or scrub clips for quick review, search and sort and view the upload status of your media. You can also link to your photos and select clips to upload to Blackmagic Cloud. Simply access your media from Blackmagic Camera’s all clips folder by choosing the Media button to see the thumbnails for each clip you have stored. You can save your media to the files folder on the device, send it to Blackmagic Cloud Storage via Blackmagic Cloud or manually choose which clips to upload to a project library. You can even sync media from Blackmagic Camera into a DaVinci Resolve project as you’re recording so you’re ready to edit and color grade!
You can record to your device and export your clips to an external drive. This allows you to free up valuable storage space on your device and let you share your files later to other users globally.

Log into Blackmagic Cloud and select a DaVinci Resolve project. After each individual recording, or as you’re recording, the media will automatically upload and sync to all project members.

Blackmagic Camera also has a manual option where you can record your footage to your device and then select which clips you want to upload via Blackmagic Cloud when you have a network connection.


Creating your Blackmagic ID allows you to have access to Blackmagic Cloud. It’s easy and there’s no charge! Simply tap on Blackmagic Cloud in the media tab to go to the Blackmagic Cloud website to register. Or go to the cloud icon on the Blackmagic Design website. Once you have created your Blackmagic ID you can log in and set up your project library. This is where you create projects to upload to Cloud Storage. With your project library set up, you can then select for Blackmagic Camera to sync directly to Cloud Storage from the app. Invite others using their Blackmagic ID to share the project and instantly collaborate with editors and colorists globally, working on the same project!
DaVinci Resolve
Project Server
Cloud Storage
Organizations
Presentations
Settings


Blackmagic Camera records an HD proxy in addition to the camera original media. The small proxy file can upload to Blackmagic Cloud in seconds, so your media is available back at the studio in real time. Blackmagic Camera can even upload live as you’re recording! The ability to transfer media directly into the DaVinci Resolve media bin as editors are working is revolutionary and has never before been possible! Any editor working anywhere in the world will get the shots! If you have multiple cameras, then the new multi source feature in DaVinci Resolve's Cut page will show each camera angle in a multiview. Blackmagic Cloud is a revolution in global post production workflows!
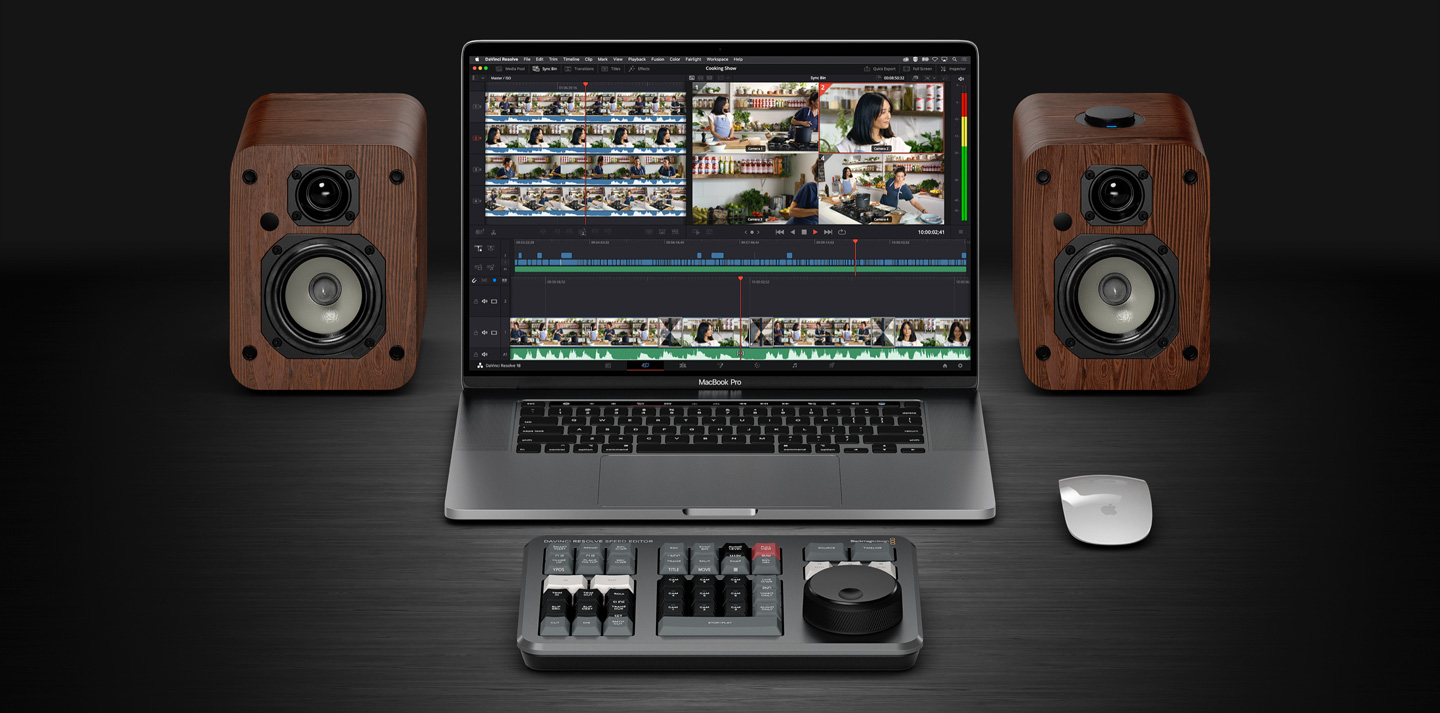
The sync bin is the world’s fastest and most innovative way to select the perfect cutaway when doing multi camera shoots. Using the time of day timecode, sync the clips shot on multiple phones at the same time. Just select the sync bin icon and DaVinci will find all clips that sync to the timeline and display them in a multiview. Simply scroll up and down the timeline and you will see all the clips that sync to the point in the timeline so you can pick the best cutaway. Then click the view with the mouse and then adjust the in and out points to select the cutaway you want. Now use the source overwrite edit mode to add this selected clip to the timeline, perfectly synced to the clip below!

Just like high end digital film cameras, Blackmagic Camera on supported phones lets you shoot in a logarithmic colorspace to preserve the dynamic range. While this is great for later post production, when these files are viewed on the phone’s display, they can look flat and washed out. 3D LUTs solve this problem as they allow you to apply a "look" to the display so you get an idea of how the finished images will look when editing. LUTs can be applied just for monitoring only, or they can be recorded into clips for use in post production. Blackmagic Camera works with industry standard 17 and 33 point 3D LUT files or, on the latest iPhone’s, you can work with the built in Apple Log to Rec. 709 LUT.

Blackmagic Camera features a built in chat workspace so Blackmagic Cloud project members can talk about shots and quickly share creative ideas, all without leaving the app! Simply log in to Blackmagic Cloud and select the project you are working on and start typing a message. You can quickly message editors, assistants, colorists or VFX artists to talk about shot selection or to receive an update on the project! Everyone on that project can see your message and reply instantly. All this means you can keep in touch with other project members without leaving the app and missing a critical shot!

Use a wide range of professional accessories to build a powerful camera rig using only your phone! You can add an external wired or wireless microphone for professional recording and use your existing wired or Bluetooth headphones to monitor audio when shooting. For easier shot composition, Blackmagic Camera works with external HDMI monitors so you can view a larger image of what you’re filming. You can even use a Blackmagic URSA Cine EVF for the ultimate immersive shooting experience! There’s even support for add on lenses with options for anamorphic desqueeze and image orientation when using SLR lenses. You can even add a follow focus or record to external SSDs for longer recording times!

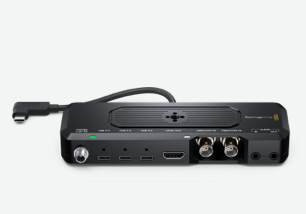
Blackmagic Camera ProDock transforms your iPhone into a professional production camera with all the connections you need to build a custom rig. It also supports the Blackmagic Camera app for iPhone! You get connections for HDMI monitoring, mic, headphones, genlock, USB for external disks and power!

With professional BNC connections, Blackmagic Camera ProDock supports external genlock and timecode to keep all your cameras in perfect sync. It also lets you shoot LED walls with no distracting flickering or tearing, which is important for virtual production!

Blackmagic Camera ProDock includes a full sized HDMI port so you can connect your iPhone to external monitors! This makes it easy for crew to frame and monitor shots from any position on set.

Blackmagic Camera ProDock features a 3.5mm audio input so you can use high quality hand held, lapel or shotgun microphones when you need a more directional microphone. You can also monitor sound on set using the 3.5mm headphone jack!

Two fast USB 3.2 ports let you connect high capacity, high speed external disks to massively extend your recording time, while the single USB 2.0 port suits accessories such as lens control systems. Plus, intelligent power management ensures everything can run at the same time.
Adds professional camera connections to your iPhone 17 Pro or iPhone 17 Pro Max.
Two fast USB 3.2 ports for recording to external flash disks.
Perfectly synchronizes multiple cameras for multi‑cam production.
Timecode input for syncing multiple iPhone recordings for multi‑cam editing.

Transform your iPhone into a powerful studio camera with remote camera control! When Blackmagic Camera ProDock is connected to ATEM Mini, video, tally and camera control are sent over a single HDMI cable, so there's no complex setup. You can adjust camera settings such as white balance, ISO and shutter remotely, as well as trigger recording, all from ATEM Software Control. Plus you can adjust focus and zoom! There's even a DaVinci primary color corrector built in so you can go beyond simple camera color balance, allowing precise camera matching and creative digital film looks during live production. For advanced use, you can even add a dedicated ATEM Micro Camera Control panel!

The optional zoom and focus demands can be added to give you broadcast style lens control with Blackmagic Camera! The focus and zoom demands have USB-C connections so they can easily connect to Blackmagic Camera ProDock. Each zoom and focus demand has 2 USB-C ports, so you can daisy chain them, then connect them to the ProDock with a single USB connection. The design has an incredibly precise feel and so you get very fine lens control, and you can frame and adjust the lens without taking your hands off the tripod handles. The buttons can be customized so you can assign different camera functions to them! Plus, hardware is included for mounting the focus and zoom demand onto tripod handles.

Blackmagic Camera is designed to be used worldwide and supports 9 different languages! When setting up your device, you can choose to work in English, German, French, Italian, Spanish, Portuguese, Chinese, Japanese or Korean. It’s easy to switch to another language so you can share your device with other crew when traveling to locations worldwide! When you switch languages, all on screen overlays, setup menus and monitoring information will be displayed in the selected language!

The best creative tools shouldn’t be limited to Hollywood. With a free version of DaVinci Resolve, you can learn how to use the same tools as professional Hollywood artists. DaVinci Resolve is designed to inspire creativity so you can do your best work. You can sync media from Blackmagic Camera directly into the DaVinci Resolve project via Cloud Storage. Once you learn the software and start using it for more work, you can purchase DaVinci Resolve Studio which adds tons of additional effects, AI tools and more. Plus, you can add an editor keyboard, color control panel, or audio console so you can use both hands at the same time, allowing you to work even faster and be more creative!

Get high end digital film camera controls and image processing on your iPhone or iPad! Adjust settings such as frame rate, shutter angle, white balance and ISO, then upload to DaVinci editors worldwide!
Free Download

Get high end digital film camera controls and image processing on Samsung and Google Pixel phones! Adjust settings such as frame rate, shutter angle and ISO, then upload to DaVinci editors worldwide!
Free Download


Rig your new iPhone 17 for professional cinema production! Adds professional camera connections including genlock, external timecode, HDMI out, headphone and mic inputs, external disk recording and more!
£235
Share projects with editors, colorists, VFX artists and audio engineers anywhere in the world! Blackmagic Cloud lets you globally sync media into DaVinci Resolve bins, even as the camera is recording!

Hollywood’s most popular solution for editing, visual effects, motion graphics, color correction and audio post production, for Mac, Windows and Linux. Now supports Blackmagic Cloud for collaboration!
Free Download

The most powerful DaVinci Resolve adds DaVinci Neural Engine for automatic AI region tracking, stereoscopic tools, more Resolve FX filters, more Fairlight FX audio plugins and advanced HDR grading.
£225

